

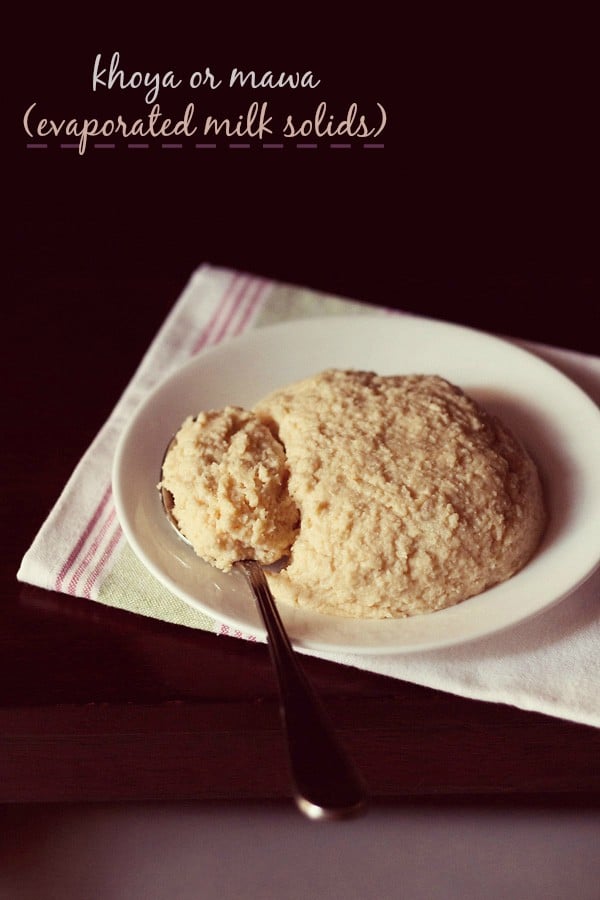
Khoya, also referred to as Mawa or Khoa, is a key ingredient for making most Indian sweets, particularly within the Northern elements of the nation. These dried, evaporated milk solids are made utilizing only one ingredient: milk. Discover ways to make this straightforward ingredient for your self at house utilizing the standard Khoya recipe!
What’s Khoya?
Khoya, also referred to as mawa or khoa, is dried evaporated milk solids. Milk is slowly simmered in a big iron kadai (wok) until all its moisture evaporates and it reduces to solids.
As I’ve talked about above, Khoya is historically made by sluggish cooking, simmering and thickening milk in a big kadai.
Consequently many of the water will get evaporated from the milk and what stays is milk solids. This course of of creating mawa recipe takes time and desires endurance as fixed stirring is required.
In Indian cooking, particularly within the northern elements of India, khoya varieties a base of virtually all sweets. Khoya can also be added to curry recipes and distinctive cake can also be created from it, the Mawa Cake.
There are a number of sorts of khoya (learn on under), which may vary from being exhausting to mushy to granular.
Just a few of the Indian sweets recipes the place khoya is used are:
Variants
Relying on the period of cooking milk and the moisture content material, there are three varieties or variants of khoya which are made and are used particularly to make some sweets or curry dishes.
- Chikna Khoya: In Hindi, because the title suggests the phrase ‘chikna’ means mushy and easy. This khoya variant has a easy, mushy texture and therefore the title. Chikna Khoya will be simply made in properties. It has extra moisture content material as in contrast with the opposite two mawa variants.
It may be used to make Indian sweets like gujiya, kheer, halwa, rabri, carrot halwa, pantua, kala jamun and gulab jamun. Chikna khoya can also be utilized in making wealthy and creamy, gravies or curries that will or could not embrace kofta.
An identical variant with extra moisture is the Dhaap Khoya which is used to make sweets like varied jamuns and halwas.
- Danedar Khoya – The phrase ‘danedar’ in Hindi means granular. In order the title implies, this khoya variant is granular. Whereas making danedar khoya the milk is curdled barely through the use of alum or an acidic ingredient like citric acid or lemon juice.
This slight curdling ends in a extra grainy and granular texture. Danedar khoya is used to make sweets like kalakand, milk cake and varied peda or barfi the place a granular texture is required.
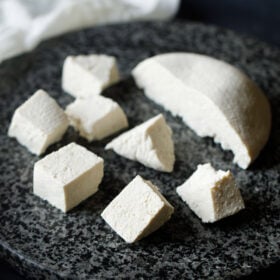
- Batti Khoya or Pindi Khoya – This variant is dry, exhausting and has a easy even look. It’s bought in within the type of moulds or balls. Since Batti Khoya is difficult, it’s grated/shredded after which used.
It has the least moisture as in comparison with the opposite two variants. Additionally it is used to make varied barfi, peda and ladoo that want a dry texture.
About Khoya Recipe
If I’m being trustworthy, I often purchase khoya from the shop. It saves time and prevents me from having to undergo the lengthy means of cooking.
Nonetheless, if you happen to put together the khoya as a facet job when you are doing one thing else within the kitchen, then it’s a easy job.
The milk will get lowered over a low warmth and all you need to do is stir and scrape it at intervals. It’s not tedious.
I do recommend getting ready khoya concurrently when you find yourself cooking or doing another chore within the kitchen. That is multi-tasking and you need to be attentive, but it surely’ll make the method really feel prefer it’s going far more shortly. 🙂
This isn’t a recipe as such, however extra of a way of the way to make khoya. You should use any quantity of milk to arrange khoya relying in your wants.
Like all do-it-yourself stuff, do-it-yourself khoya can also be 100 instances higher than the store-bought sort. There’s solely the richness & goodness of milk on this do-it-yourself khoya, with no components or preservatives.
Suggestions To Bear in mind
1. Milk: The milk needs to be recent. Complete milk provides higher outcomes. 1.25 litres of milk yielded 250 gms of khoya. Relying on the standard and fats content material, the khoya yield can range. I recommend making khoya recipe with 1 litre to 2 litres of milk.
2. Pan: The pan for making mawa recipe must be thick bottomed. That is in order that the milk doesn’t get burned or browned from the underside. If the milk will get scorched, no matter effort you will have put out goes waste.
The pan needs to be deep too, in order that the milk doesn’t overflow whereas simmering. I used my giant non-stick kadai to make the khoya. Non-stick works very effectively when making merchandise like khoya.
You could possibly additionally use a sauté pan or a wok. The scale of those cooking pans will range with the quantity of milk you employ.
3. Stirring Usually: It is very important stir the milk typically because it simmers, cooks and thickens. So be certain that to stir and scrape at intervals so the milk or the khoya doesn’t burn or persist with the pan.
4. Storage: This khoya stays good for about 3 to 4 days within the fridge or 6 to eight days within the freezer.
Step-by-Step Information
The best way to make Khoya or Mawa
1. Pour milk in a big, thick-bottomed pan and place the pan on the range high.
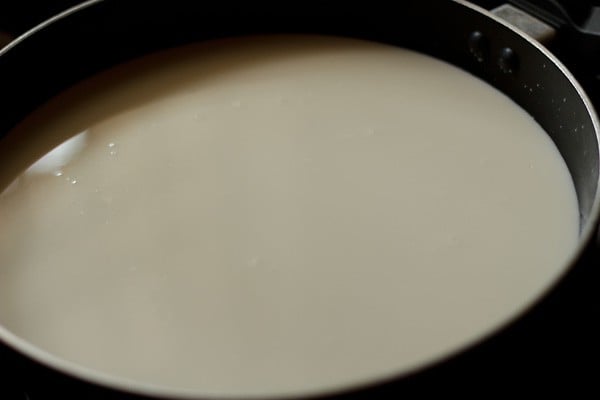
2. Deliver milk to a delicate boil on a low to medium warmth.
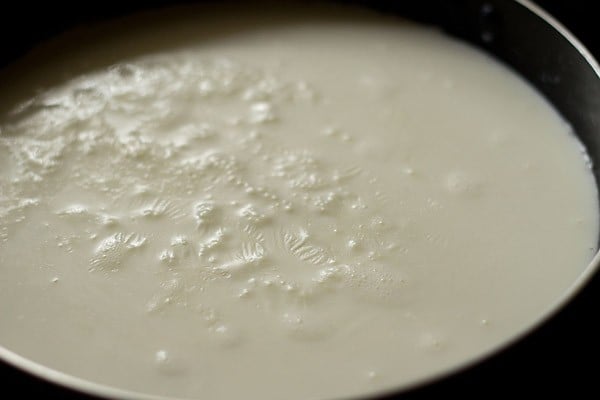
3. Then decrease the warmth and simmer the milk. Stir at intervals while the milk is simmering.
4. That is the consistency of the milk after 23 minutes proper from the start. You possibly can see it’s getting thicker and there’s a pores and skin on the highest.
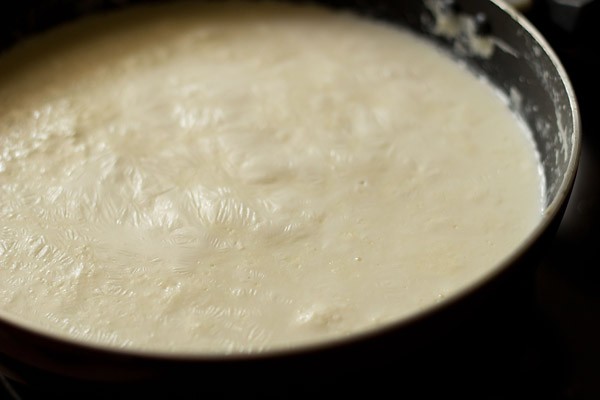
5. The milk will froth many instances, whereas its being simmered.
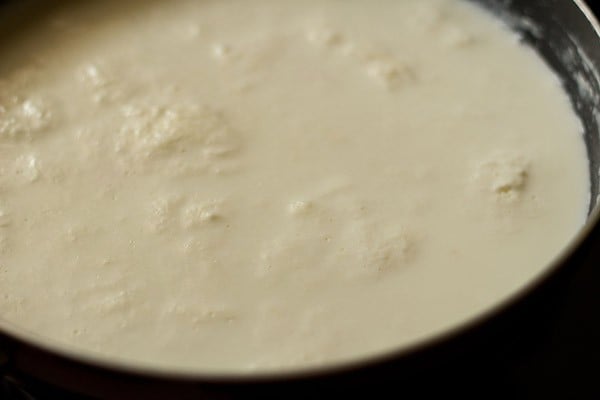
6. So once you see this occurring, stir the milk with a spatula.
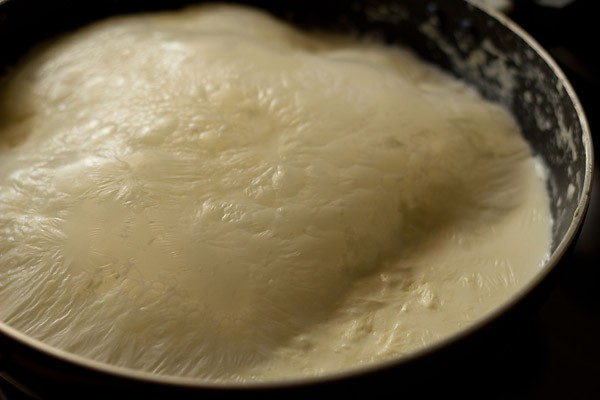
7. Scrape the milk solids from the perimeters and add them again to the milk. The consistency after 1 hour 40 minutes. The milk has lowered significantly.
8. Stir and proceed simmering.
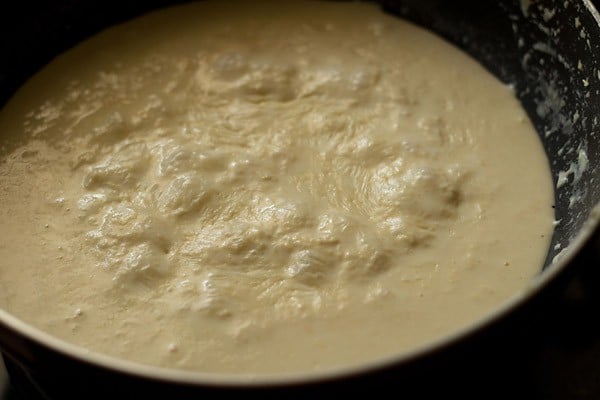
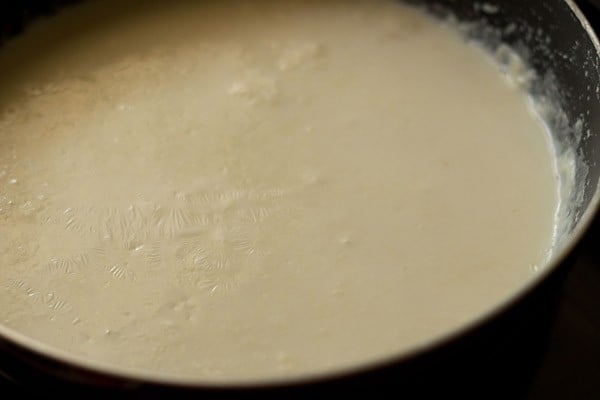
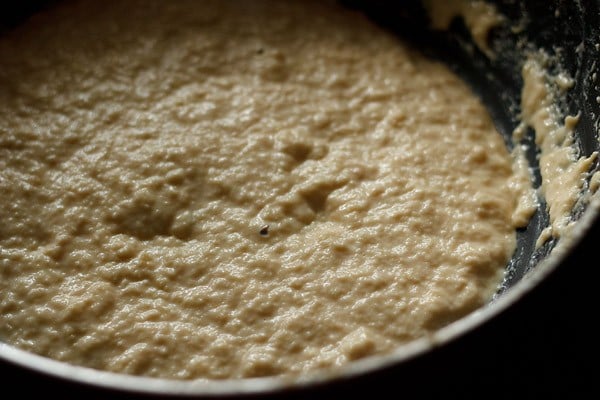
9. You possibly can see under the consistency like that of Rabdi.
10. That is what we get after 2 hours of simmering. Simply couple of minutes extra 🙂
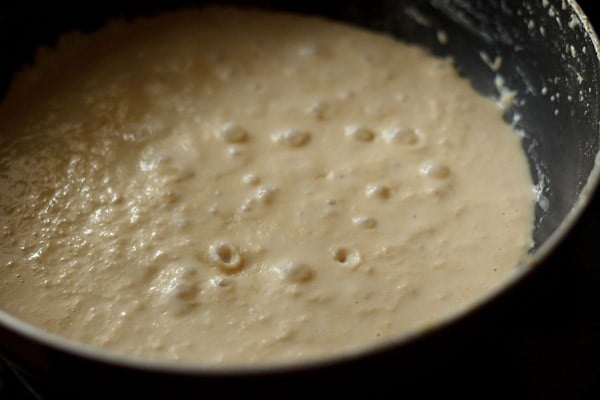
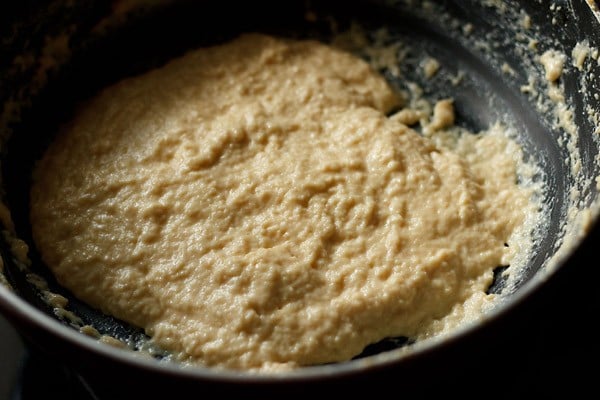
11. After 3 extra minutes this how the consistency seems.
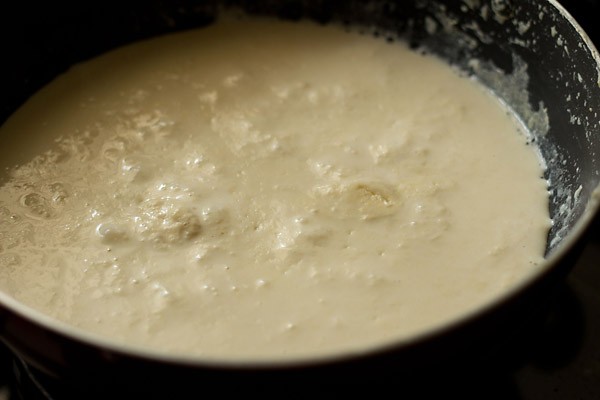
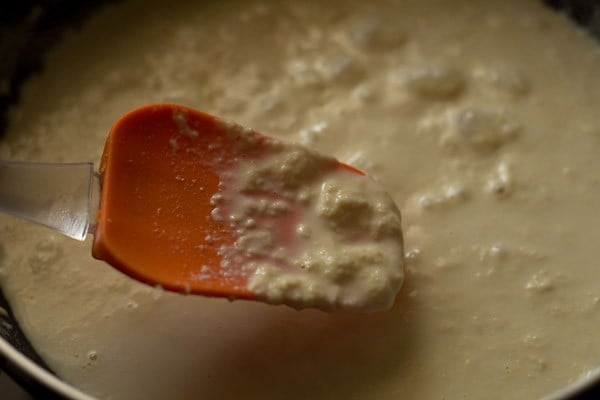
12. In the direction of the final 7 to eight minutes, you will notice bubbles bursting within the lowered and condensed milk. At this stage, constantly stir the lowered milk.
Should you don’t then the underside will get browned or burnt. The bubbles signify the presence of moisture within the lowered milk.
Stir and simmer until you see no bubbles within the milk solids. Additionally, you will see some granular texture within the lowered and thickened milk.
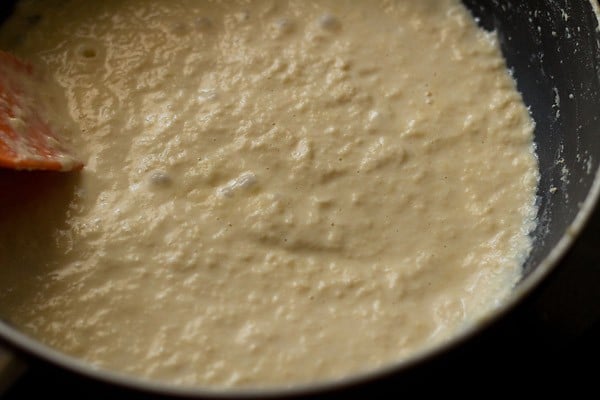
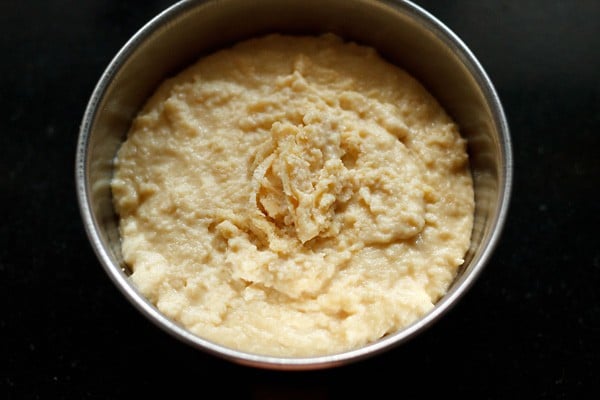
13. If you see no bubbles bursting, it’s time to show off the warmth. It took me 2 hours and eight minutes general on a low warmth.
Whereas the mawa was lowering, I used to be prepping and cooking veg fried rice together with mushroom manchurian.
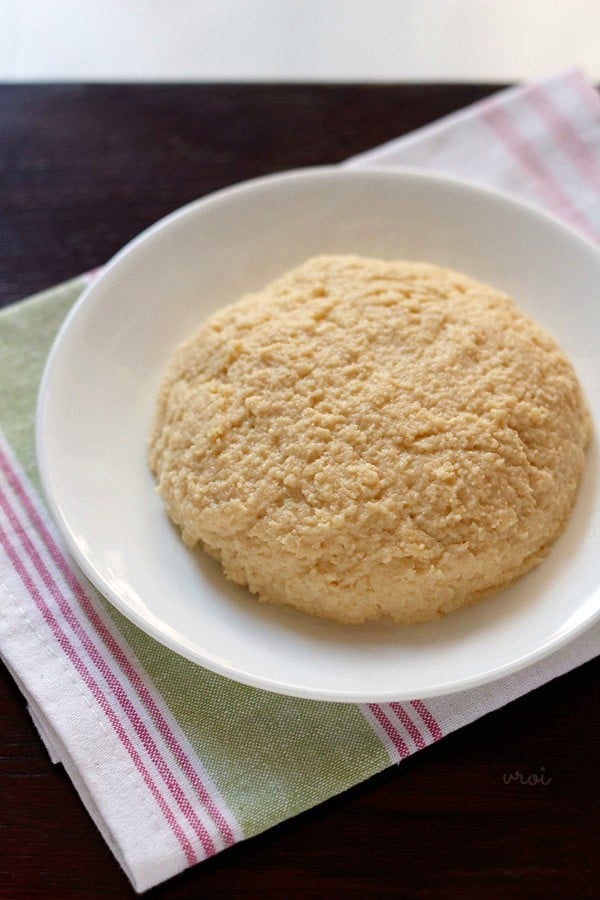
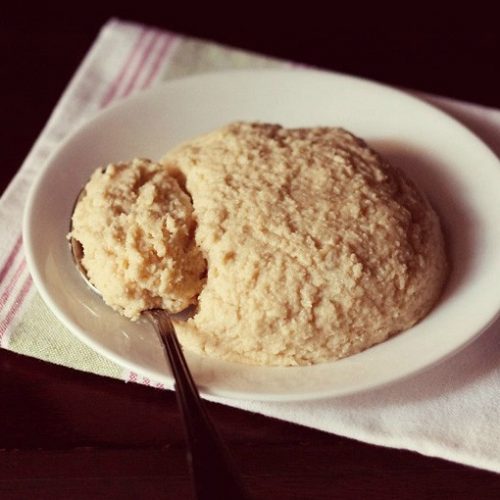
14. As soon as completed, accumulate the khoya or mawa in a bowl. With a spatula, scrape the milk solids from the perimeters and add these to the bowl.
Cowl the bowl and let the khoya cool at room temperature. Then you possibly can refrigerate it in an air-tight container.
15. Add this do-it-yourself khoya or mawa to varied Indian sweets or Indian curries. Bear in mind to retailer in an hermetic container within the fridge or freeze it.
FAQs
It would hold in an hermetic container for 3 to 4 days within the fridge, or 6 to eight days within the freezer.
About 180 to 200 grams, relying on the standard of milk.
If there isn’t a off scent or aroma from the khoya, then it’s high-quality to make use of. In actual fact, the batti number of khoya is usually aged for months or as much as a yr and has mouldy floor.
Should you use a wider heavy-bottomed pan with extra floor space, the liquid will evaporate extra shortly. I recommend doing this in case you are making a big batch.
I haven’t tried it myself, however I’ve seen another recipes which have used this technique. Should you do strive it, let me know the way it seems within the feedback under!
Extra DIY Recipes
DIY & Collections
Gluten Free Recipes
DIY & Collections
DIY & Collections
Please you should definitely price the recipe within the recipe card or depart a remark under in case you have made it. For extra vegetarian inspirations, Sign Up for my emails or comply with me on Instagram, Youtube, Facebook, Pinterest or Twitter.
Khoya Recipe | Mawa Recipe
Do-it-yourself Khoya Recipe or Mawa Recipe made with the standard technique of sluggish cooking and simmering milk in a kadai (wok) till it thickens, reduces and turns into barely granular. Khoya is also referred to as Mawa or Khoa and is a key ingredient for making many Indian sweets.
Prep Time 0 minutes
Cook dinner Time 2 hours
Whole Time 2 hours
Stop your display from going darkish whereas making the recipe
Pour the milk in a big thick bottomed pan and place the pan on the range high.
Deliver milk to light boil first on a low to medium warmth.
Then decrease the warmth and simmer the milk. Stir at intervals while the milk is simmering.
The milk will froth many instances, whereas its being simmered. So once you see this occurring, with a spatula stir the milk.
Scrape the milk solids from the perimeters and add to the milk.
The milk will proceed to scale back and thicken as its being simmered on a low flame.
A stage will attain when the lowered milk will resemble rabdi (an indian candy).
Proceed to simmer and stir.
- In the direction of the top when the milk has lowered a lot, you will notice bubbles bursting within the lowered milk. At this level constantly stir. Should you do not then the lowered milk will get browned or burnt. The bubbles are attributable to moisture within the milk.
If you see no bubbles within the lowered milk, its time to change off the flame. It took me 2 hours and eight minutes general on a low flame.
With a spatula, scrape the milk solids from the perimeters and add these to the bowl. Cowl the bowl and let the khoya cool at room temperature. Then you possibly can refrigerate it.
Add this do-it-yourself khoya or mawa as wanted whereas making varied indian sweets or Indian curries.
When cooled, retailer khoya in an air-tight container. Refrigerate for two to three days or freeze for six to eight days.
- Use a thick bottomed and heavy kadai (wok) or sauté pan.
- Guarantee to stir the milk typically because it simmers and sluggish cooks.
- Endurance is a key when making do-it-yourself khoya from scratch with the standard method. You additionally should be attentive in order that the milk doesn’t burn or get browned.
- Bear in mind to make use of entire milk which is inside its shelf interval.
- Pair the duty of creating khoya along with your different kitchen chores that want you to be within the kitchen.
Diet Details
Khoya Recipe | Mawa Recipe
Quantity Per Serving
Energy 3 Energy from Fats 2
% Each day Worth*
Fats 0.2g0%
Saturated Fats 0.1g1%
Polyunsaturated Fats 0.01g
Monounsaturated Fats 0.04g
Ldl cholesterol 1mg0%
Sodium 2mg0%
Potassium 8mg0%
Carbohydrates 0.2g0%
Sugar 0.2g0%
Protein 0.2g0%
Vitamin A 8IU0%
Vitamin B1 (Thiamine) 0.003mg0%
Vitamin B2 (Riboflavin) 0.01mg1%
Vitamin B3 (Niacin) 0.01mg0%
Vitamin B6 0.003mg0%
Vitamin B12 0.03µg1%
Vitamin D 0.1µg1%
Vitamin E 0.003mg0%
Vitamin Okay 0.02µg0%
Calcium 6mg1%
Magnesium 1mg0%
Phosphorus 5mg1%
Zinc 0.02mg0%
* P.c Each day Values are primarily based on a 2000 calorie food regimen.
This Khoya recipe from the archives first printed in October 2014 has been up to date and republished on August 2023.
Source link


