

It is a submit that was initially created for Informal Zine.
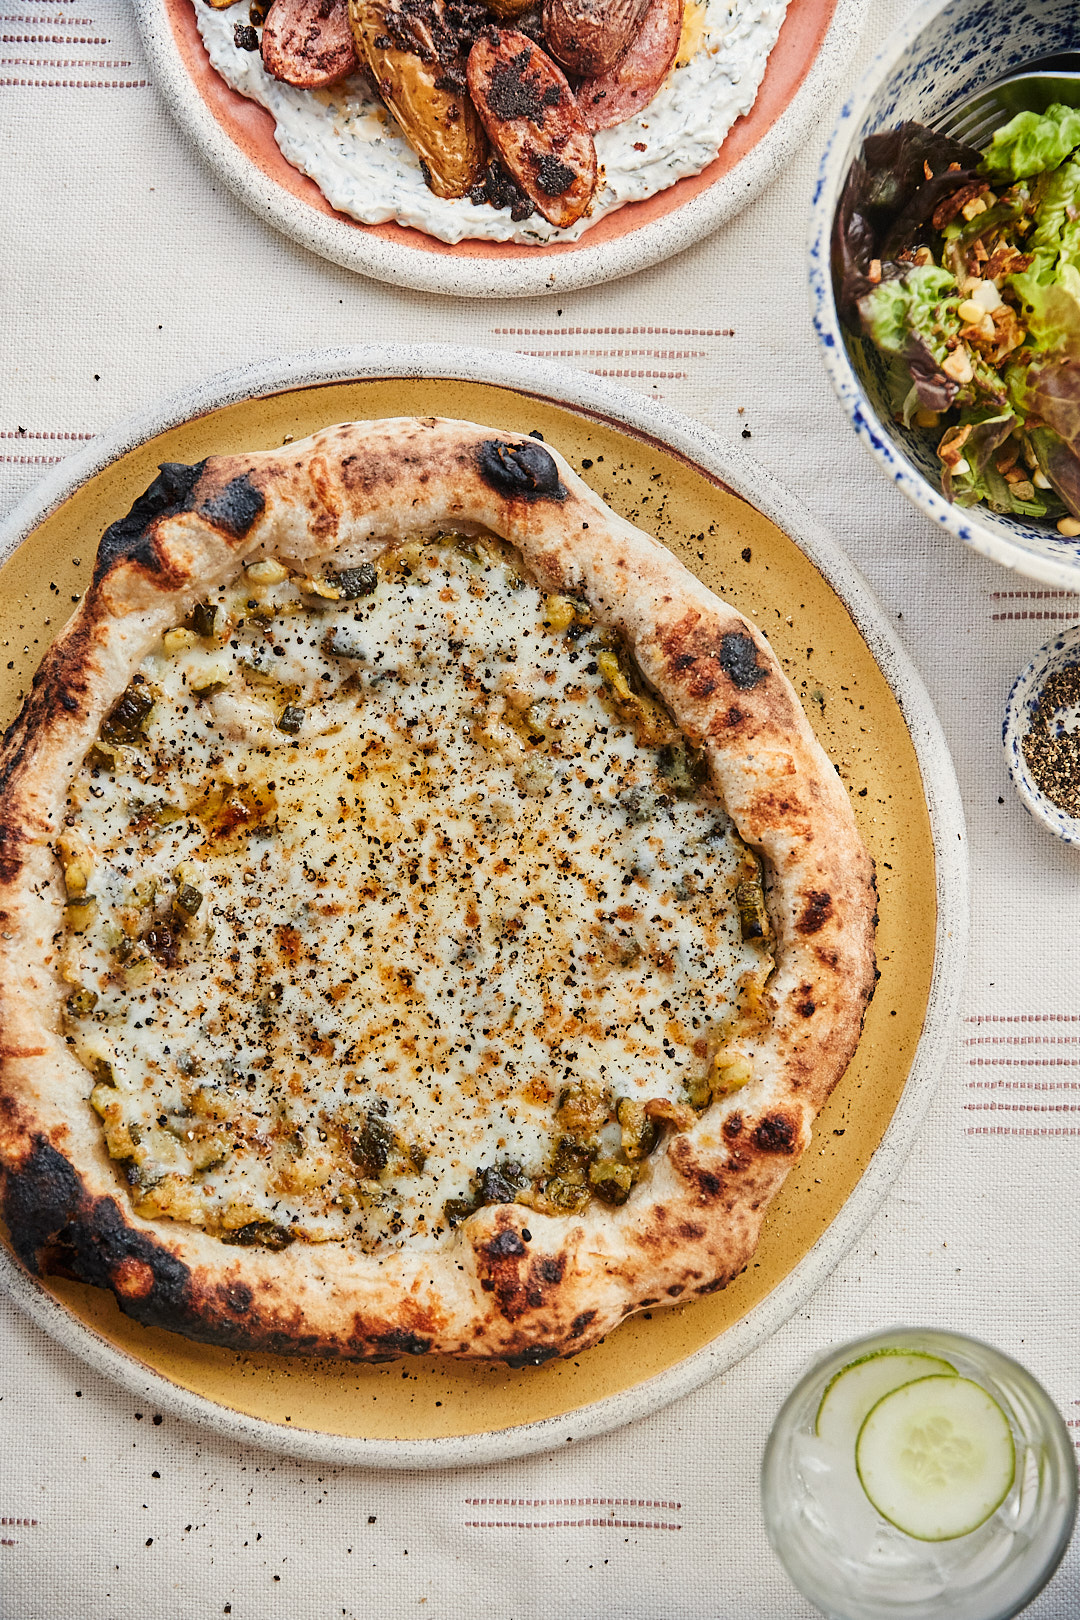
Pizza has turn into a weekly custom in our home whereas being at residence over the previous yr. It’s what I look ahead to making every week. It’s additionally the factor I get essentially the most questions on, so I figured it was time to place a little bit of it to paper.
For starters, I’m not an knowledgeable. Every week I’m studying and enjoying round with completely different flours, dough hydration, pizza oven temperature, and toppings. However, issues prove fairly tasty, so under is a tough go at what I do with hyperlinks out for movies I discover useful (as a result of there’s a number of nuance to pizza dough, and whenever you get it, it’s unbelievable). This submit is simply the bottom pizza- I’ll do one other submit with topping concepts and issues I’ve executed.
For the dough base
I’ve been making a variation of the recipe for the same-day dough from the ebook Flour Water Salt Yeast by Ken Forkish. The recipe within the ebook says it yields 5 dough balls, however the place I’ve landed is reducing the recipe in half (500g flour) and yielding 3, 12” pizzas. I used to make the total recipe (1000g of flour) each different week and freeze half, however I discovered I similar to the texture of the contemporary dough higher. It’s price it to me to make the dough every week and is ideal for a household of 3-4 with a little bit of leftover pizza.
You may also discover great sourdough recipes (I’d recommend this one) if that’s your jam. Ideally, it is going to be my jam one day- I’ve a tough time babysitting sourdough and remembering to feed it in time to make dough.
For the dough, I weigh out 500g of flour, 370g to 420g of 95˚F water, 10g of kosher salt, and 1g of prompt yeast. Ken’s recipe has a bit decrease hydration degree for the dough (350g), however I almost at all times use some portion of whole-grain flour.
My present ranges have been about 80% freshly milled wheat (normally smooth wheat like Chiddam Blanc or Wit Wolkoring) and 20% bread flour (both King Arthurs or Cairnspring). The smooth wheats don’t have the identical gluten energy as a tough wheat, so the 20% bread flour is balancing that deficit. For this degree flour steadiness, I exploit 400g of water. If I do a portion of exhausting wheat, I push the hydration degree nearer to the 420g degree. Wheat, particularly freshly milled, is a little more thirsty, and so the upper hydration retains the dough feeling smooth and workable. You will discover the wheat flours I discuss at Grist + Toll or Capay Mill.
For mixing the dough
I comply with Ken’s technique fairly carefully, and once more, would extremely advocate choosing up the ebook for detailed directions. Weigh the flour in a big container and weigh salt and yeast in separate small containers. Subsequent, weigh the water and pour about two tablespoons over the yeast, and stir. Pour the remaining water over the flour and mix along with your palms till many of the flour/water are included—cowl for 20 minutes.
After the flour has hydrated, make dimples on the highest and sprinkle the salt over. Stir the yeast and pour over the dough as properly. Then, start stretching upwards and folding the sides of the dough over the salt/yeast combine. Then, use the pincer technique (Ken has a good video explaining this process much better than I could do in writing), repeating this course of till all the pieces is properly included. End by shaping the dough right into a ball and canopy with a silicone cowl or plastic wrap.
Necessary notice: when stretching the dough, complete wheat doesn’t stretch close to so far as all-purpose or bread flour. The dough ought to by no means tear, so be a bit extra mild with the entire wheat dough. And when you’ve got no clue what I imply by stretch and fold, Ken explains it above, however here’s another helpful post/video as properly.
For resting of the dough
After about 60 minutes, when the dough has unfold to fill the underside of the container, the dough will get another fold into a good ball. Moist your palms and comply with the identical folding technique for above. After this, the dough simply will get to sit back till double the amount. I normally search for air bubbles on the high and a pleasant jiggle to the dough. Determining timing can take some experimenting to determine what’s greatest.
As soon as the dough is prepared, tip the dough onto a floured floor and divide/form into three balls. This, too, has a course of, and I’d recommend watching this video (and once more, if utilizing complete wheat-heavy doughs, use a lighter contact).
As soon as your dough balls are formed, place them on a floured plate or tray, cowl them once more with silicone or plastic, and place them within the fridge. The dough can now chill within the fridge till you’re prepared to make use of it (as much as two days). Simply make sure to pull the dough from the fridge about 45 minutes earlier than cooking to heat the dough a bit.
For shaping the pizza dough
And at last, shaping the dough as a result of this too is essential. There are a couple of completely different strategies for stretching the dough. The important takeaways for this are retaining levity within the rim of crust and ensuring the underside of the pizza is skinny and even. I’m not a professional at this, so for this, I give you another video (or I extremely advocate looking for New York Pizzaria movies on Youtube as a result of they’re enjoyable to look at).
I stretch the dough as I make every pizza. So stretch, high, bake, repeat.
For cooking the pizza
I exploit my Ooni pro. Do you want a pizza oven to make nice pizza? By no means. Is it a hell of a number of enjoyable? Sure, sure it’s.
You may also use your oven and a forged iron pan. I warmth oil within the pan on the stovetop, slide the assembled pizza into the pan and prepare dinner over medium (to medium-high) till the crust begins to puff and set. From there, I switch into an oven preheated to 450˚F and let it bake the remainder of the best way. Resist the urge to tug the pizza early- the cheese must be bubbly, and the crust must be golden.
For reheating leftover pizza
Warmth a skillet with a lid and drizzle sufficient olive oil to cowl the underside of the pan. Warmth over medium-ish warmth, place slices within the pan and canopy with a lid. The crust will get a bit crisp, the cheese melts, and it’s a lot better than a microwave.


