

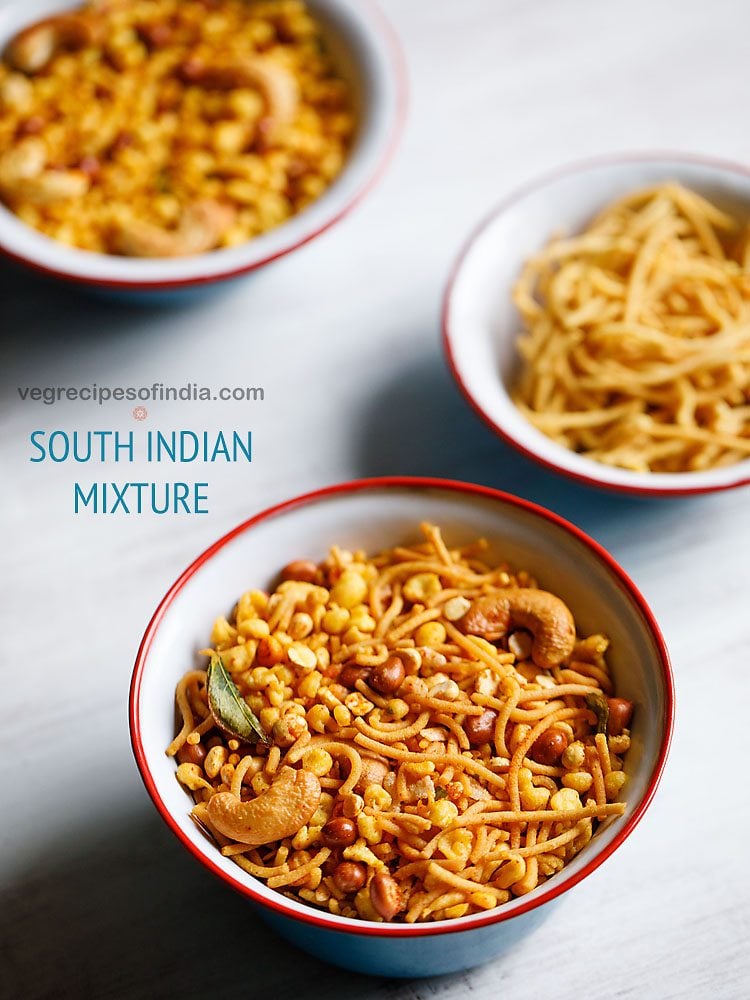
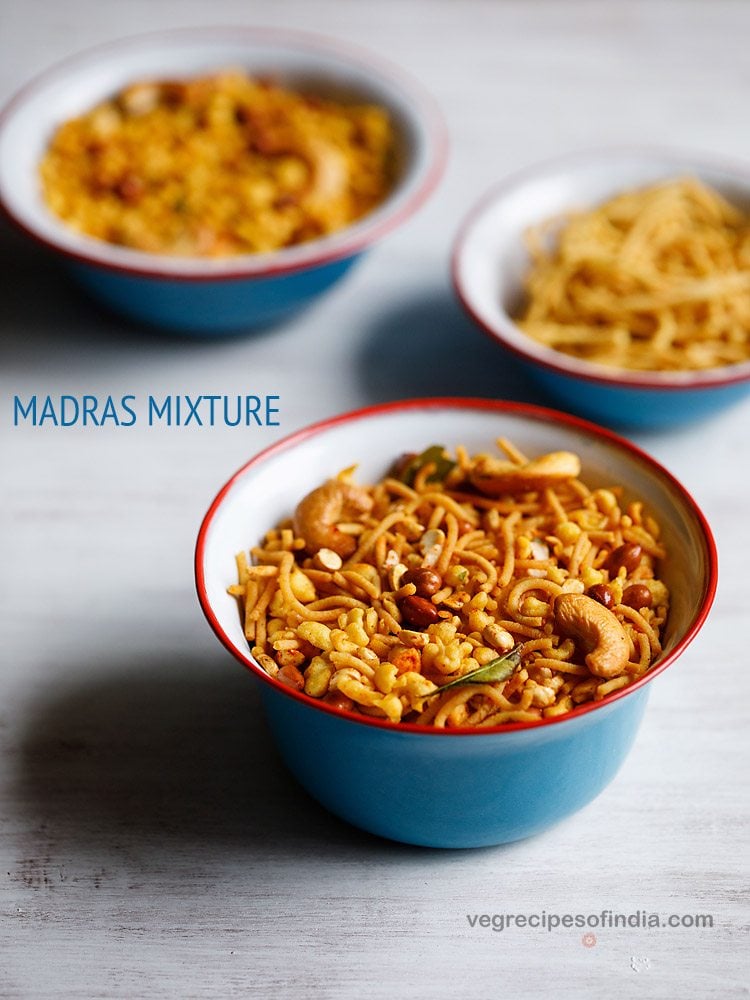
Right here is one other of my recipe variations for the favored and attractive Madras Combination, which is mainly a snack dish manufactured from a medley of assorted components, dry fruits/nuts, seasonings and spices. Although you would possibly discover a bit of hesitant in direction of this Combination Recipe by wanting on the variety of steps within the methodology, however belief me, it will be completely value when you put together it. So, simply go for it! As a result of serving the home made model of this snack combination throughout Diwali, may also simply brighten the already lit festivities.
Extra on Combination Recipe
What is usually often called Chivda within the northern and western elements of India, is the Combination in southern India. And similar to there are various forms of a chivda recipe, comparable is the case with a Combination Recipe too.
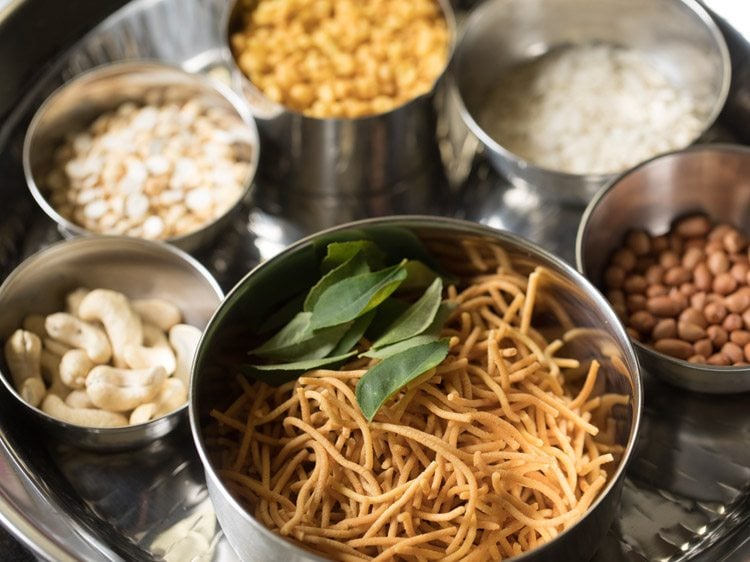
On this submit, I’ve shared the favored and cherished South Indian Combination, common from Madras (Chennai). Two of the primary components of this one is omapodi (plain sev) and boondi.
Apart from these, there are some nuts, poha (aval), chana dal, curry leaves, spices and seasonings. You’ll be able to even add fried coconut. However I normally don’t add because it lowered the shelf-life of this specific snack.
So mainly, in case you have the boondi and omapodi prepared from earlier than, you simply must fry the opposite components and blend all of them along with the spices and salt.
However in case should you don’t have the plain sev and boondi prepared, look nowhere else, as my Combination Recipe mentions the step-by-step pictorial illustration of creating these as properly.
Some variations of the South Indian Combination even have candy maida (all-purpose flour) biscuits too added in them. Nonetheless, I prefer it to maintain it easy and genuine. Therefore, haven’t added in my recipe.
The preparation together with the making of the two essential parts of this Madras Combination Recipe, does take time. So, you may plan forward and make accordingly.
Identical to I made the omapodi and boondi a day earlier than to scale back the prep work, you may as well maintain these prepared, a day prior. This can undoubtedly cut back the time to finish your Combination Recipe the following day.
Why this recipe works
On this Madras Combination recipe submit, I’ve talked about the strategies of getting ready each the omapodi and boondi. For an unique detailed submit on each these, you may examine this Omapodi Recipe and Kara Boondi Recipe.
It’s at all times higher to organize your personal snacks, particularly the fried ones like this Madras Combination Recipe, at residence. By doing so, you’re guaranteeing that the recipes are getting executed utilizing the very best of components and likewise the oil which is used to fry, isn’t reused many occasions.
Thus, home made chivda and mixtures are more healthy too, and can at all times style a notch increased as in comparison with the store-bought ones.
On this South Indian Combination too, you may as well add extra like Ribbon Pakoda, Thattai, Murukku and even Karasev. Simply break these into smaller items and toss in with different components.
This Madras Combination Recipe yields about 350 grams of the yummy, crunchy-munchy snack. You’ll be able to relish it with family and friends throughout tea-time or make it part of your Diwali or some other pageant celebrations as properly. For storing, pack in air-tight jars and maintain.
Step-by-Step Information
Tips on how to Make Combination Recipe
Make Omapodi Dough
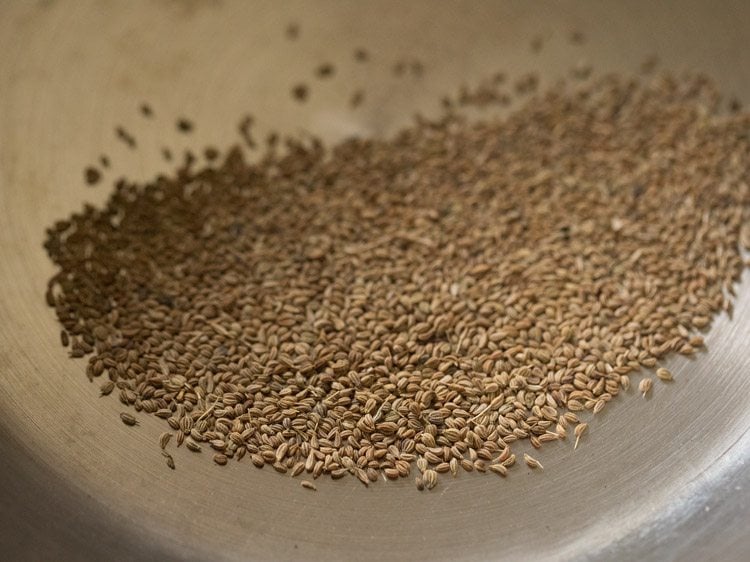
1. Warmth a small pan and maintain the warmth to low. Add 1 teaspoon carom seeds (ajwain).

2. Stirring typically, roast carom seeds for some seconds or until they’re aromatic. No must brown them. Allow them to cool.
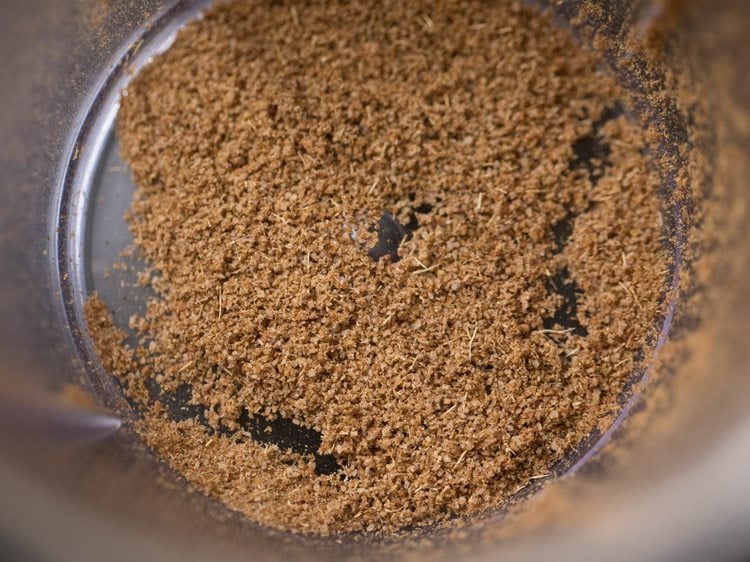
3. Then, add them in a small dry grinder jar or a spice grinder.
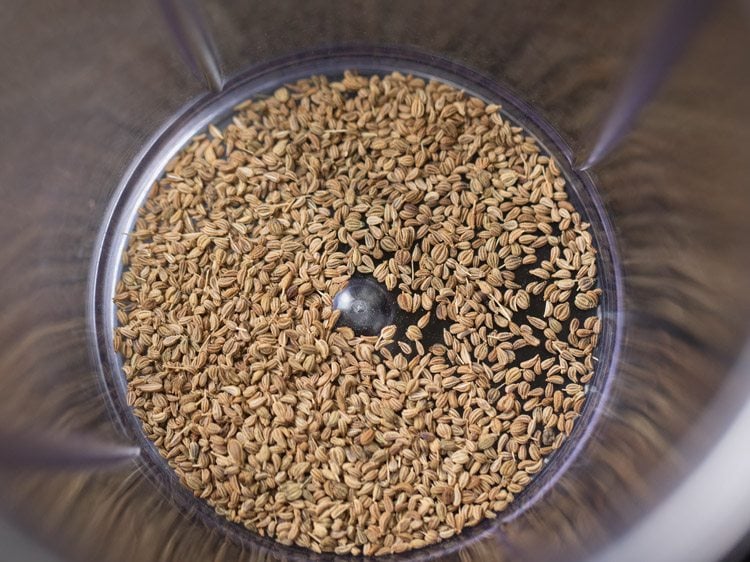
4. Grind to a high-quality powder. Hold apart. You’ll be able to even crush ajwain in a mortar-pestle. On this case, when including ajwain, use a tea strainer and sift the ajwain powder via it.
That is executed in order that when urgent via the sev maker, the dough strands don’t break.
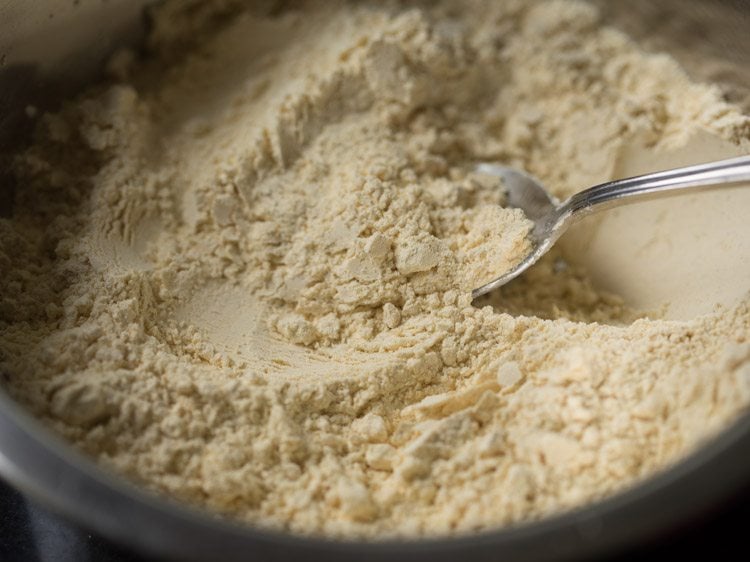
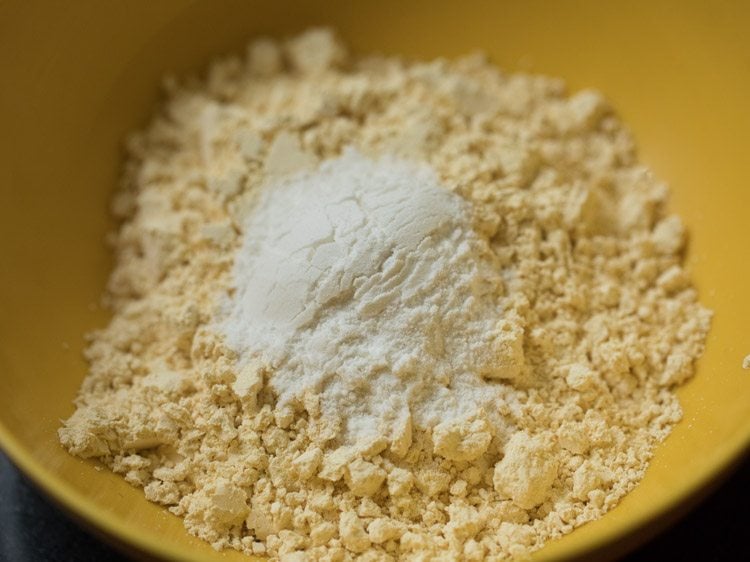
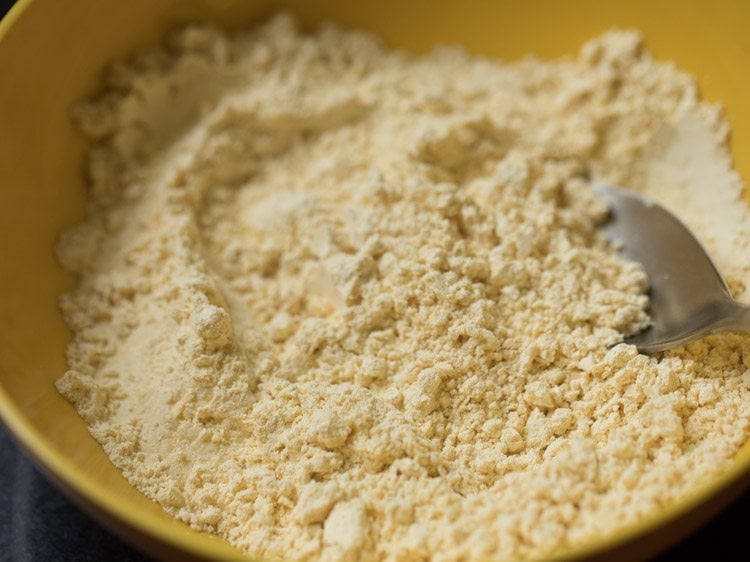
5. In a mixing bowl or pan, take 1 cup gram flour (besan) and ½ cup rice flour.
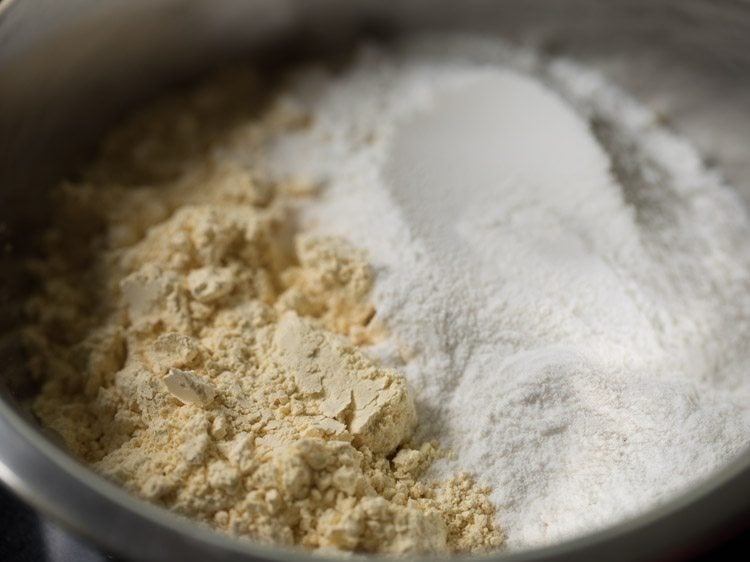
6. Add the ready carom seeds powder.
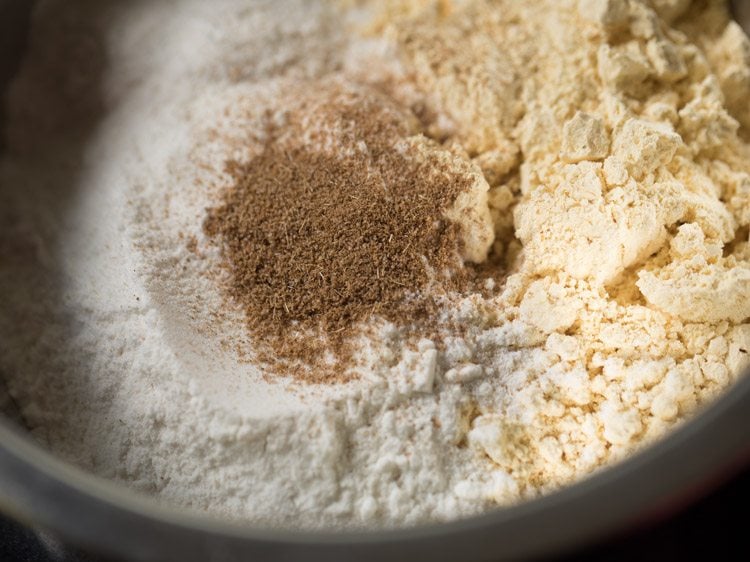
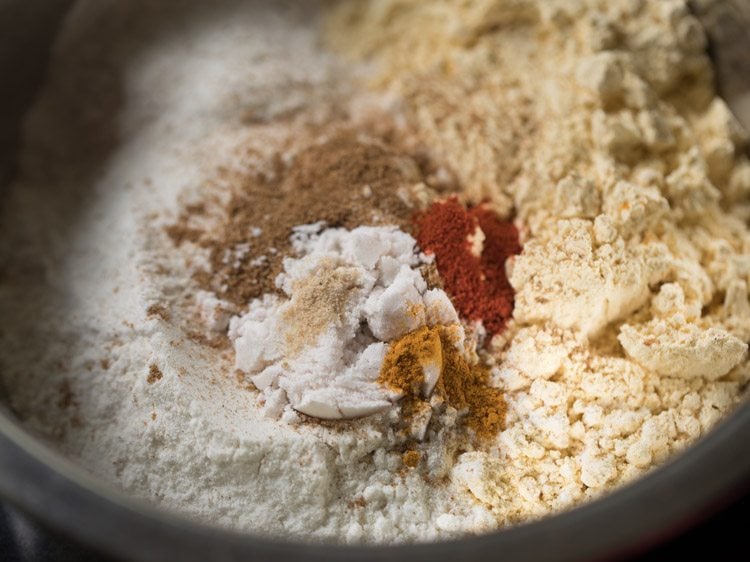
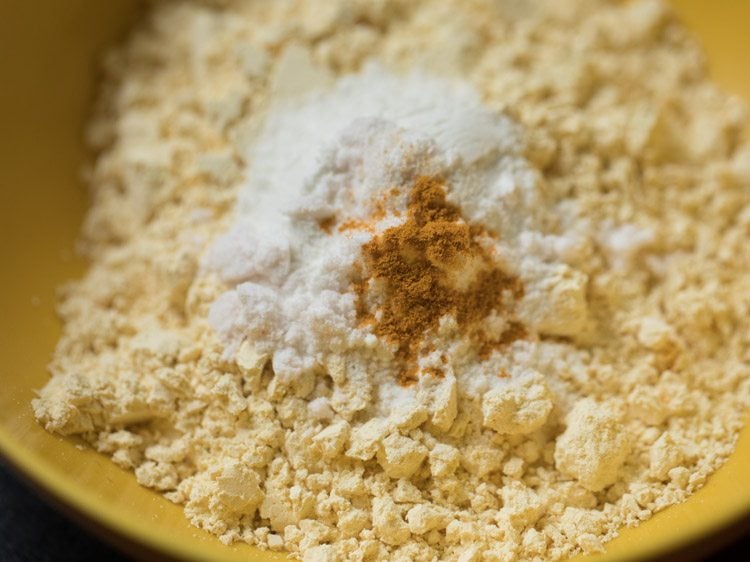
7. Then, add 1 beneficiant pinch asafoetida (hing), 2 pinches turmeric powder, ¼ teaspoon pink chili powder and 1 teaspoon salt. You’ll be able to add salt as per style.
Turmeric powder might be skipped. For a spicy omapodi, you may enhance the quantity of pink chili powder. For extra crispiness, you may add a pinch of baking soda additionally.
8. Combine very properly with a spoon or spatula.
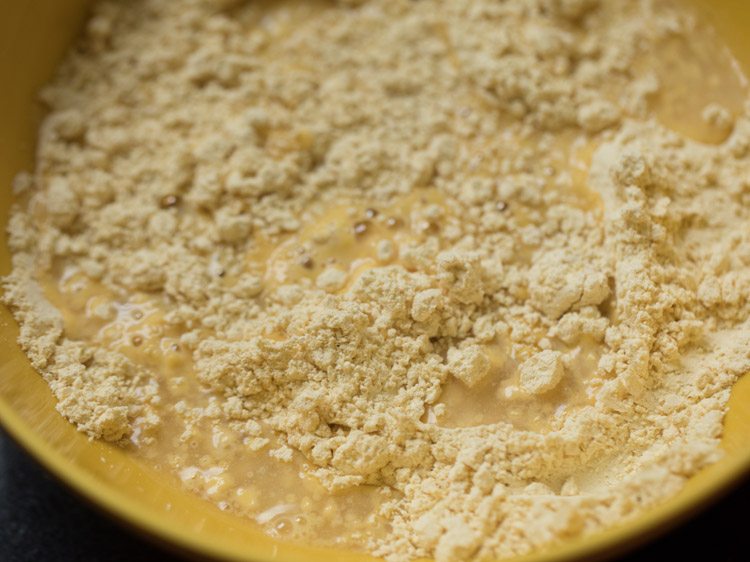
9. Now, warmth 1 tablespoon oil in a metal bowl or a metal measuring cup.
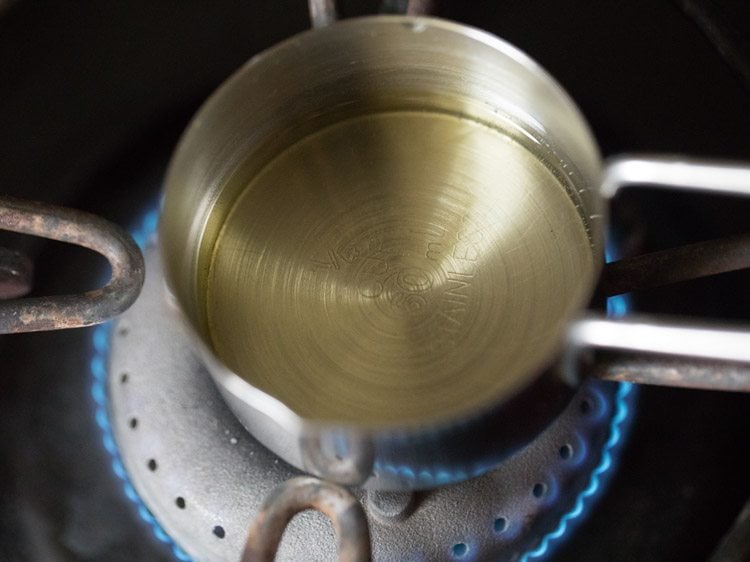
10. When the oil turns into sizzling, add it to the flour combination. As a substitute of oil, you may as well use ghee or butter.
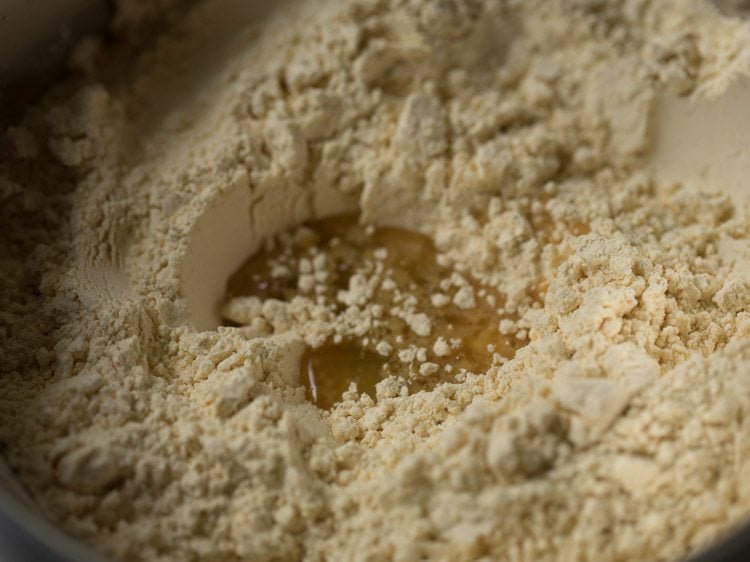
11. With a spoon, combine the oil with the flour combination.
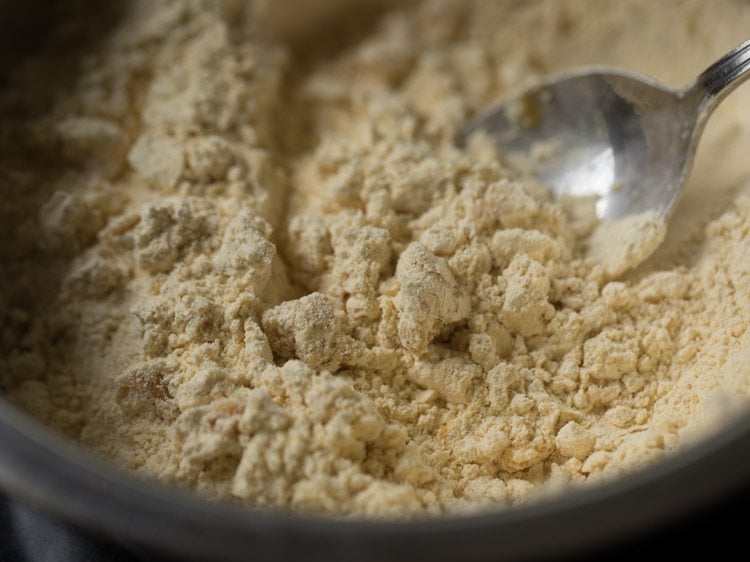
12. Now, add water in elements. First, add 2 to three tablespoons water. Combine properly and start to knead to a clean dough.
I used 7 tablespoons water general. You’ll be able to add 6 to 7 tablespoons water, relying on the standard of gram flour and rice flour.
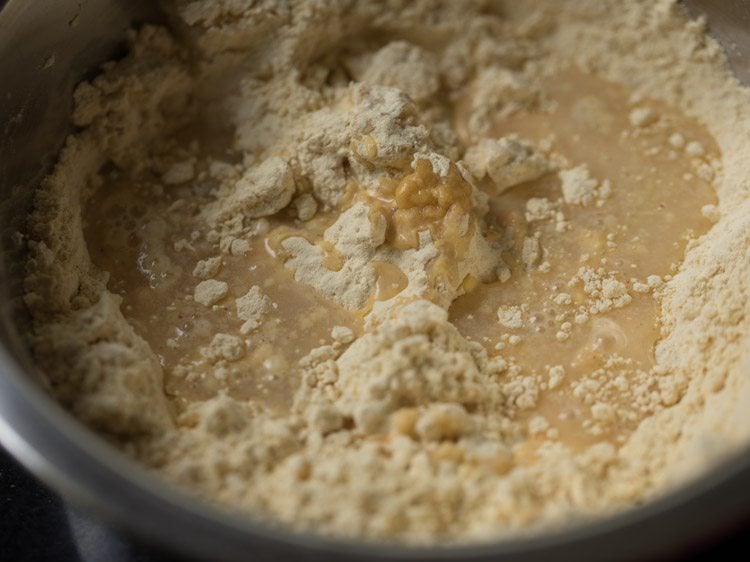
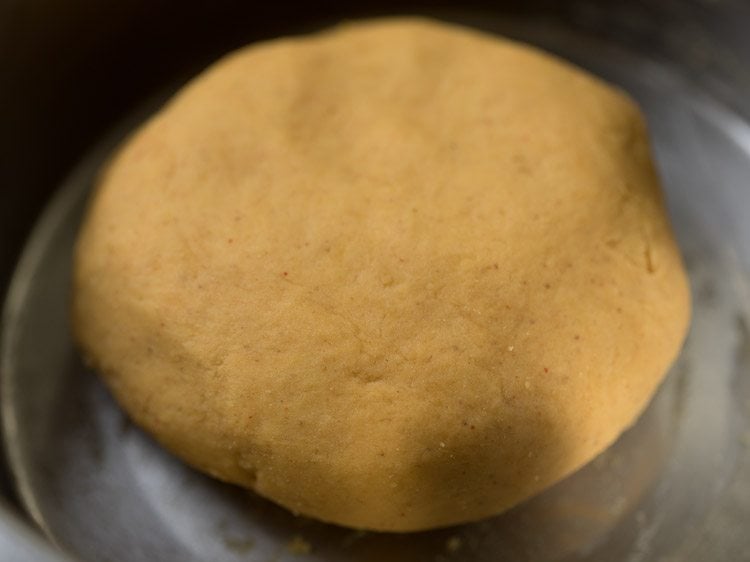
13. Knead to a clean dough. If the dough turns into sticky, then you may add some extra besan. If the dough seems dry, then add some extra water and knead once more. Cowl the bowl.
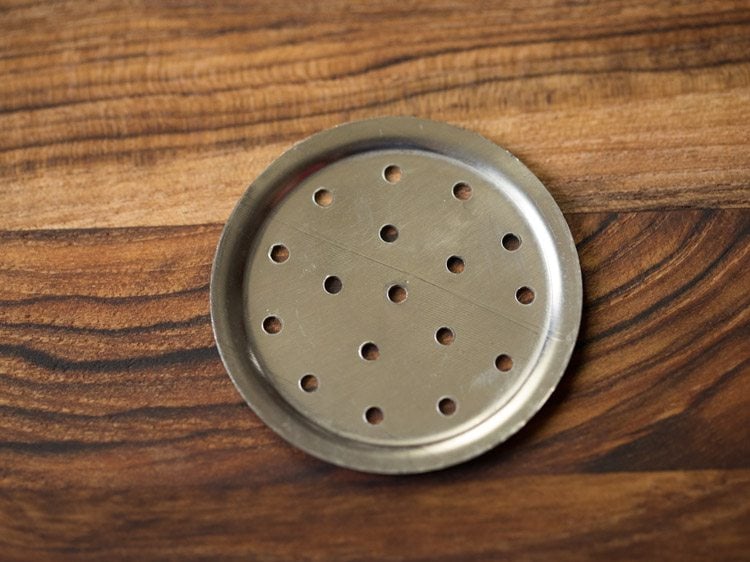
14. Use the disc proven within the image under, for getting ready omapodi. You’ll be able to even use the disc with high-quality holes. Additionally, warmth a kadai and add oil as required for deep frying omapodi.
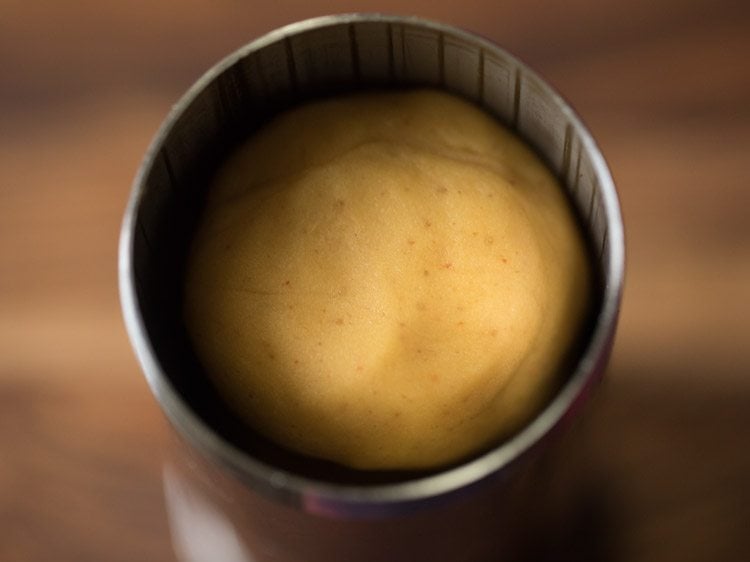
15. Apply some water or oil within the sev/murukku maker. Then, take a portion of the omapodi dough and place it contained in the sev maker. Cowl with the highest half and maintain apart.
Fry Omapodi
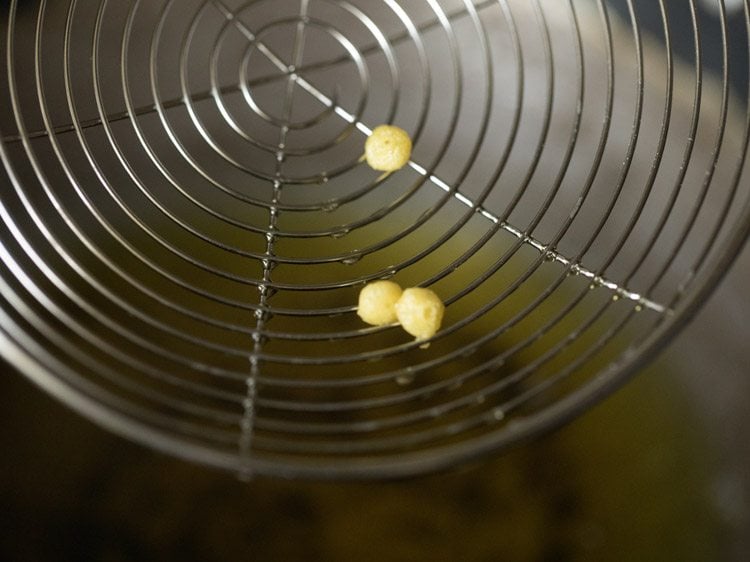
16. Let the oil within the kadai turn out to be medium sizzling. Verify the oil temperature by including a tiny piece of the dough. If the small piece comes up step by step and steadily on high, the oil is sizzling sufficient to fry.
In case it comes up too shortly, then oil is simply too sizzling. If it settles down at backside of kadai or comes up very slowly, the oil shouldn’t be sizzling sufficient for frying.
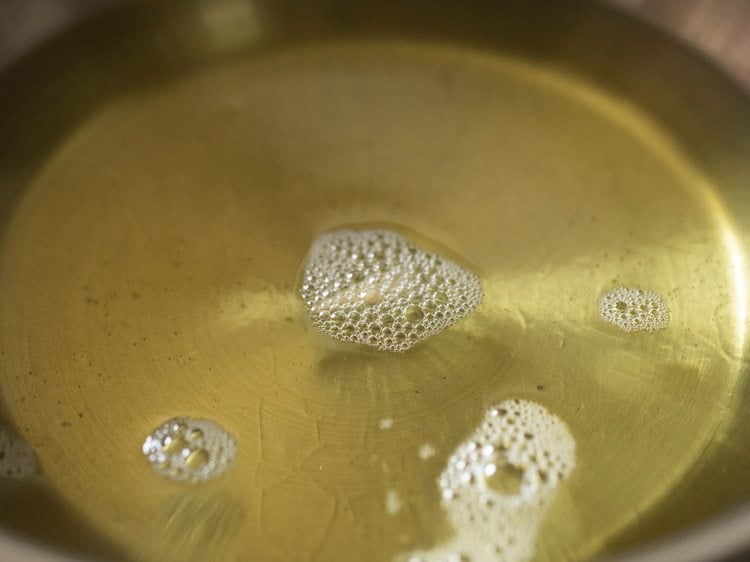
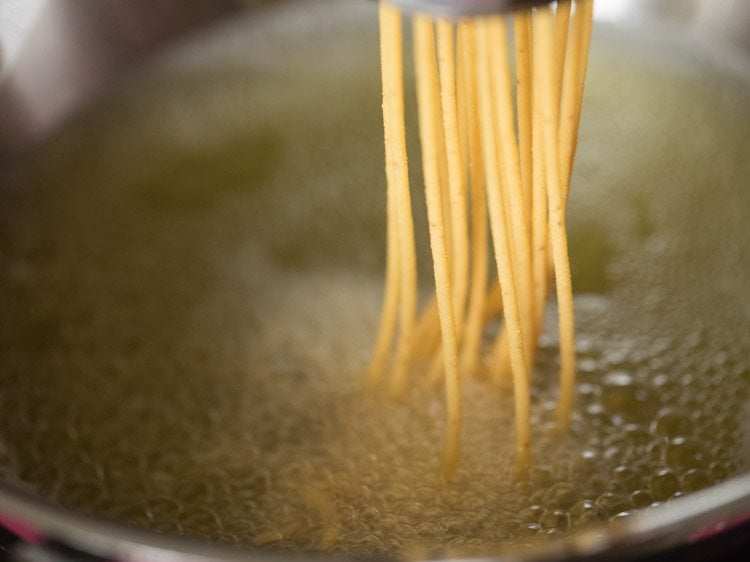
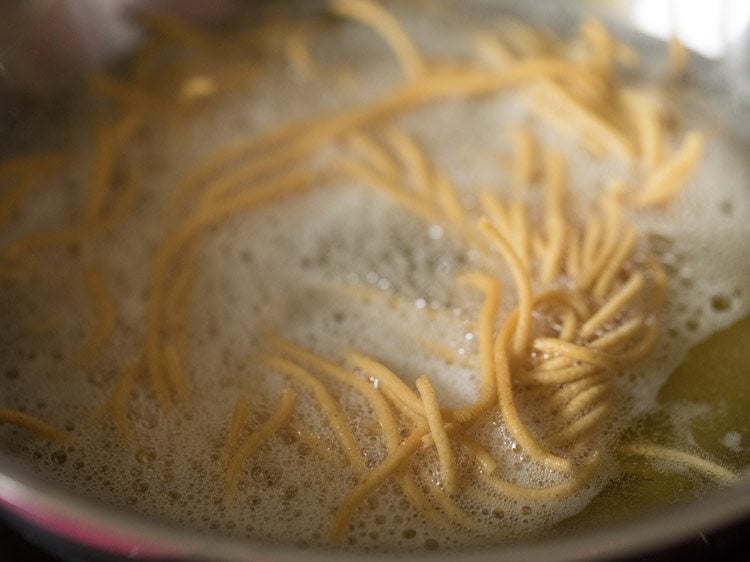
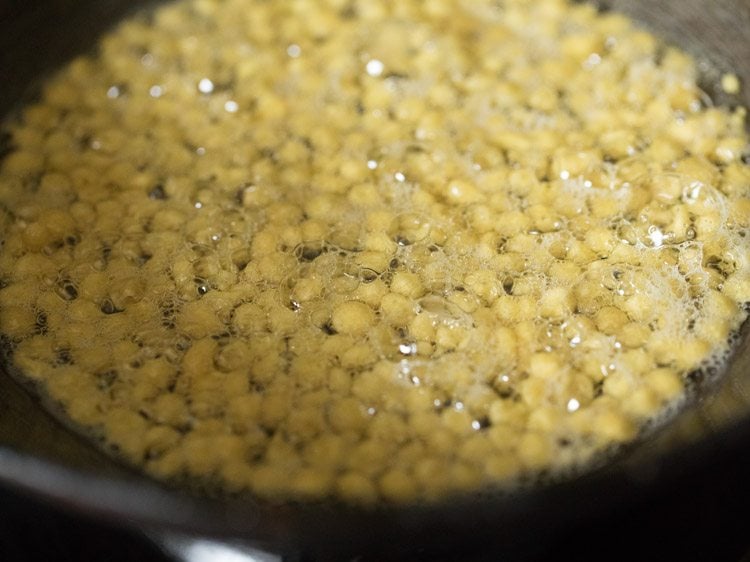
17. When the oil is sizzling sufficient, immediately press holding the sev maker on high of the oil and let the omapodi immediately fall within the oil.
Whereas urgent, rotate in a concentric circle from the middle to outwards just like making a Chakli.
Don’t over crowd the kadai with omapodi. Watch out when urgent the omapodi within the oil.
After it’s is pressed within the oil, break the highest strands with a spoon or knife and let the strands fall within the oil.
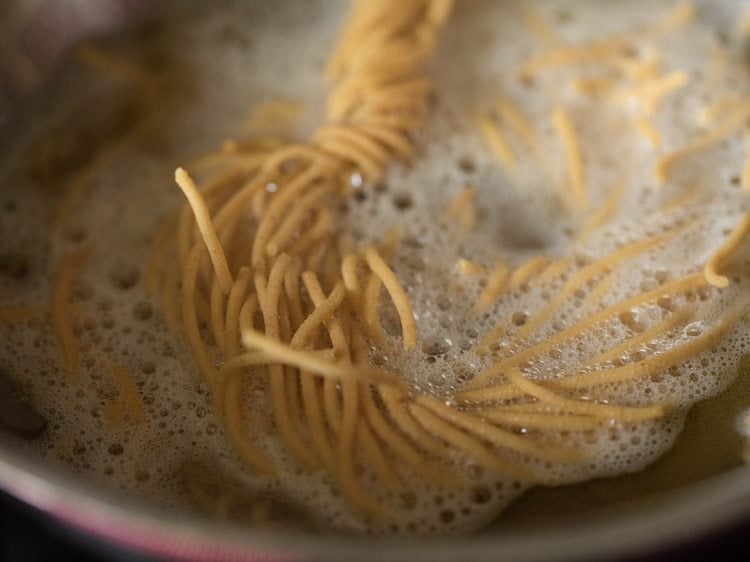
18. After including the omapodi, don’t contact instantly with the slotted spoon as they may break. Allow them to get fried first for a minute.
They should turn out to be crisp first after which you may flip them over with the slotted spoon.
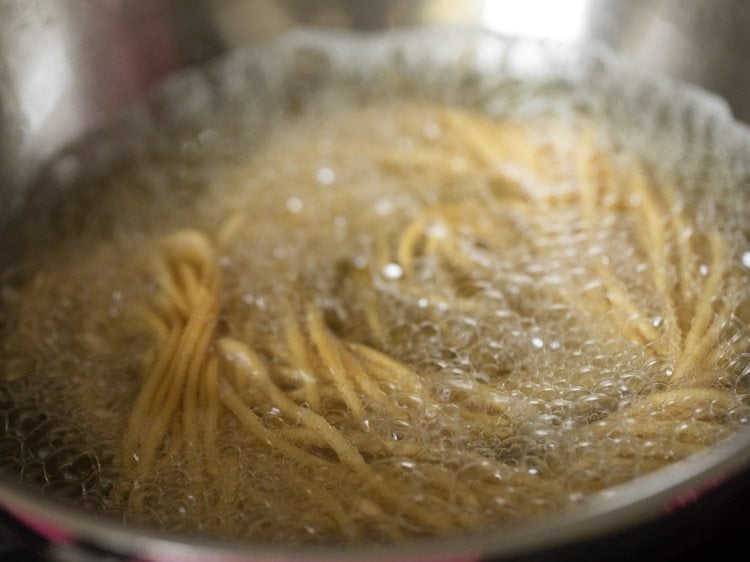
19. Gently start to show with a slotted spoon.
20. Now, fry the second facet. You’ll be able to flip over a few occasions for even frying.
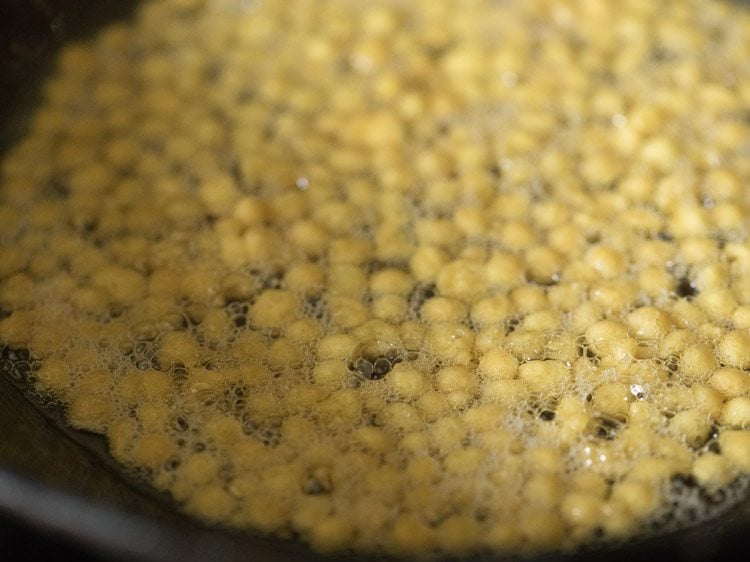
21. When the oil stops scorching, proceed to fry for some extra seconds until the omapodi is golden and crisp. Flip over as wanted, when frying.
Don’t break omapodi whereas frying as then it turns into additional work to take away the small items from the oil. So, fry all the spherical formed omapodi as one piece and don’t break it.
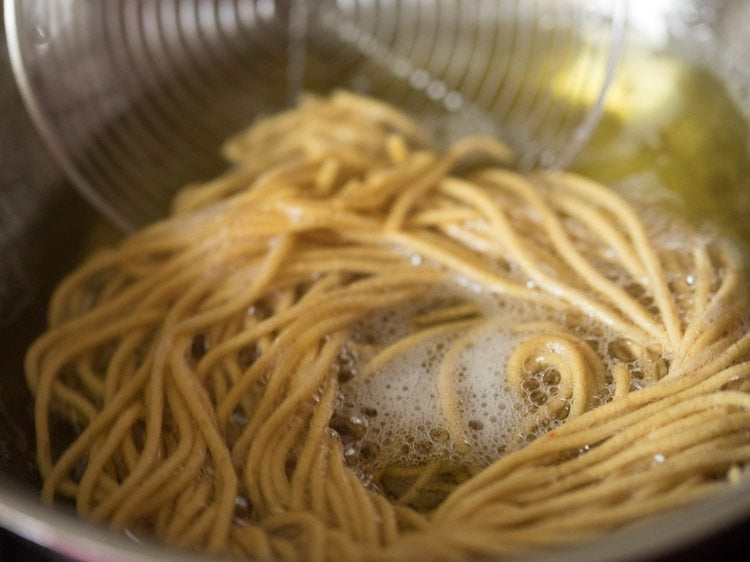
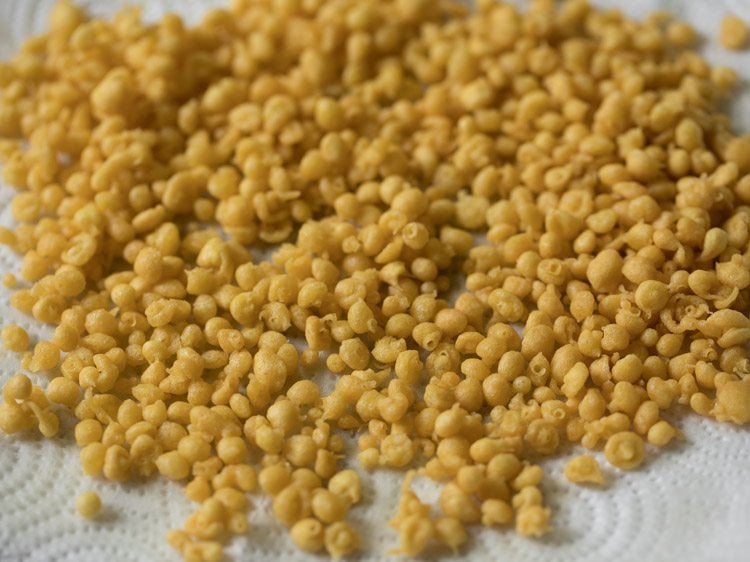
22. As soon as executed, take away fried omapodi with a slotted spoon or a strainer spoon draining off the additional oil.

23. Place fried omapodi on kitchen paper towels. Fry remaining in the identical means.

24. When omapodi cools, place in an air-tight container or field. Earlier than including to the Madras Combination, break the omapodi.

Make Boondi Batter
25. Take ½ cup gram flour (besan) and 1 tablespoon rice flour in a mixing bowl.
26. Then, add 1 pinch asafoetida (hing), 1 pinch baking soda, 2 pinches turmeric powder and ½ teaspoon salt.
27. Combine every part with a spoon.
28. Now, add 8 to 9 tablespoons water in elements.
29. Utilizing a wired whisk, make a clean and barely skinny batter with out lumps.
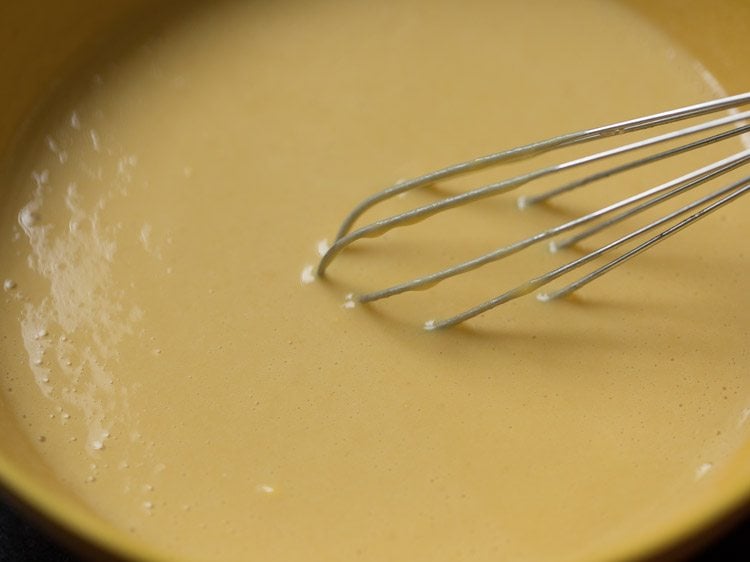
30. The batter consistency is barely skinny. The quantity of water to be added will depend on the standard of gram flour. So, add accordingly.
Fry Boondi
31. Warmth oil for frying in a kadai or pan. When the oil turns into sizzling, then faucet the wired whisk or the deal with of a spoon which has a little bit of batter in to the recent oil.
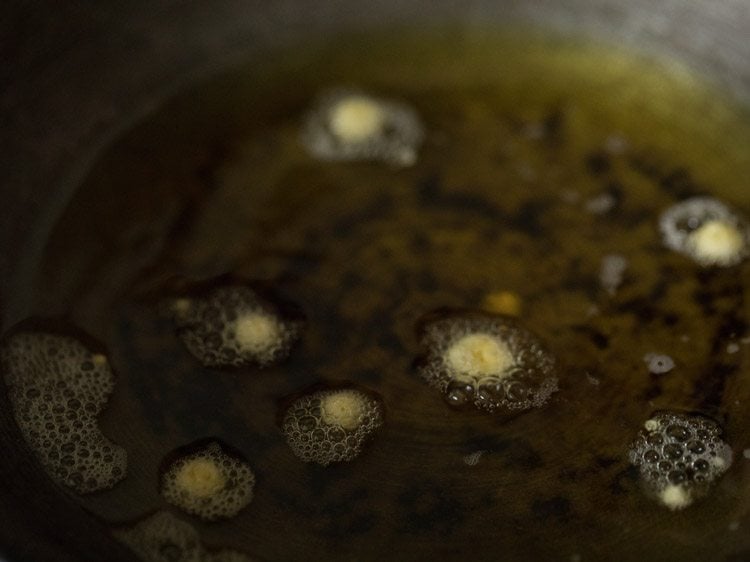
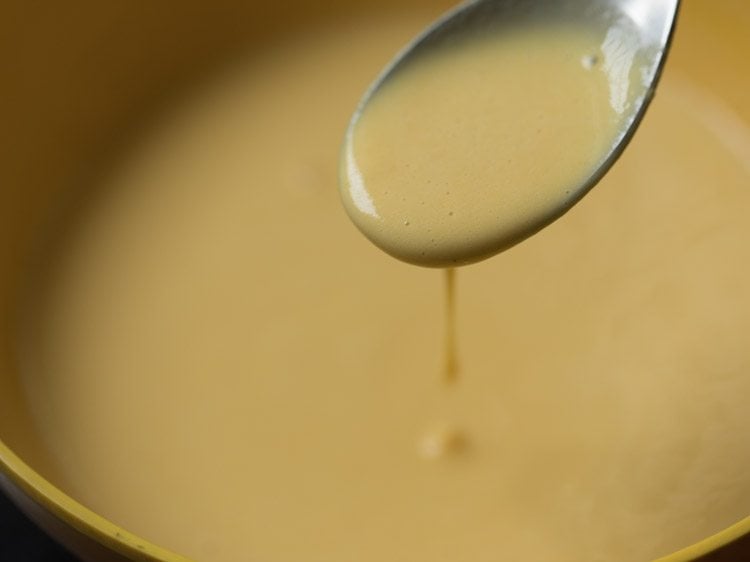
32. The boondi ought to have a spherical form. After they turn out to be flat, then the batter is skinny. In the event that they get tail ends, then the batter is thick.
Tip: In case the batter is skinny, then add 1 to 2 teaspoons gram flour and examine by frying just a few boondi.
Tip: If the batter is thick, then add just a few teaspoons water after which do the identical take a look at. When you get the right consistency, proceed with the following step of frying the boondi.
33. Now, take a dry perforated ladle (jhara) and place it above the recent oil. Don’t maintain at an excessive amount of top, because the batter droplets, when falling from a top, don’t give a spherical form.
With a spoon, add some batter on the perforated ladle. Unfold the batter frivolously with a spoon. End up the batter on the perforated ladle this fashion.
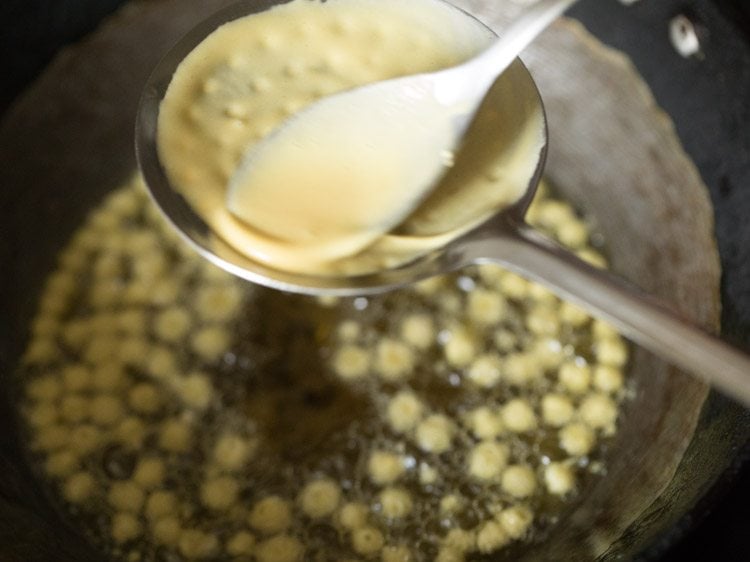
34. On medium warmth, start to fry the boondi. Don’t flip them. Allow them to turn out to be barely crisp after which solely flip them over.
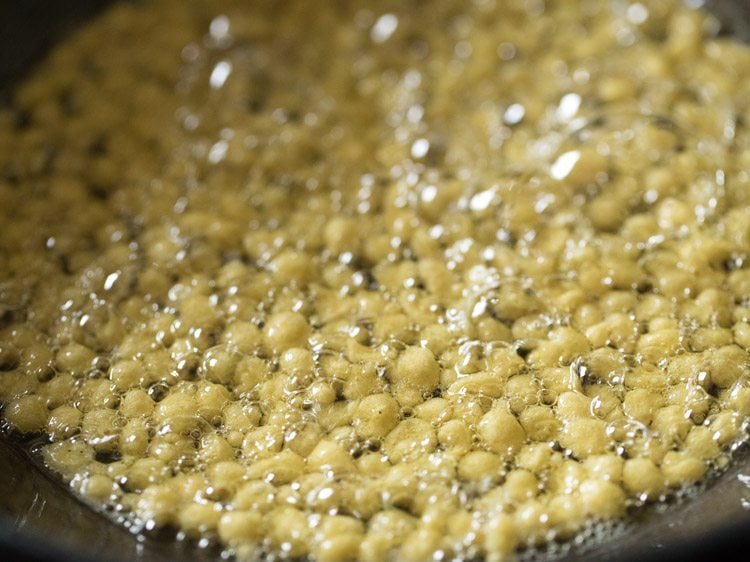
35. When the boondi has turn out to be crisp, flip with a slotted spoon. You gained’t get excellent spherical form for every boondi, nevertheless it doesn’t matter because the style of home made boondi is best than retailer purchased ones.
36. After the oil stops scorching, proceed to fry the boondi for some extra seconds in order that they turn out to be crisp
37. Take away with a strainer spoon or a slotted spoon draining the additional oil.

38. Place the fried boondi on kitchen paper towels.
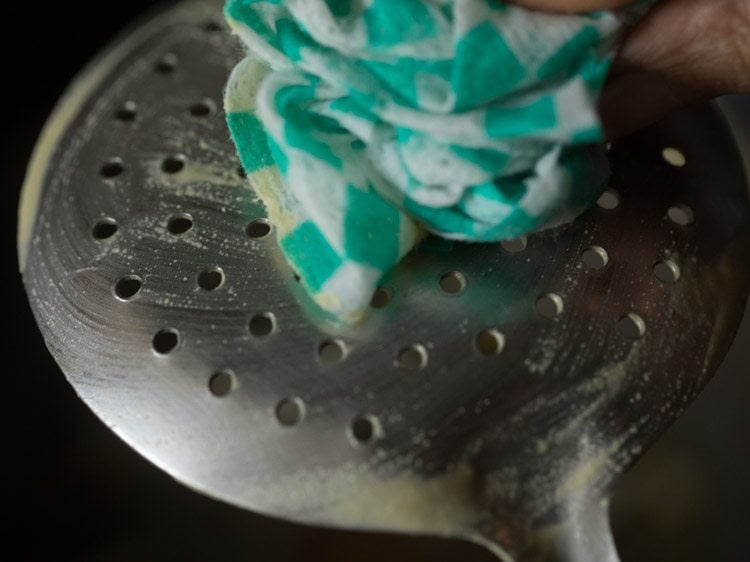
39. After every batch, wipe the perforated ladle with a clear piece of skinny moist cotton kitchen towel from either side. Proceed to fry boondi this fashion. As soon as the boondi cools at room temperature, retailer in an air-tight jar or container.
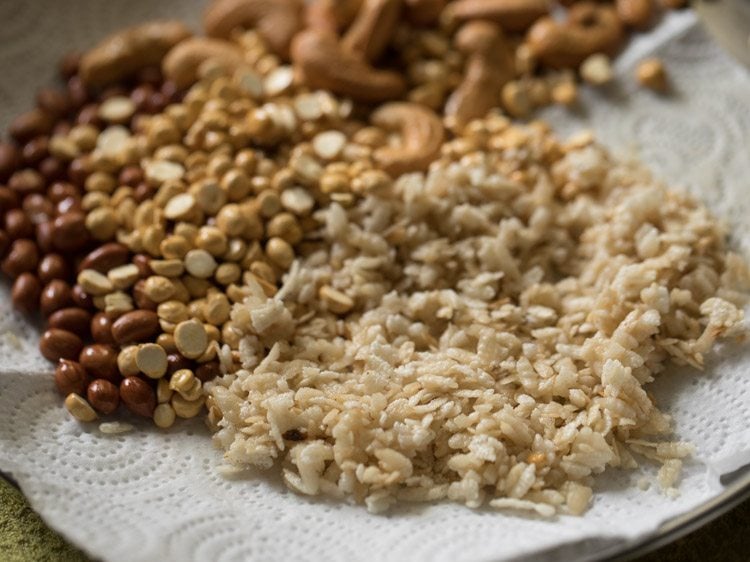
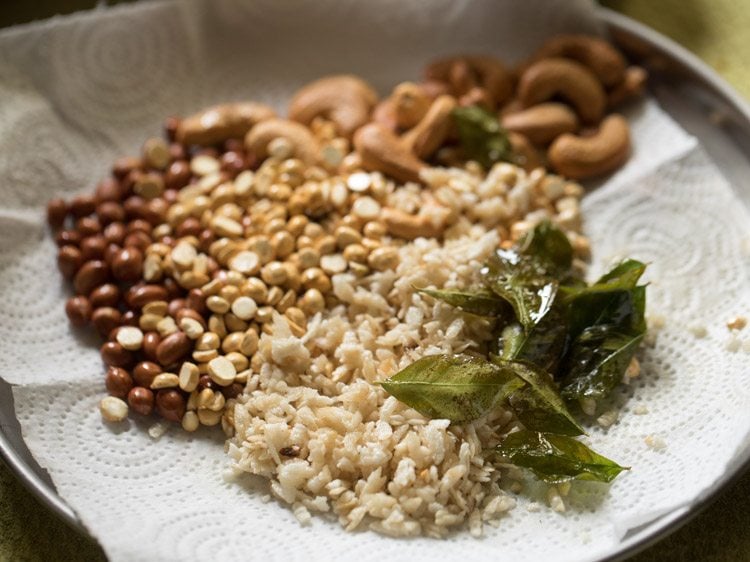
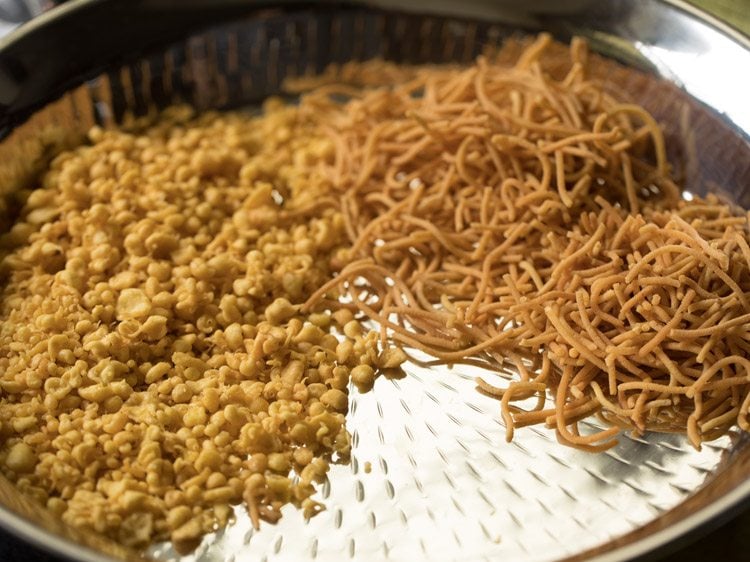
40. Whereas the boondi is getting fried, you may maintain every part prepared for the following step. Take 2 cups omapodi and a pair of cups boondi.
The remainder of the omapodi you may function snack. The remaining boondi can be utilized for making different boondi-based dishes.
Fry Extra Components for Madras Combination
41. Use a high-quality sieve ladle as proven within the image under for frying. In Indian markets, we get these sieve with a deal with.
This sieve ladle may be very useful for frying components which have small items or flakes. As you don’t waste time and vitality looking for out the rice flakes or the chana dal within the oil.
Warmth some oil for deep frying in a pan or kadai. You can too use the identical oil wherein you fried the boondi. Hold the warmth to medium.
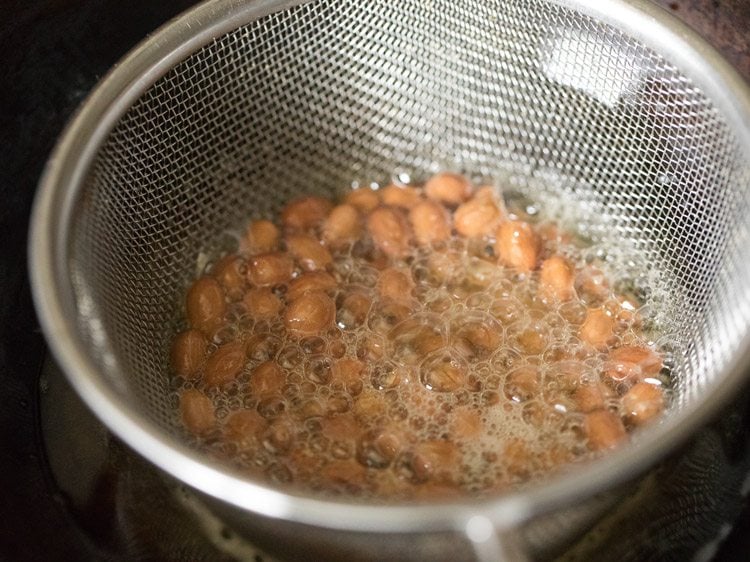
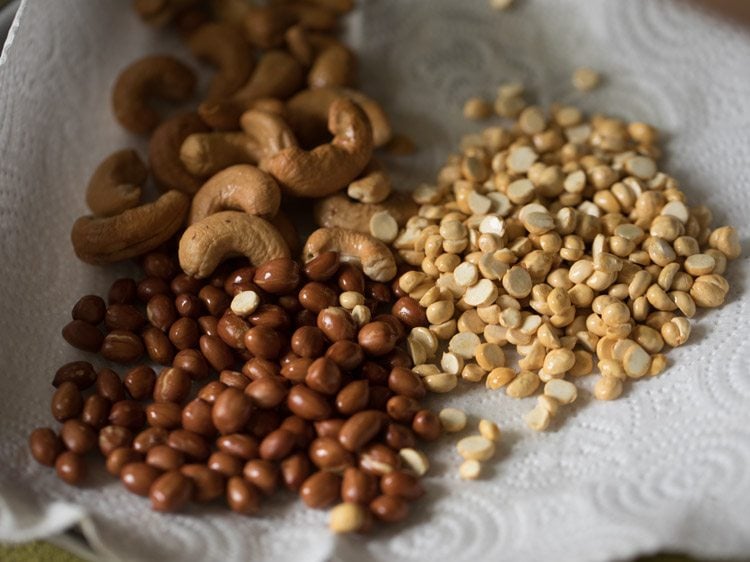
42. Take ¼ cup peanuts first within the sieve. Immerse within the oil and start to fry on medium warmth.
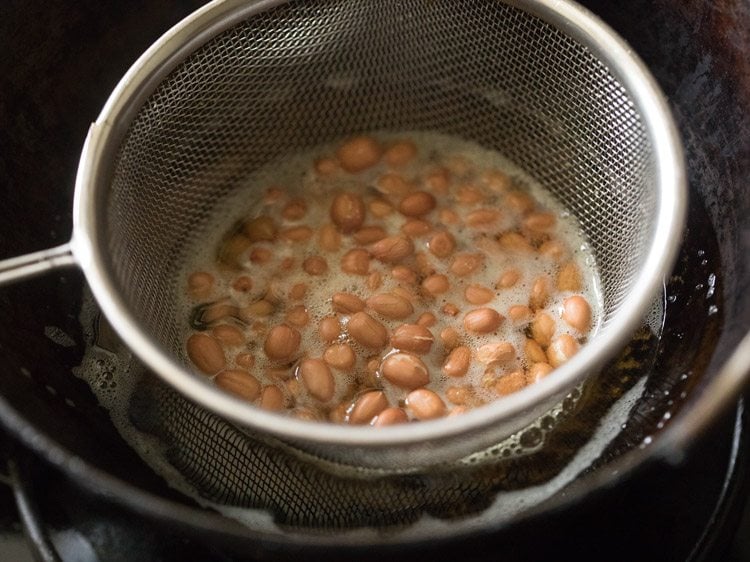
43. With a spoon, stir typically whereas frying in order that the peanuts are fried evenly.
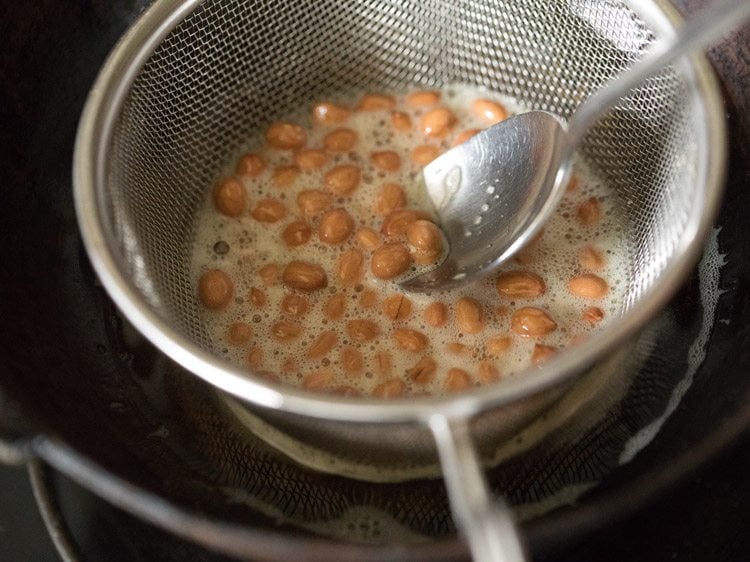
44. Fry peanuts until they’re crisp and crunchy.
45. Utilizing the identical sieve, drain the additional oil. So this ladle is useful for frying in addition to for eliminating additional oil after frying.
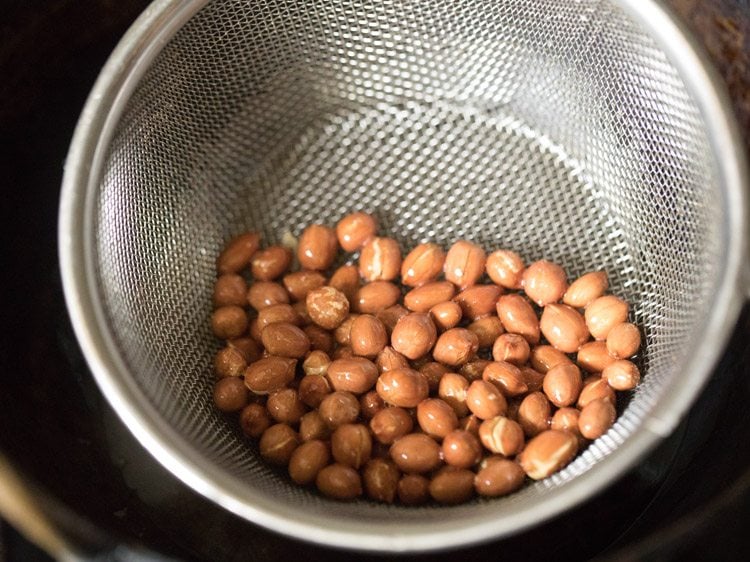
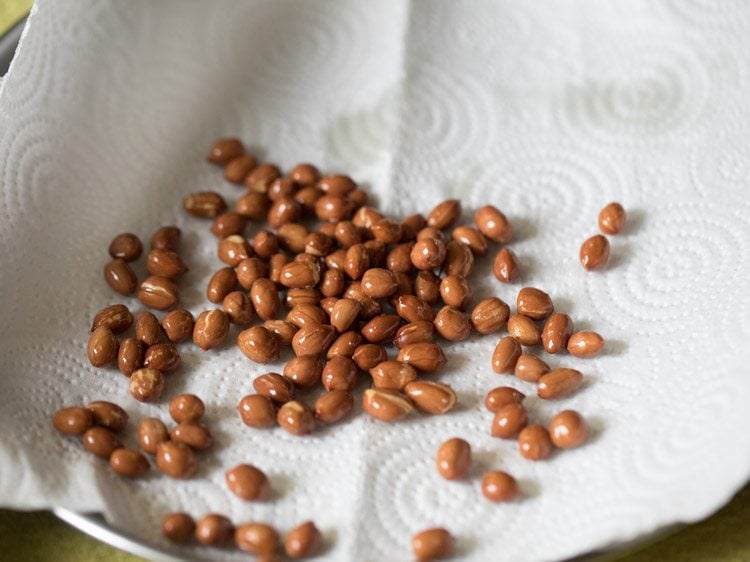
46. Place the fried peanuts on kitchen paper towel.
47. Then, take 25 cashews in the identical ladle.
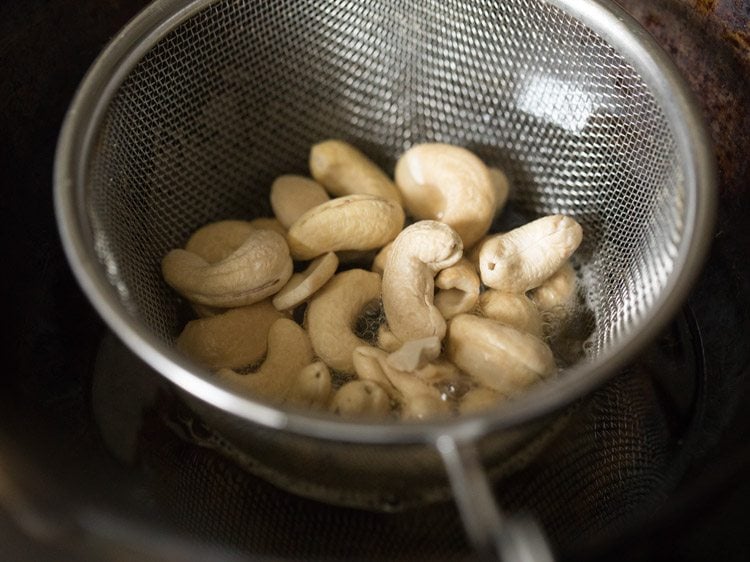
48. Stirring typically with a spoon, fry cashews until golden.
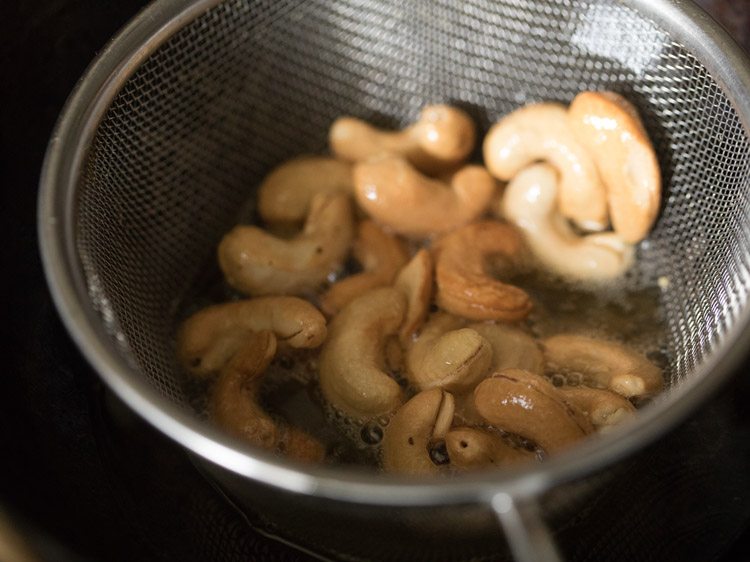
49. Place the fried cashews on the identical kitchen paper towel.

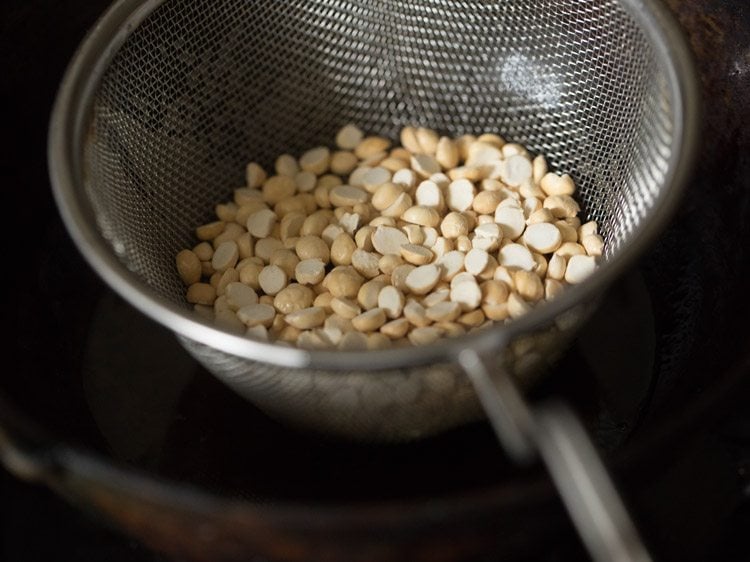
50. Subsequent, take ¼ cup roasted Bengal gram (chana dal).
51. Stirring typically with a spoon, fry roasted chana dal until crisp.
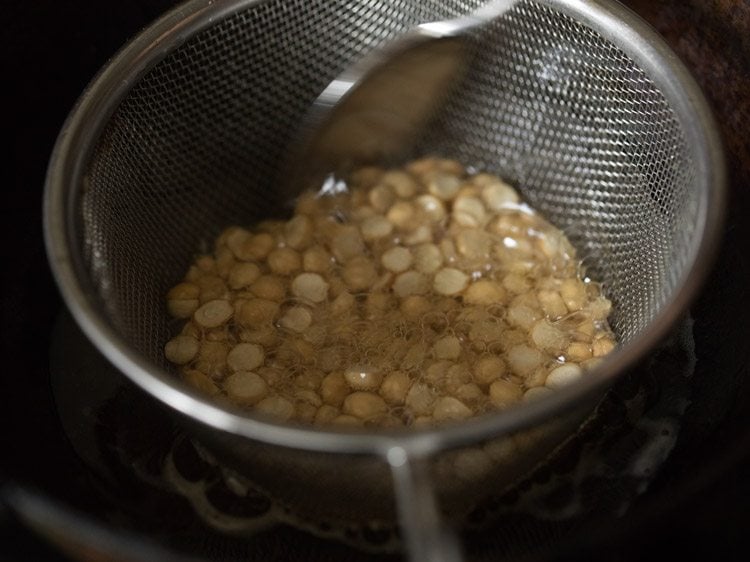
52. Frying chana dal will take some seconds and their shade will change.
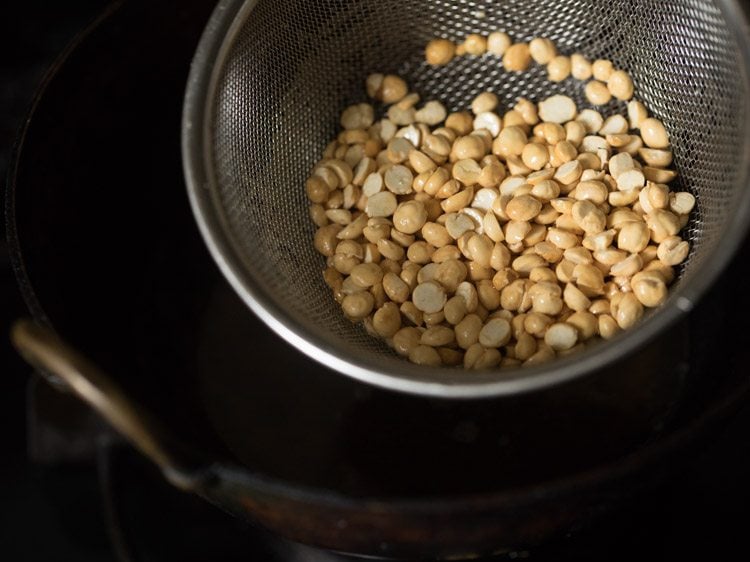
53. Place the fried chana dal on the identical kitchen paper towel.
54. Now, take ¼ cup thick flattened/parched rice (poha). I’ve used thick poha. You can too use skinny poha.
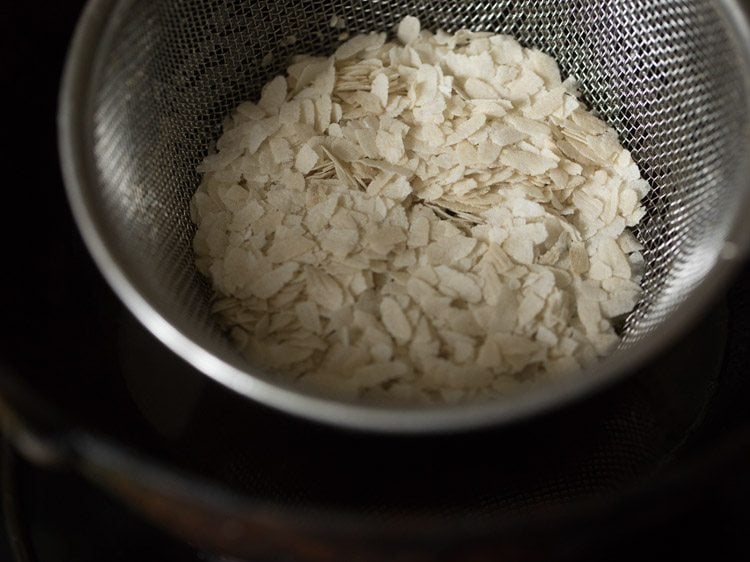
55. Stirring typically with a spoon, fry the poha until crisp and pale golden. Don’t brown the poha.
You’ll be able to add extra poha in order for you. You can too add extra of peanuts, roasted chana dal or cashews, should you like.

56. As soon as the poha is fried properly, drain off the additional oil utilizing the identical ladle.
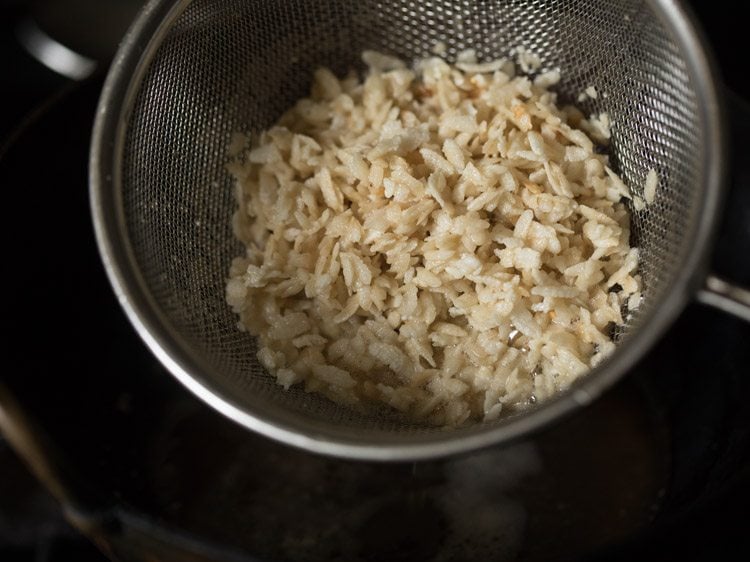
57. Place the fried poha on the identical kitchen paper towel.
58. Subsequent, add 12 to fifteen curry leaves.
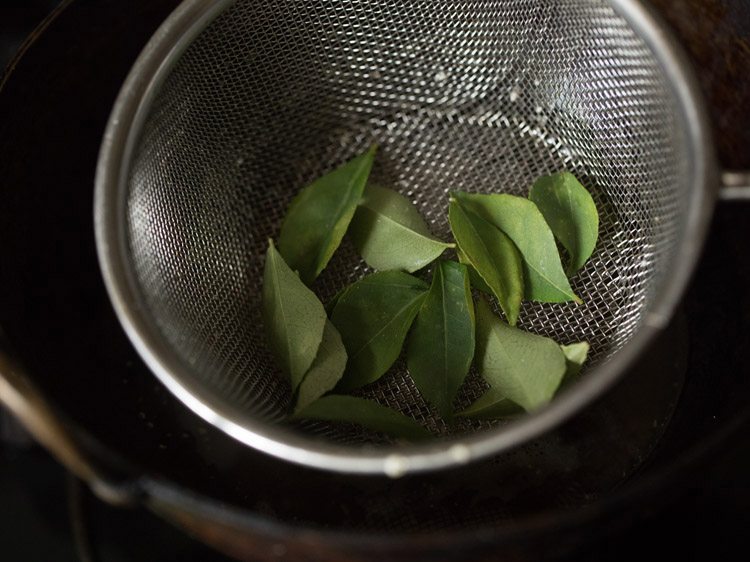
59. Stirring typically, fry curry leaves until crisp.
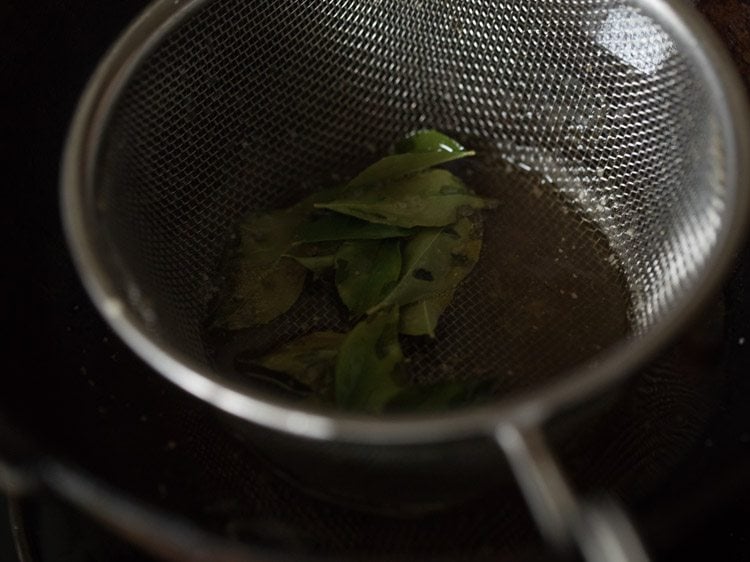
60. Curry leaves take just a few seconds to fry.
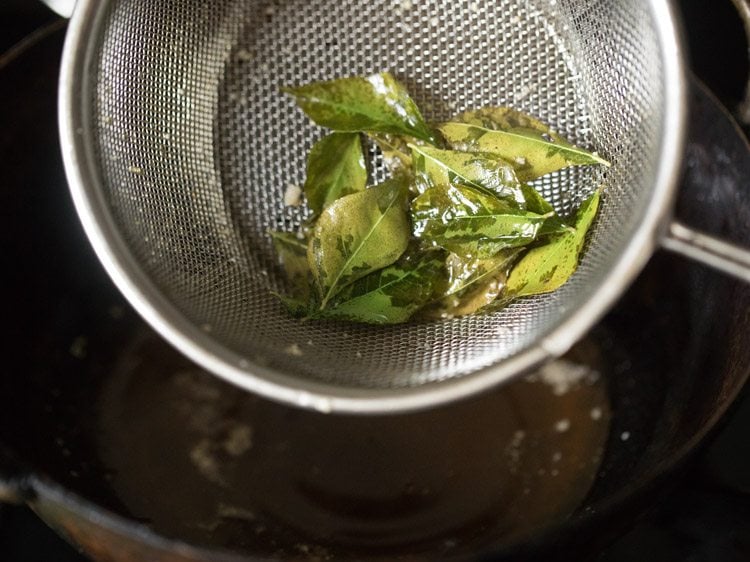
61. Place the fried curry leaves on the identical kitchen paper towel.
Make South Indian Combination
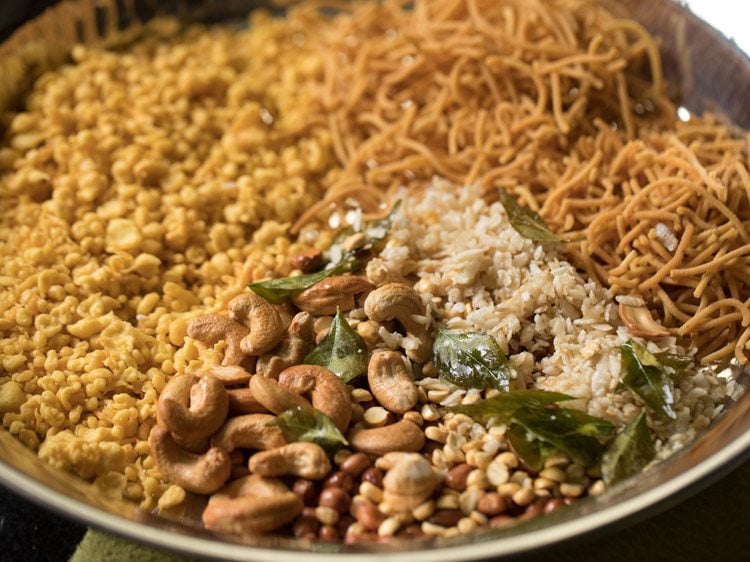
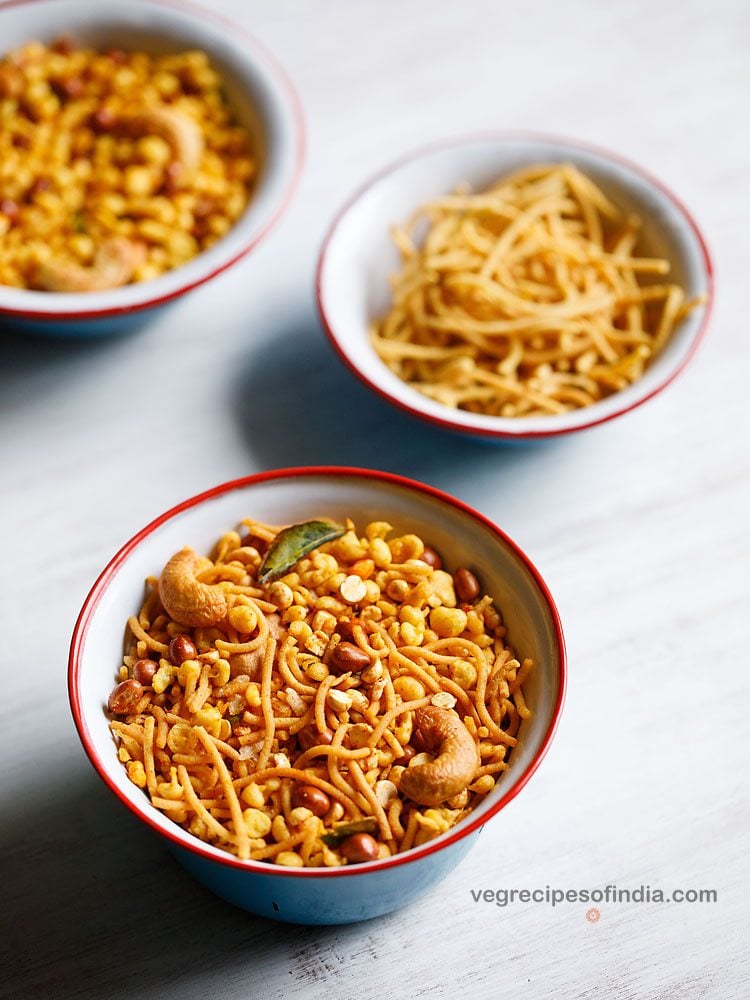
62. In a big bowl, tray or plate, take 2 cups omapodi and a pair of cups boondi. Break omapodi earlier than you start to combine.
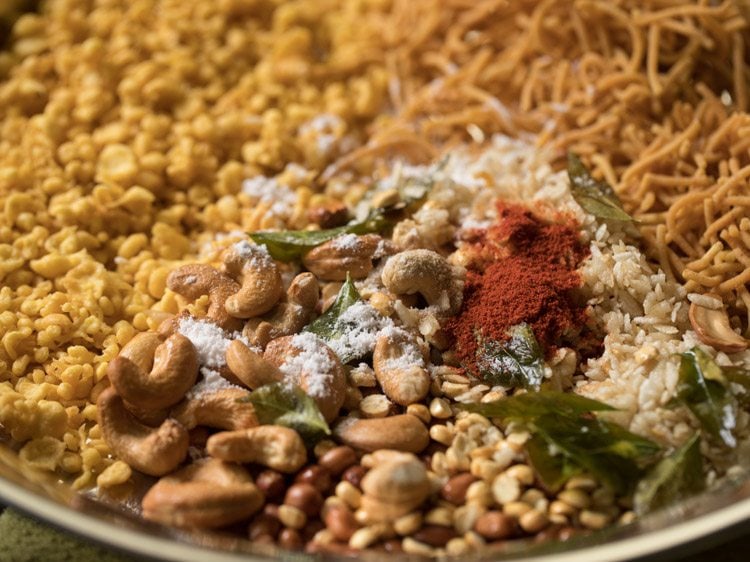
63. Add the fried cashews, poha, chana dal and curry leaves.
63. Add ½ teaspoon pink chili powder, ⅛ teaspoon (2 pinches) asafoetida (hing) and salt as per style over the fried chana dal, poha, nuts and curry leaves, as these shall be nonetheless sizzling. You can too add some powdered sugar for a slight candy style.
64. Combine properly with a spoon first after which later you may combine along with your fingers.
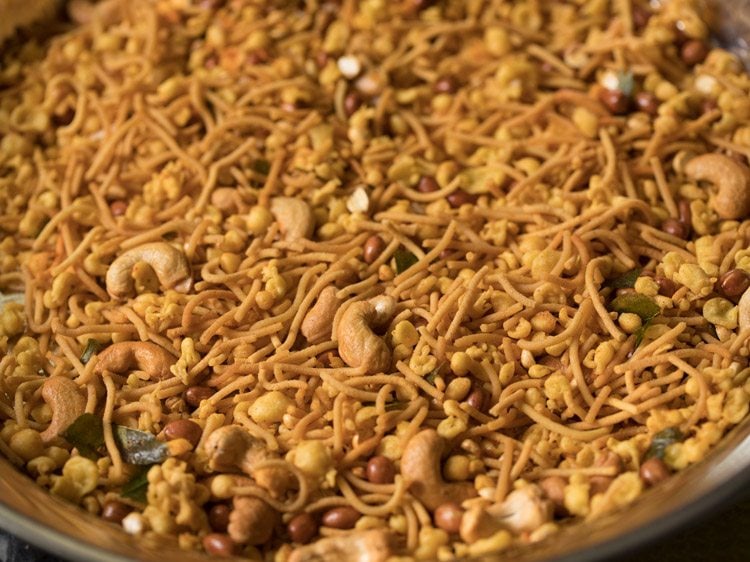
65. Then, place the Madras Combination in an air-tight jar or container. Retailer at room temperature.
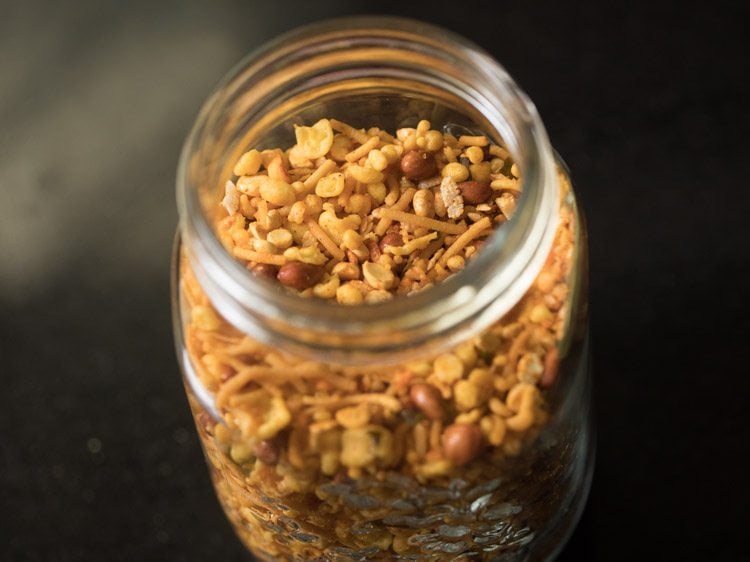
66. Serve South Indian Combination as a Diwali or tea time snack.
Professional Suggestions
- As a substitute of grinding the carom seeds for the omapodi, you may even crush in a mortar-pestle. If doing so, be certain to sift the ajwain powder utilizing a tea strainer. This can forestall the dough from breaking when it’s pressed via the sev maker.
- Within the omapodi, the turmeric powder might be skipped. To make it spicier, add extra pink chili powder. to make it crispier, add a pinch of baking soda.
- Amount of water to knead the omapodi dough will rely upon the standard of gram flour and rice flour. In case your dough turns into sticky, add extra gram flour and knead. If dry, add extra water and knead once more. The ultimate consistency of the dough needs to be clean.
- The consistency of boondi batter needs to be barely skinny. Relying on the standard of gram flour, regulate the amount of water.
- Whereas frying the batter into boondi utilizing a perforated spoon/ladle, be certain to not maintain at an excessive amount of top. As this fashion, the batter droplets won’t have a spherical form.
- It’s higher to make use of a high-quality sieve ladle, simply out there out there or on-line, for frying the components. Utilizing this lets you not waste time and vitality to find out smaller items or flakes within the oil.
- You need to use both use thick poha or skinny poha for this recipe. You’ll be able to even enhance the amount of poha together with extra peanuts, cashews and chana dal.
- Some powdered sugar might be added to the fried components whereas mixing. That is, should you like a barely candy style in your Madras Combination.
Extra Diwali Snacks Recipes To Strive!
Please you should definitely charge this recipe within the recipe card under in case you have made it. For extra vegetarian inspirations, Sign Up for my emails or comply with me on Instagram, Youtube, Facebook, Pinterest or Twitter.
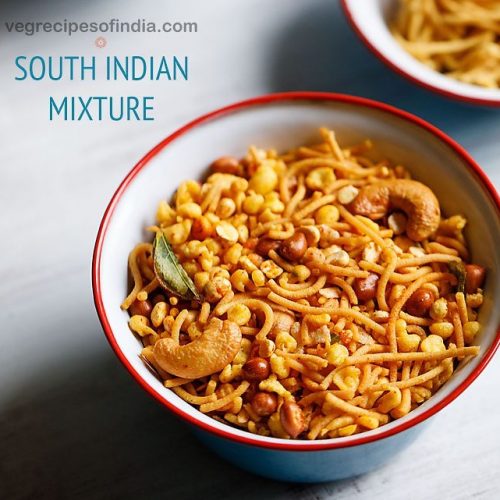
Combination Recipe | Madras Combination
One of many common South Indian snacks made throughout Diwali is that this Madras Combination Recipe which is mainly a mixture of varied edible components, nuts and dry fruits. It’s also referred to as as Omapodi Combination.
Prep Time 15 minutes
Cook dinner Time 1 hr
Whole Time 1 hr 15 minutes
Stop your display from going darkish whereas making the recipe
Getting ready omapodi dough
Warmth a small pan and maintain flame to a low. Add 1 teaspoon ajwain (carom seeds).
Stirring typically roast ajwain for some seconds until they’re fragrant. No must brown them. Allow them to settle down.
Then add them in a small dry grinder jar or a spice grinder.
- Grind to a high-quality powder. Hold apart. You’ll be able to even crush ajwain in a mortar-pestle. On this case, when including ajwain, use a tea strainer and sift the ajwain powder via it. That is executed in order that when urgent via the sev maker, the dough strands don’t break.
In a mixing bowl or pan take 1 cup besan (gram flour) and ½ cup rice flour.
Add the bottom ajwain powder.
- Then add 1 beneficiant pinch asafoetida (hing), 2 pinches turmeric powder, ¼ teaspoon pink chilli powder and 1 teaspoon salt. You’ll be able to add salt as per style. Turmeric powder might be skipped. For a spicy omapodi, you may enhance the quantity of pink chilli powder. For extra crispiness you may add a pinch of baking soda additionally.
Combine very properly with a spoon or spatula.
Now warmth 1 tablespoon oil in a metal bowl or a metal measuring cup.
When the oil turns into sizzling, add it to the flour combination. As a substitute of oil you may as well use ghee or butter.
- Now add water in elements. First add 2 to three tablespoons of water. Combine properly and start to knead to a clean dough. Total I used 7 tablespoons of water. You’ll be able to add 6 to 7 tablespoons of water relying on the standard of besan and rice flour.
Knead to a clean dough. If the dough turns into sticky, then you may add some extra besan. If the dough seems dry, then add some extra water and knead once more. Cowl the bowl and put aside.
Use the disc to make sev or omapodi and assemble the sev press or murukku press. You’ll be able to even use the disc with high-quality holes. Additionally warmth a kadai and add oil as required for deep frying omapodi.
Apply some water or oil within the sev/murukku maker. Then take a portion of the omapodi dough and place it contained in the sev maker. Cowl with the highest half and maintain apart.
Frying omapodi
- Let the oil within the kadai turn out to be medium sizzling. Verify the oil temperature by including a small tiny piece of the omapodi dough. If the small piece of dough comes up step by step and steadily on high, the oil is sizzling sufficient to fry. If it comes up too shortly, then oil is simply too sizzling. If it settles down at backside of kadai or comes up very slowly, the oil shouldn’t be sizzling sufficient for frying.
- When the oil is sizzling sufficient, immediately press holding the sev maker on high of the oil and let the sev immediately fall within the oil. Whereas urgent rotate in a concentric circle from the middle to outwards just like making a chakli. Don’t over crowd the kadai with omapodi. Add as a lot as wanted with out overcrowding the kadai. Watch out when urgent the dough within the oil. After the omapodi is pressed within the oil, break the highest strands with a spoon or knife and let the dough strands fall within the oil.
- After including the omapodi, don’t contact them instantly with the slotted spoon as they break. Allow them to get fried first for a minute. They should turn out to be crisp first after which you may flip them over with the slotted spoon.
Gently start to show with a slotted spoon.
Now fry the second facet. You’ll be able to flip over a few occasions for even frying.
- When the oil stops scorching, proceed to fry for some extra seconds until the omapodi are golden and crisp. Flip over as wanted when frying. Don’t break the omapodi whereas frying as then it turns into additional work to take away the small items of omapodi from the oil. So fry all the spherical formed omapodi as one piece and don’t break it.
As soon as executed then take away omapodi with a slotted spoon or a strainer spoon draining off the additional oil.
Place them on kitchen paper towels. Fry the remaining omapodi in the identical means.
When the omapodi are cooled, then place them in an air tight container or field. Break omapodi earlier than including within the combination.
Getting ready boondi batter
Take ½ cup besan (gram flour) and 1 tablespoon rice flour in a mixing bowl.
Then add 1 pinch asafoetida (hing), 1 pinch of baking soda, 2 pinches turmeric powder and ½ teaspoon salt.
Combine every part with a spoon.
Now add 8 to 9 tablespoons water in elements.
Utilizing a wired whisk make a clean and barely skinny batter with out lumps.
The batter consistency is barely skinny. The quantity of water to be added will depend on the standard of gram flour. So add accordingly.
frying boondi
Warmth oil for frying in a kadai or pan. When the oil turns into sizzling, then faucet the wired whisk or the deal with of a spoon which has a little bit of batter in to the recent oil.
- Now take a dry perforated ladle/jhara and place it above the recent oil. Do not maintain an excessive amount of on a top, because the batter droplets, when falling from a top, don’t give a spherical form. With a spoon add some batter on the perforated spoon ladle/jhara. Unfold the batter frivolously with a spoon. End up the batter on the perforated spoon ladle this fashion.
On a medium flame warmth to fry the boondi. Don’t flip them. Allow them to turn out to be barely crisp after which flip them.
When the boondi have turn out to be crisp, flip them with a slotted spoon.
After the oil stops scorching, proceed to fry the boondi for some extra seconds in order that they turn out to be crisp.
Take away with a strainer spoon or a slotted spoon draining the additional oil.
Place the fried salted boondi on kitchen paper towels.
- After every batch, wipe the perforated ladle/jhara with a clear piece of moist skinny cotton kitchen towel from either side. Proceed to fry boondi this fashion. As soon as the boondi cools at room temparature, retailer in an air tight jar or field.
When the boondi are frying you may take away the opposite components and maintain every part prepared for the following step.
Frying nuts
Use a high-quality sieve ladle with a deal with to fry as proven within the stepwise photographs within the submit. Warmth oil on medium warmth.
Take the peanuts first within the sieve. Immerse within the oil and start to fry.
With a spoon stir typically whereas frying in order that the peanuts are fried evenly.
Fry peanuts until they’re crisp and crunchy.
Utilizing the identical seive drain the additional oil. So this ladle is useful for frying in addition to for eliminating additional oil after frying.
Place the fried peanuts on kitchen paper towel.
Then take cashews in the identical ladle.
Stirring typically with a spoon fry cashews until they’re golden.
Place the fried cashews on the identical kitchen paper towel.
Subsequent take roasted chana dal.
Stirring typically with a spoon fry roasted chana dal until they’re crisp.
Frying chana dal will take some seconds and their shade will change.
Place the fried chana dal on the identical kitchen paper towel.
Now take thick poha.
Stirring typically with a spoon fry poha until they’re crisp and pale golden. Do not brown the poha.
As soon as the poha is fried properly, then drain off the additional oil utilizing the identical ladle.
Place the fried poha on the identical kitchen paper towel.
Subsequent add curry leaves. stirring typically fry curry leaves until they turn out to be crisp.
Curry leaves take just a few seconds to fry. Place the fried curry leaves on the kitchen paper towel.
Making Madras Combination
- In a big bowl or tray or plate take 2 cups of the omapodi and a pair of cups of fried boondi. The remaining omapodi you may function a snack. With the remaining boondi, you may make boondi raita. You can too take extra of the omapodi or boondi should you favor.
Add the fried nuts, poha, chana dal, curry leaves.
Add ½ teaspoon pink chilli powder, ⅛ teaspoon asafoetida (hing) and salt over the fried chana dal, poha, nuts and curry leaves as they are going to be nonetheless sizzling.
Combine properly with a spoon first after which later you may combine along with your fingers.
Then place the combination in a jar or container. Retailer at room temperature.
Serve South Indian Combination as a diwali snack or a tea time snack.
- Fry the boondi and omapodi and the remaining components in reasonably sizzling oil.
- Add extra pink chilli powder within the omapodi dough for a spicier omapodi. You would additionally use inexperienced chili paste as a substitute of pink chilli powder.
- Skip asafoetida for a gluten-free variation.
- Be aware that the approximate diet data is for 1 serving.
Vitamin Info
Combination Recipe | Madras Combination
Quantity Per Serving
Energy 452 Energy from Fats 216
% Every day Worth*
Fats 24g37%
Saturated Fats 3g19%
Polyunsaturated Fats 1g
Monounsaturated Fats 1g
Ldl cholesterol 1mg0%
Sodium 841mg37%
Potassium 364mg10%
Carbohydrates 48g16%
Fiber 7g29%
Sugar 4g4%
Protein 13g26%
Vitamin A 180IU4%
Vitamin B1 (Thiamine) 1mg67%
Vitamin B2 (Riboflavin) 1mg59%
Vitamin B3 (Niacin) 29mg145%
Vitamin B6 1mg50%
Vitamin C 48mg58%
Vitamin E 6mg40%
Vitamin Okay 3µg3%
Calcium 36mg4%
Vitamin B9 (Folate) 294µg74%
Iron 9mg50%
Magnesium 43mg11%
Phosphorus 97mg10%
Zinc 1mg7%
* % Every day Values are based mostly on a 2000 calorie eating regimen.
This Combination Recipe from the archives first revealed in October 2017 has been up to date and republished on 21 October 2022.
Source link


