
Whether or not you name this on a regular basis staple Indian bread, Roti or Phulka or Chapati, one factor stays unchanged: it’s a humble, comforting and satisfying meals that’s made in almost each a part of India. Roti is an unleavened flatbread made with only a handful of substances – finely milled entire wheat flour, water and optionally ghee or oil and salt. It goes completely with nearly each Indian entrée you possibly can consider. I share 3 methods of creating roti.
What’s Roti
The flatbread referred to as roti has many variations throughout totally different areas of India. Whereas I name this explicit kind of roti, phulka, hubby simply refers to them as roti. Toe-may-toe, toe-mah-toe, phulka or roti. Both manner is appropriate!
That stated, very similar to the phrase “bread” can imply all the things from a slice of sandwich bread to a French baguette, roti can also be a broad class of flatbreads. Whereas all phulkas are rotis, not all rotis are phulkas.
So far as the dough is worried the identical dough is used to make roti, phulka and chapati. This fundamental merely consists of entire wheat flour, salt and water. Fat like oil or ghee are optionally included. I choose so as to add some oil or ghee within the dough because it makes these flatbreads comfortable.
Different kinds of roti varieties embody Missi Roti, Rumali Roti, Ragi Roti, and Tandoori Roti, amongst others. All these roti variants style totally different as they’re made with totally different grain flours (like millet); or have varied distinctive seasonings; mashed or chopped greens like spinach; or herbs added to the dough.
What’s Chapati
A chapati is a really rustic model of roti. The phrase “chapati” is derived from a Hindi and Marathi phrase “chapat” which suggests “flat” or “slap”. As an alternative of rolling out the dough, historically chapatis had been flattened by hand by slapping parts of the wheat dough.
In fact, it’s time consuming to flatten the chapati this fashion, so these days a rolling pin is usually used. A chapati will be additionally skinny or medium rolled, very similar to phulka. Whereas a phulka is smaller in measurement, a chapati is bigger in measurement.
Chapati are solely roasted on the skillet or tawa. Whereas roasting they could puff or not. Roasting them with oil or ghee can also be non-obligatory. Once more after being roasted, it’s non-obligatory to brush them with fat like ghee or oil.
For roasting chapati, it’s best to make use of a tawa or skillet manufactured from forged iron or iron as these retain warmth. Most Indian properties use an iron or a forged iron tawa for making chapati.
What’s Phulka
Phulka is a Hindi phrase, which suggests to puff. These roti will get overvalued when uncovered to dry warmth, therefore the identify. This puffing up will be achieved both on a direct flame or on a tava, which is a concave flat pan for making roti.
Largely, to make phulka, first the roti is partially cooked on the skillet after which positioned over a stove-top flame which helps it to puff.
They’ve a spectrum of thickness that’s thought-about acceptable, from the very skinny phulkas of Gujarat (referred to as rotli) to a extra medium-thickness roti as I make right here.
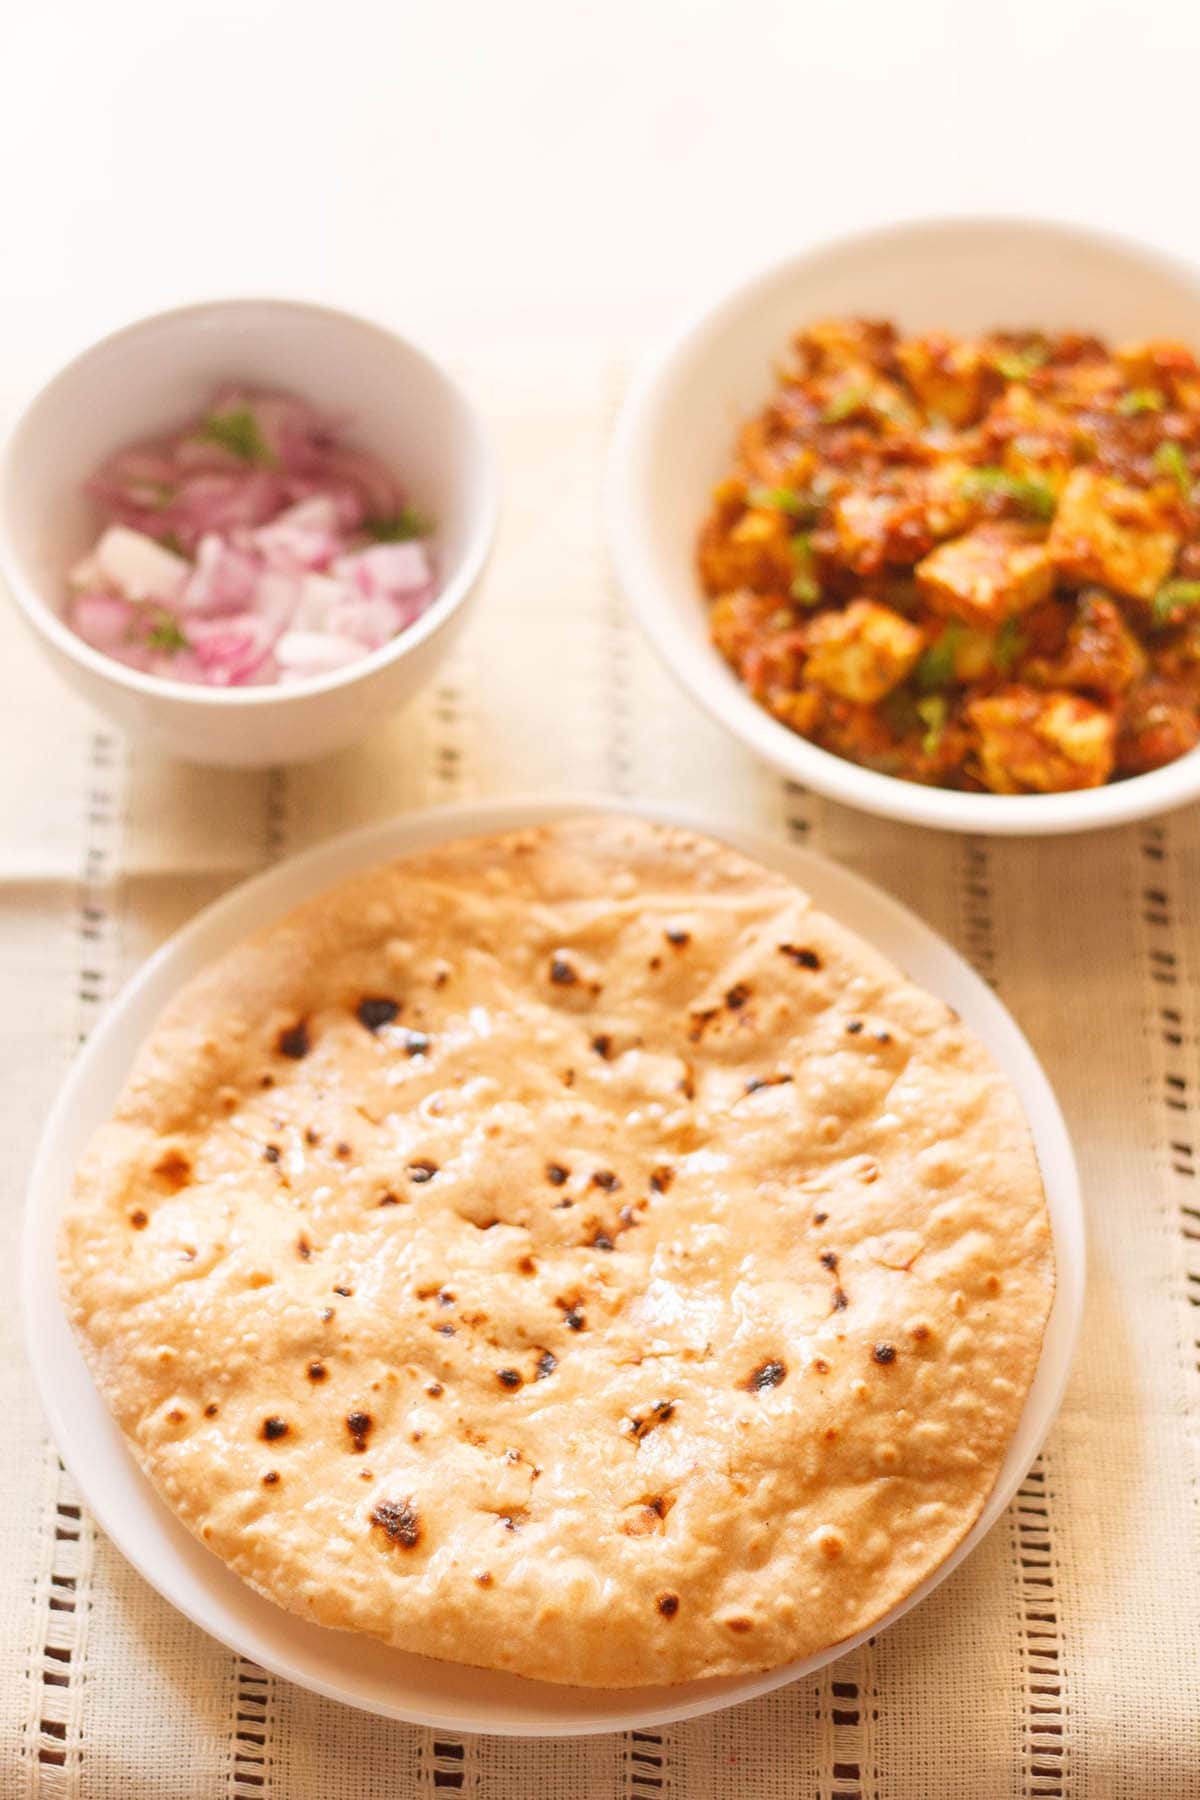
The phulka will be smeared with ghee or oil for serving. In my house, we positively take pleasure in a little bit of ghee on our roti. It’s one in every of our favourite issues to eat with veggie dishes like aloo gobi, aloo matar, bhindi masala, lauki kofta or with dals like dal fry, dal tadka, or dal makhani.
Distinction Between Chapati and Phulka
Chapati can also be made on a tava and might puff or partly puff. In contrast to the dry warmth used to make phulka, oil could also be used whereas roasting the chapatis on the tava. Additionally not like phulkas, the chapati by no means will get roasted on an open flame, cooking during on a tava.
Chapati is normally bigger in measurement than a phulka which is smaller in measurement. There may be additionally a model of chapati made in Maharashtra referred to as ‘poli,’ the place the rolled dough is layered with oil/ghee and folded thrice earlier than rolling once more. This strategy of lamination is much like the way in which we make parathas in Northern India.
Distinction Between Roti and Paratha
Paratha are additionally flatbreads however they’re layered with ghee, folded and rolled. This layering and folding technique of laminating the dough, offers the paratha a comfortable texture from inside with a nicely toasted crispy and flaky crust from exterior. A Roti is solely rolled as soon as and never layered. That is the important thing distinction between roti and paratha.
Paratha is made plain easy or filled with vegetable stuffings. The greens are mashed or finely chopped or grated. The stuffing will be combined with the dough or layered as a single filling contained in the dough. There are various variants of paratha which might be made within the Indian delicacies.
What Form Of Wheat Flour For Roti
These flatbreads are at all times produced from entire wheat flour and water, although ghee and salt could or will not be added. I choose including some salt and ghee to the dough for a bit of additional taste and a extra tender outcome.
The entire wheat flour used for making these flatbreads is called “atta” in India. Even at this time, many Indians make their very own atta by visiting native grinding mills (referred to as chakki in Hindi). The wheat grains are stone floor making for a very positive flour.
In the event you do use the wheat flour milled in the USA or Europe or another nation, then sift the flour a couple of times to eliminate the bran. Atta is finely milled and floor than the wheat flour that’s obtainable exterior India.
The perfect, softly textured roti comes from the Sharbati wheat that’s cultivated and grown within the Madhya Pradesh state. I exploit this Sharbati atta to make roti, and whether it is attainable so that you can get your palms on some, I extremely suggest it.
Residing exterior India? Purchase atta from an Indian grocery retailer or from Amazon or different Indian on-line shops. Ideally use sharbati atta to get comfortable and tender roti and in addition attempt to get natural atta.
Because the rotis are produced from entire wheat flour, they’re each wholesome and simple to digest. On this put up, I’ll clarify the essential technique of creating roti or phulka in 3 methods so you possibly can have this yummy Indian staple at house. Let’s get began!
Step-by-Step Information
Knead Roti Dough
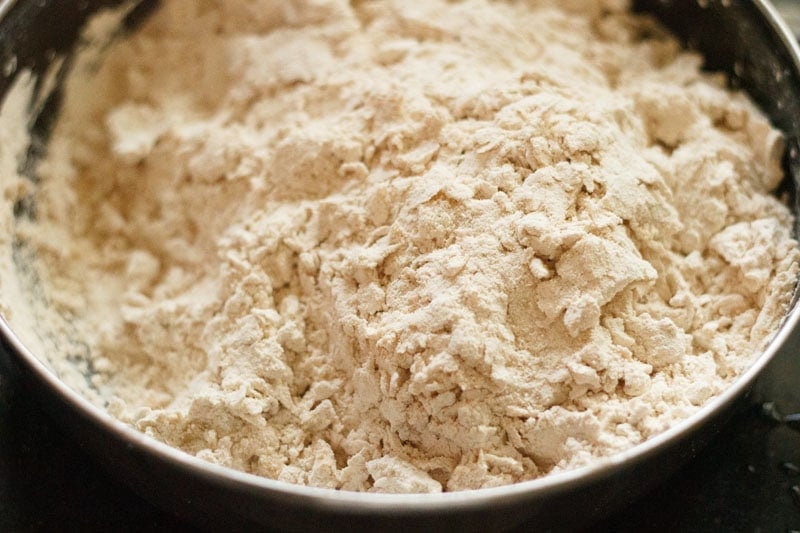
1. Take 3 cups of entire wheat flour (atta) in a bowl. Add about 1 teaspoon of salt or in keeping with style. Add a little bit of water and 1 to 2 tablespoons ghee or oil and begin mixing.
For the oil you should utilize sunflower oil, avocado oil, grapeseed oil, rice bran oil and in addition peanut oil.
You may measure and preserve about 1 to 1.25 cups of water that you may be needing relying upon the standard of the flour.
3 cups of flour is perhaps tough to deal with and work upon. So you possibly can cut back the amount of flour if wanted.
Word:
1. In case your entire wheat flour has quite a lot of bran then sieve it.
2. I’m displaying the method of kneading the dough with palms. However be at liberty to knead the roti dough in a stand mixer.
2. Including water to the dough in elements, start to knead the dough.
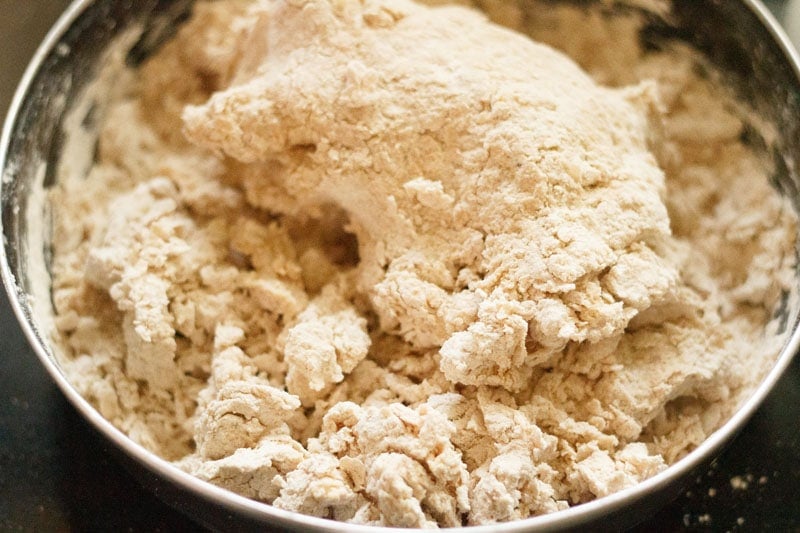
3. Proceed to knead the dough. Hold including water as required, knocking the dough down as you knead to create extra gluten.
TIP: In the event you add all of the water without delay, then the flour will change into too sticky to deal with. So add in elements as wanted.
On the last stage of kneading the dough, some individuals choose to throw the dough from a peak of roughly 1 to 2 toes to the bowl whereas kneading. This helps in making the dough comfortable. I personally choose to use strain from my fist reasonably than utilizing the throwing technique. Within the pic beneath you possibly can see the hand posture which is used to knead the dough.
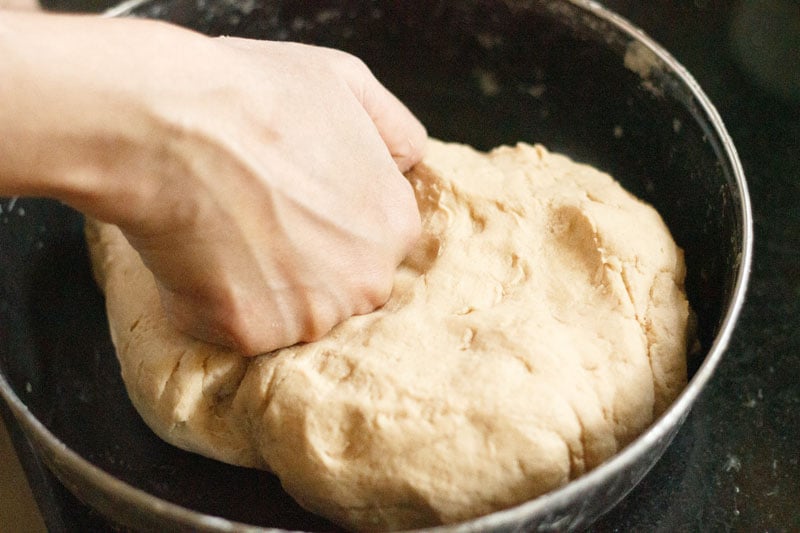
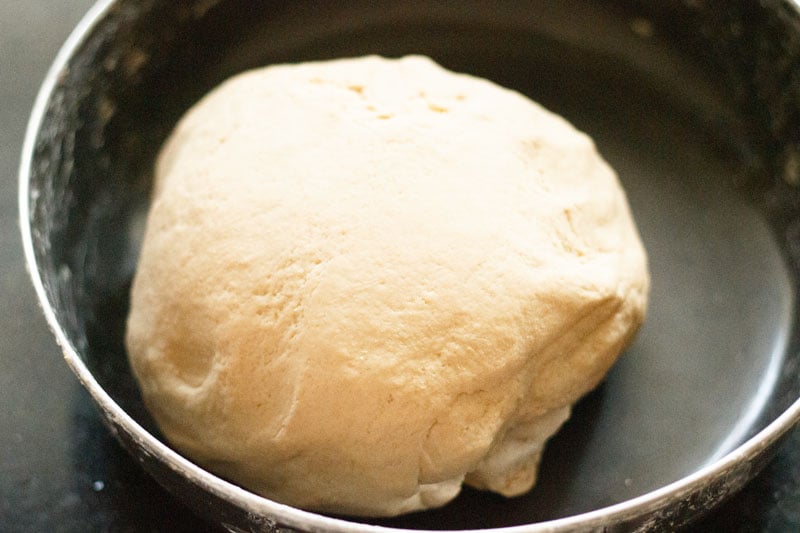
4. Carry on kneading until the dough turns into pliable and comfortable. The ultimate dough consistency ought to be neither sticky nor arduous. The dough for rotis is extra softer than the dough kneaded for Poori (Indian Fried Bread).
After kneading the dough, cowl it with a plate or material and permit it to relaxation for 20 to half-hour. When you can make the roti right away after kneading the dough, this 30 minute ready interval helps the gluten loosen up, which makes it simpler to roll out.
NOTE: You may as well use a stand mixer or roti maker home equipment to knead the dough in case you choose.
Step-by-Step Information
Roll Roti Dough
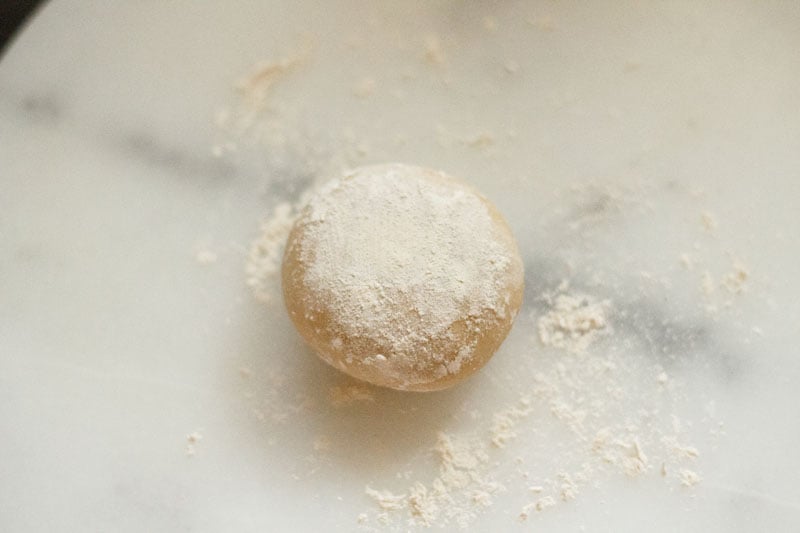
5. Now make small to medium balls of the dough. Roll the balls within the palms of your palms to smoothen it. Flatten the ball and place them on a rolling board or a clear kitchen countertop.
Sprinkle some entire wheat flour on the dough ball. Alternatively, you may also mud the rolling board with flour.
7. Activate the fuel range and put the tawa to make it sizzling. The tawa must be sufficiently sizzling to make comfortable roti. I typically make rotis on a medium-high flame.
NOTE: On “sim” or low flame, the roti change into arduous; and on a really excessive flame they cook dinner too quick. So regulate the temperature whereas making the roti.
So how do you discover out if the tawa is sizzling sufficient to make roti? We sprinkle little entire wheat flour in tawa or griddle. If it darkens shortly then the tawa is able to make roti.
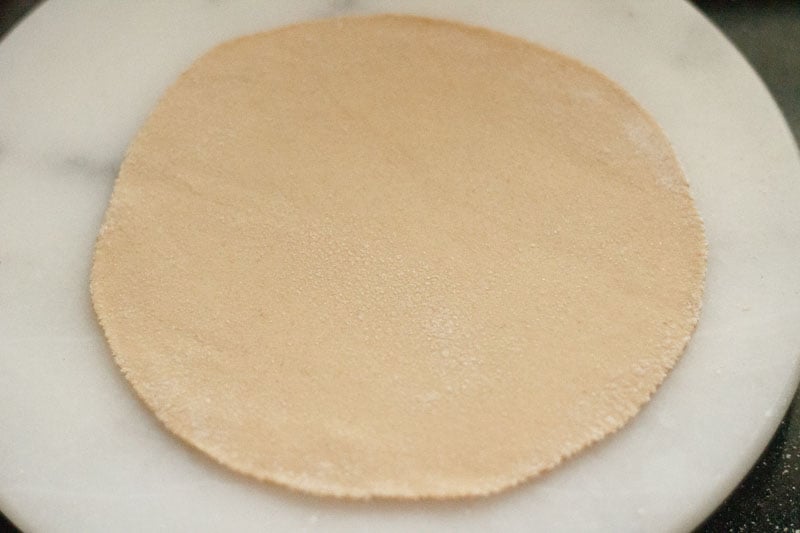
8. Whereas tawa is getting sizzling, begin rolling the dough ball right into a flat spherical circle.
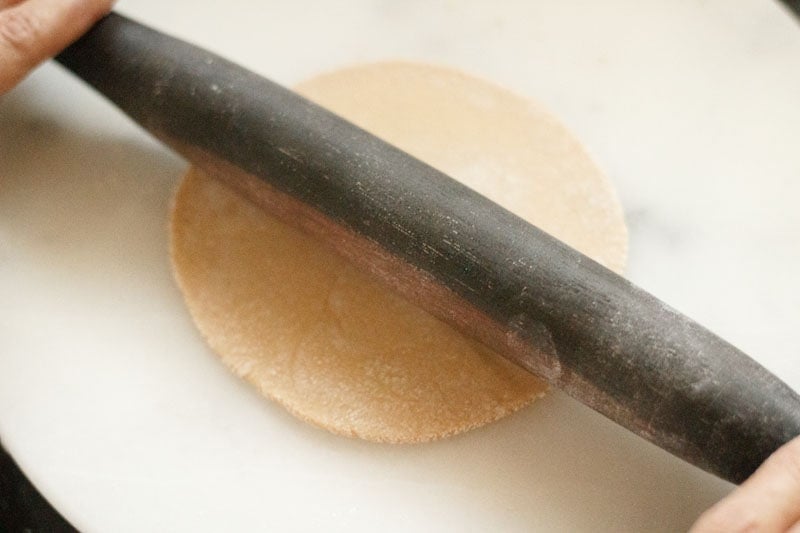
9. Carry on rolling until you get a fair circle as proven within the image beneath. Making the roti spherical shouldn’t be simple! With observe, it is possible for you to to roll them spherical, but when they’re a little bit misshapen at first, they are going to nonetheless style good. Sprinkle some wheat flour if the dough begins to stretch or change into sticky whereas rolling.
The trick to rolling spherical roti is that if you find yourself rolling the dough then the roti must also be transferring in a round path.
Additionally ensure that the rotis should not too thick, as they are going to take an excessive amount of time to cook dinner and won’t puff up as they need to
NOTE: Whereas rolling the dough, don’t coat it with an excessive amount of of the dry wheat flour. The flour ought to be calmly used and simply sufficient that will help you with the rolling. An excessive amount of flour on the rolled roti dough will make for a denser texture. The dry flour particles additionally burn whereas roasting and keep on with the outer floor of the roti.
Step-by-Step Information
Learn how to make Phulka
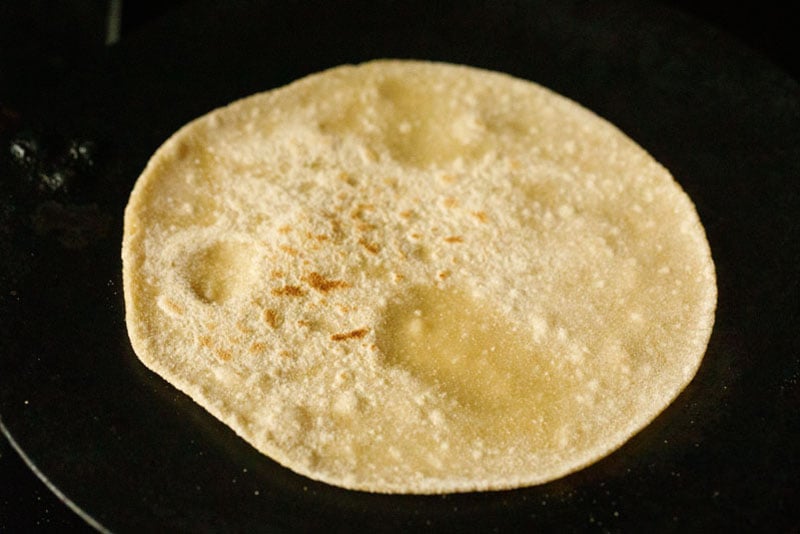
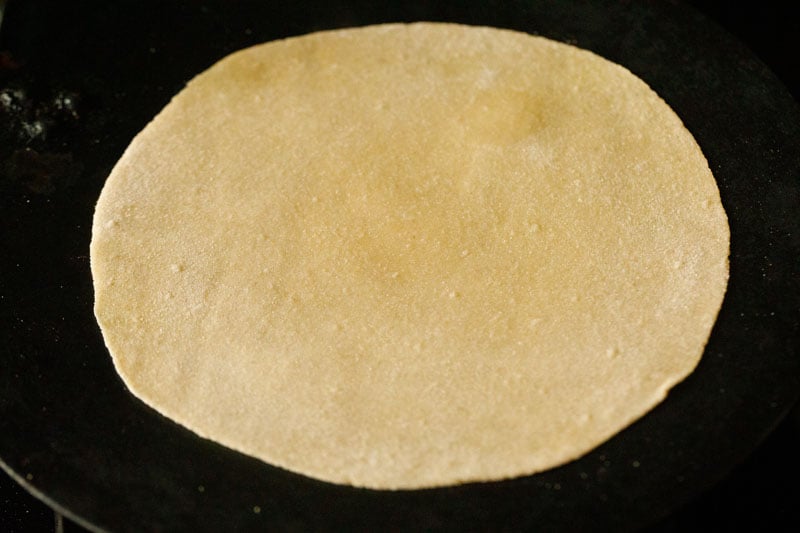
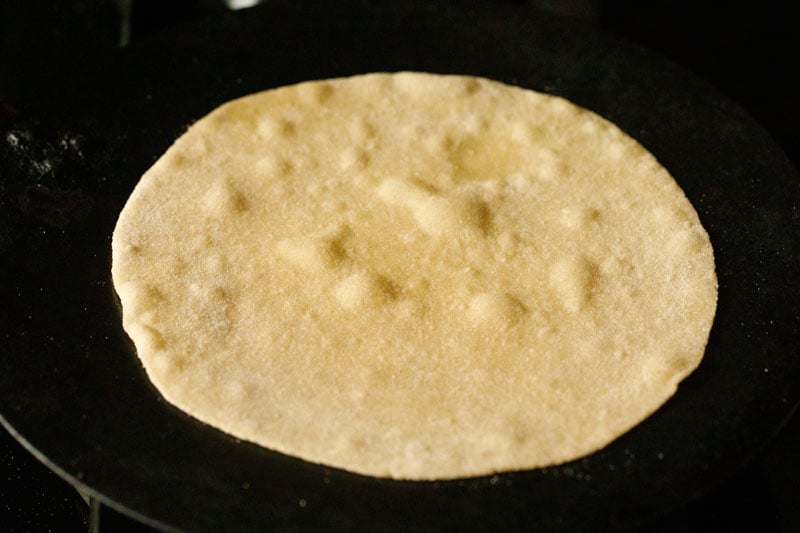
10. Now put the roti on a sizzling tawa or skillet or griddle.
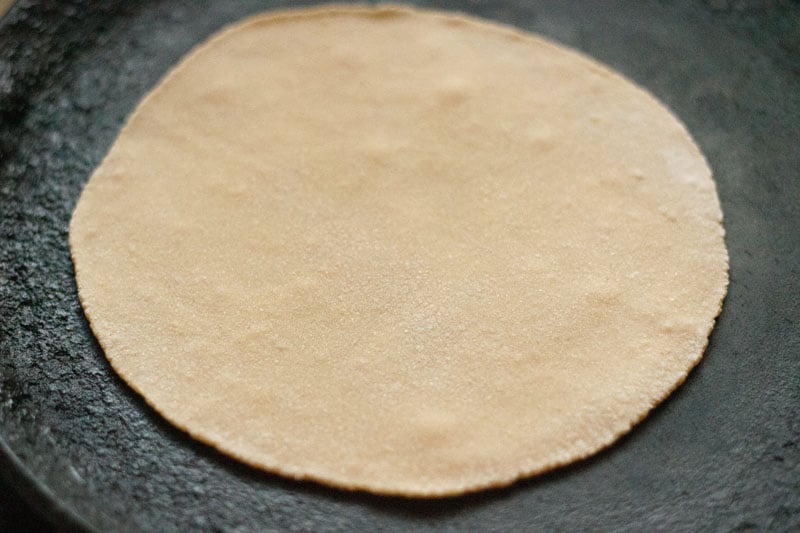
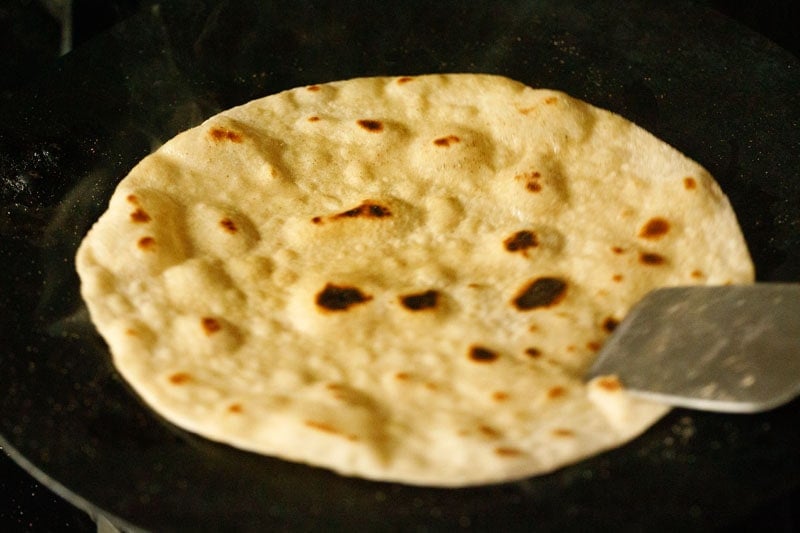
11. First cook dinner one facet. It ought to be about one-fourth cooked, as proven within the photograph beneath. You will notice some air pockets forming on the rolled dough.

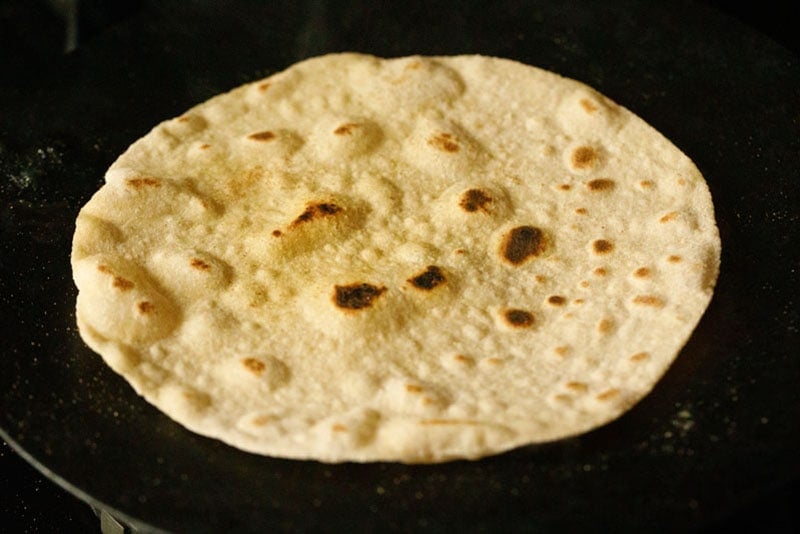
12. Flip with the assistance of tongs and cook dinner the opposite facet. This ought to be a little bit bit extra cooked than the primary facet. Brown spots ought to be seen. The photograph beneath reveals the roti able to placed on hearth.
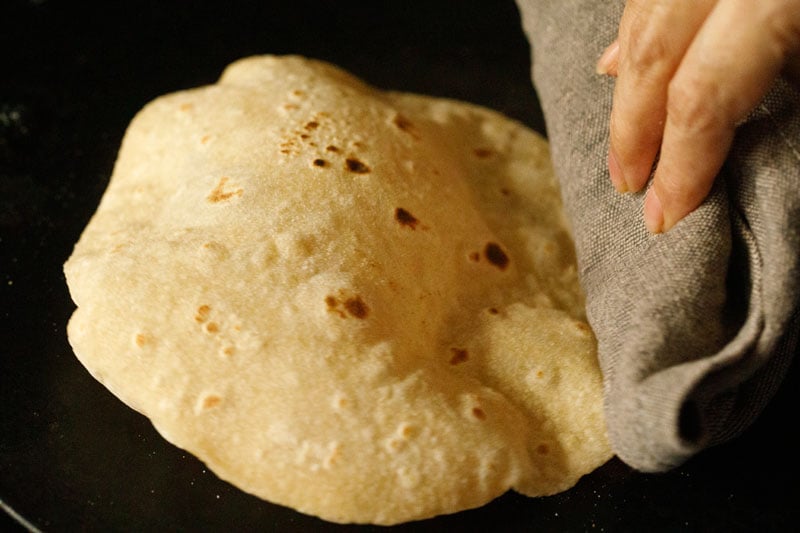
13. Now maintain the roti with a tong and place the primary facet which was one-fourth cooked instantly on the hearth. It will begin to puff.
TIP: In case you have an induction stove-top, then preserve a holdable baking rack (a baking rack with a deal with) on prime of the range or place it in your palms. Hold the half cooked roti on the baking rack and let it puff from the warmth of the induction range. Flip it with tongs or spatula and cook dinner the second facet.
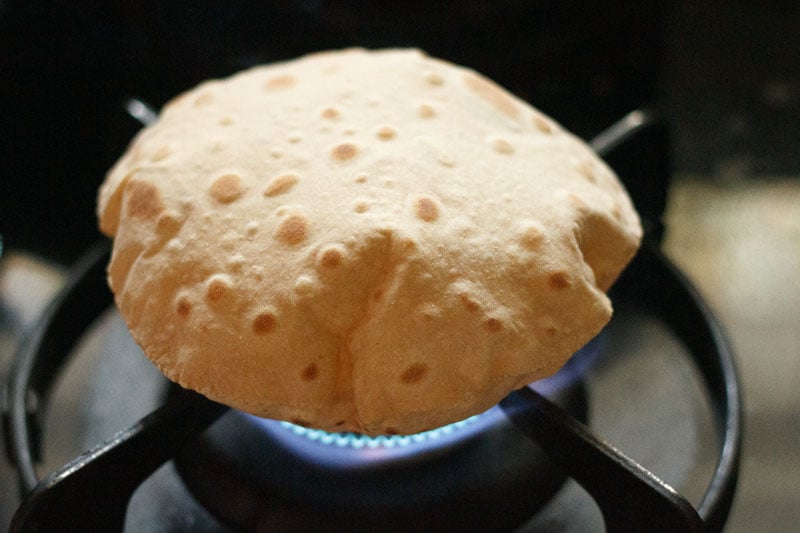
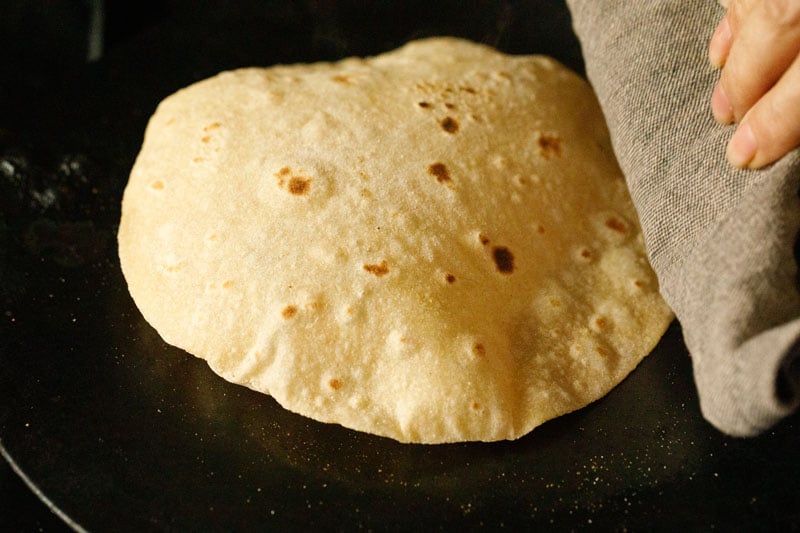
14. Flip and preserve the opposite facet on hearth. The roti will puff extra. Keep away from burning or overcooking the rotis, as they are going to change into crisp and arduous like papad.

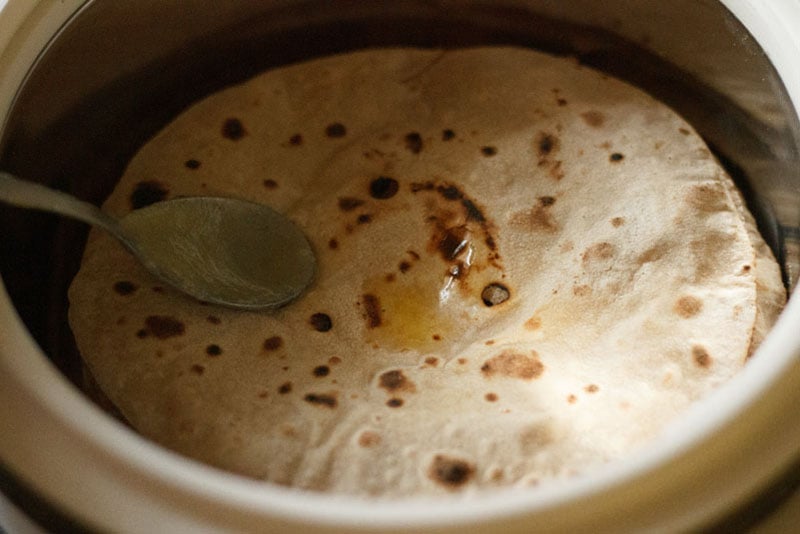
15. Take away and place in a roti basket if not serving instantly. Apply ghee or oil on the roti. Making use of or brushing the phulka with any of those fat retains them comfortable for a very long time.
Roti made with this technique is ideally served sizzling. In the event you can’t serve them sizzling, then you possibly can preserve them in a container that retains meals heat like a casserole or in a roti basket. You may as well wrap them up in a kitchen towel or serviette.
Step-by-Step Information
Learn how to Make Roti on Tawa
Right here I present you to cook dinner and puff the roti or phulka on tawa or skillet. That is useful in case you have an induction stove-top.
1. Place the rolled roti dough on a sizzling tawa or skillet. Hold the warmth to medium-high or excessive. Inside some seconds you will note air pockets forming on the uncooked chapati dough.
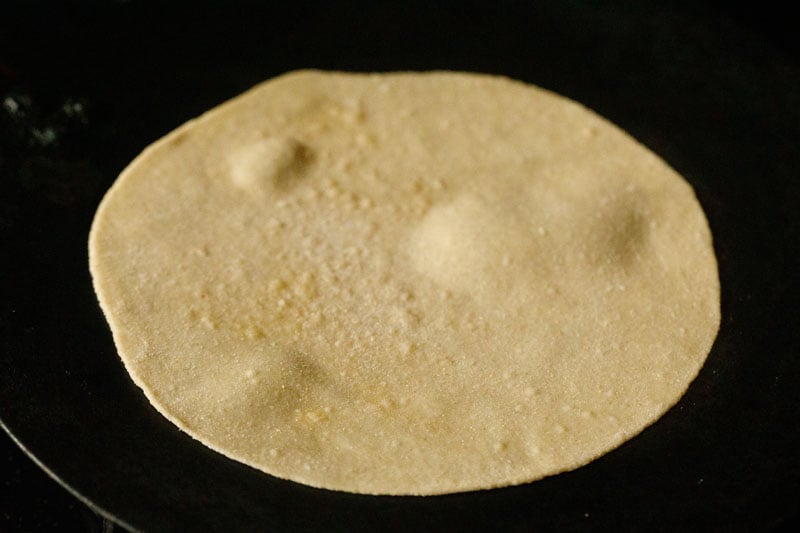
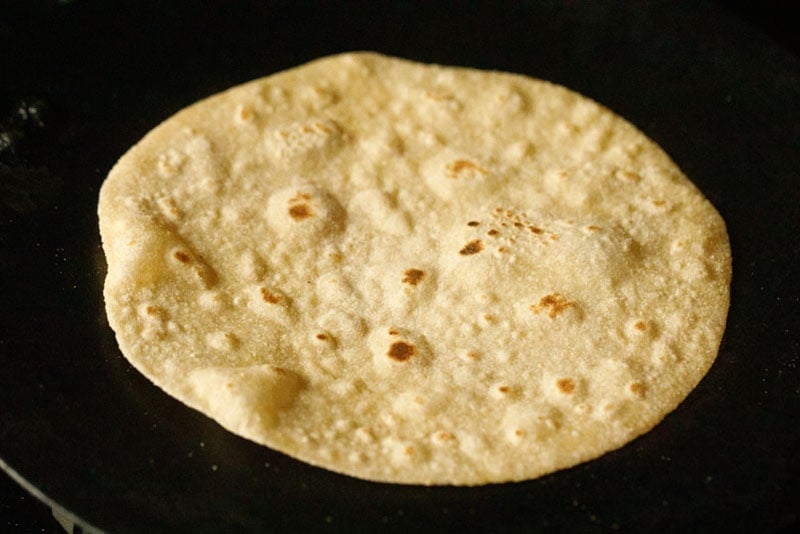
2. Roast for about 30 seconds or so and you will note the air-pockets improve on the floor.
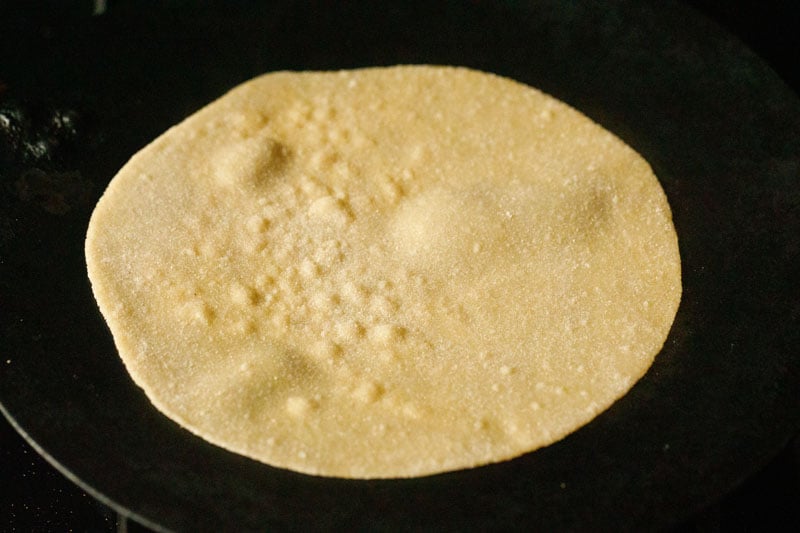
3. Flip with a spatula or tongs.
4. Roast the second facet for a couple of minute.
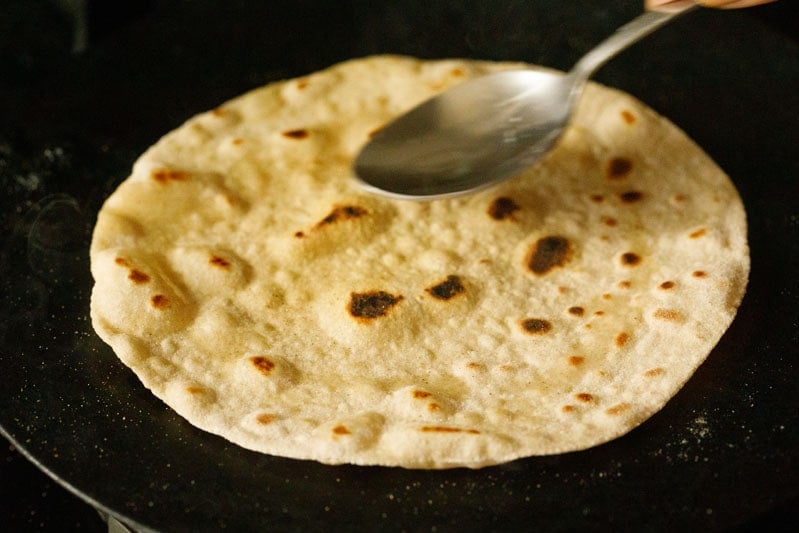
5. Flip once more. This second facet can be cooked barely extra with some seen brown spots.
NOTE: I’m giving approximate timing that may take to roast the roti. The precise timing will range because it relies upon upon the thickness of the roti, the depth and strain of the flame and thickness and high quality of the skillet or tawa.
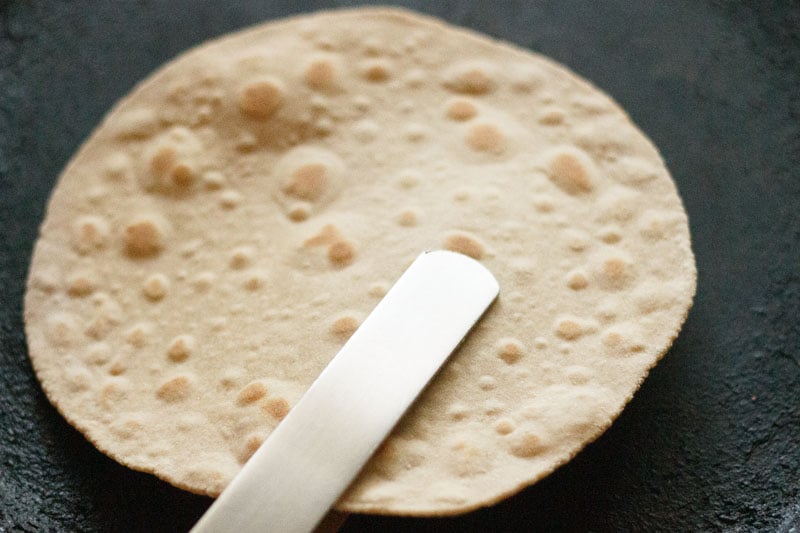
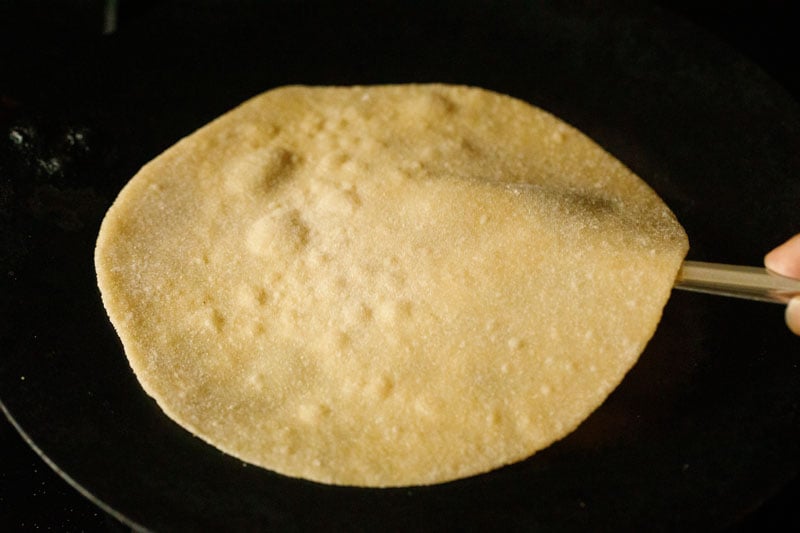
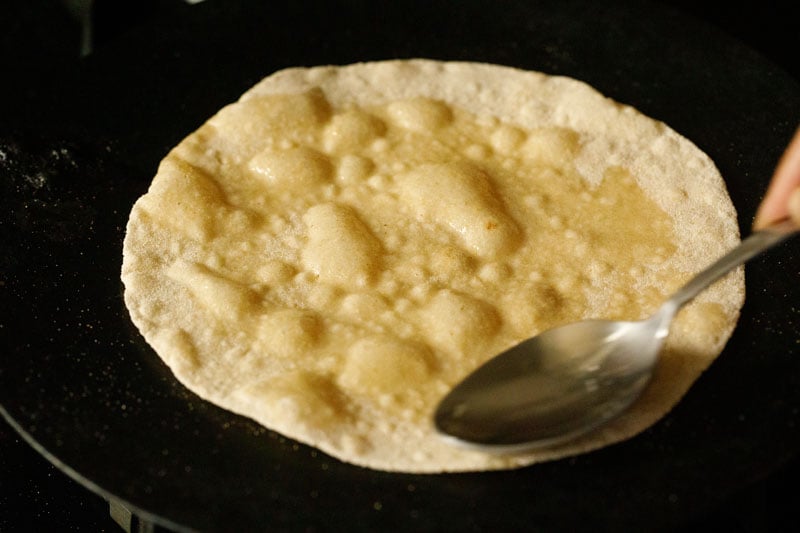
6. Now with a clear folded cotton kitchen serviette or a spatula, start to press the partially cooked dough on all sides and heart.
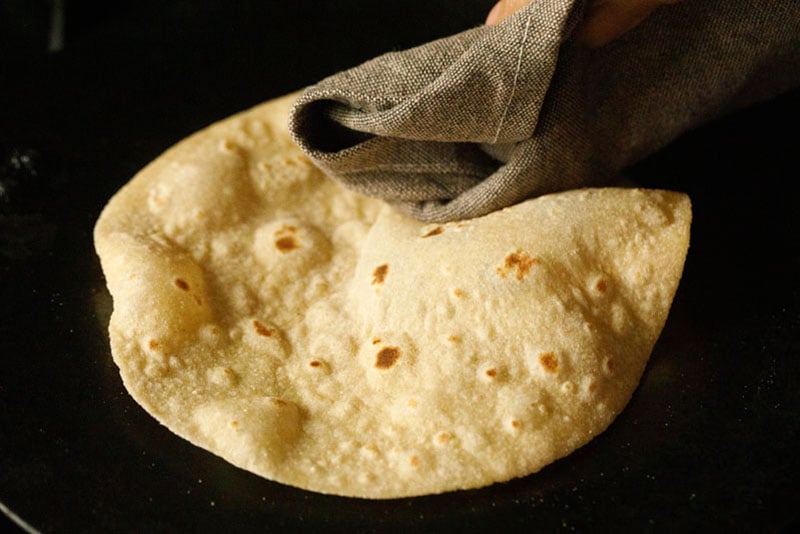
7. Urgent and nudging the chapati gently throughout its floor, helps to puff it up.
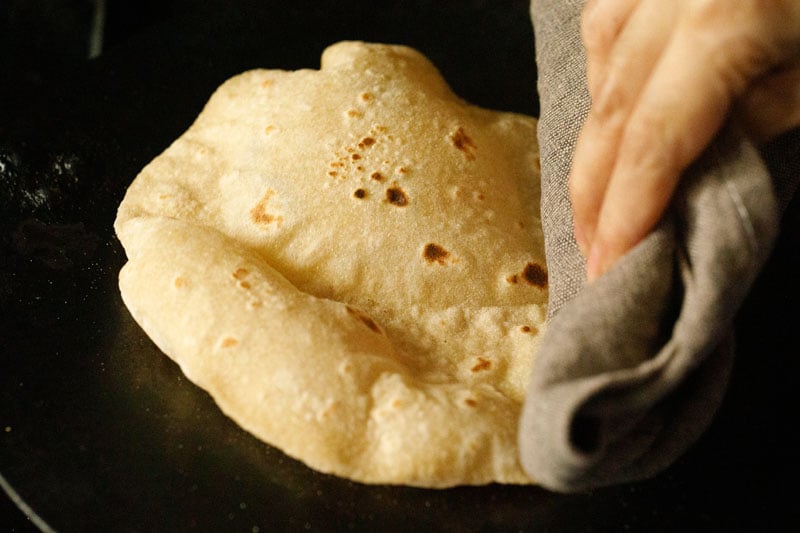
8. Carry on urgent throughout, particularly the flat parts, in order that your entire roti will get overvalued nicely.
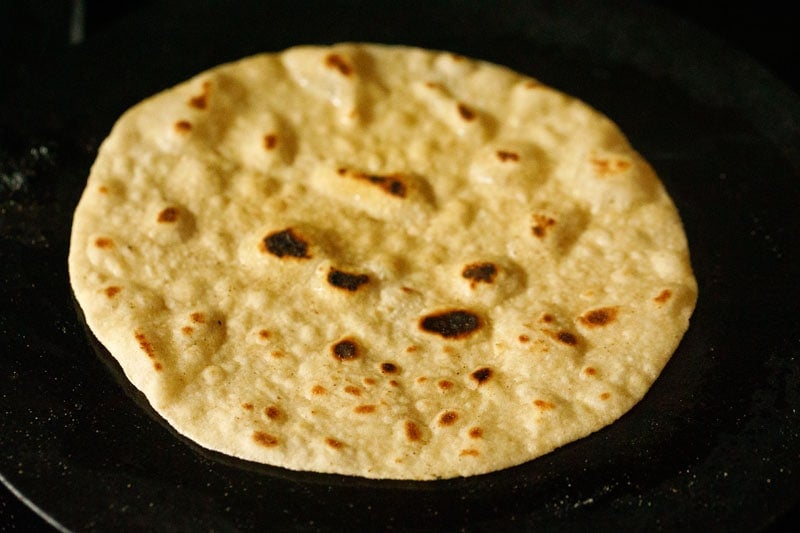
9. Under you see a properly puffed phulka roti on a tawa. If you’d like you possibly can flip once more and cook dinner the second facet too for some seconds.
10. Place the comfortable and puffed roti in a roti-basket and unfold or brush some oil or ghee on prime.
Step-by-Step Information
Learn how to Make Chapati
1. Switch the rolled chapati dough on a sizzling tawa or skillet.
2. Cook dinner for about 30 seconds or so till you see some air pockets throughout. Word that the timing will change or range with the sort of skillet you’re utilizing, the chapati thickness and the depth of the flame.
3. Flip the chapati and unfold some oil throughout whereas the second facet is getting roasted. Cook dinner the second facet for about 45 seconds to 1 minute.
4. Flip the chapati once more with a spatula. You will notice that the second facet is nicely roasted with some blisters and brown spots.
5. Unfold some oil on this cooked facet in the meantime the primary facet is getting roasted once more. Roast the primary facet once more for about 20 to 30 seconds.
6. Press the perimeters with a spatula whereas cooking the second facet of the chapati.
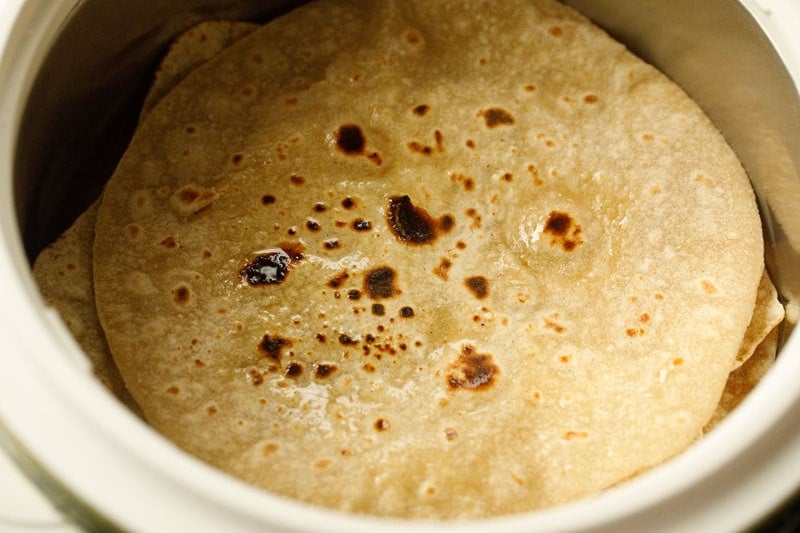
7. Under photograph is of the cooked chapati. Make chapati with the remainder of the dough on this method and retailer them in a chapati container or field.
Chapati is roasted this fashion with oil or ghee tastes totally different and extra like parathas, than the fire-roasted phulka or roti puffed on tawa. Everybody has a unique desire. So make what you and your loved ones like.
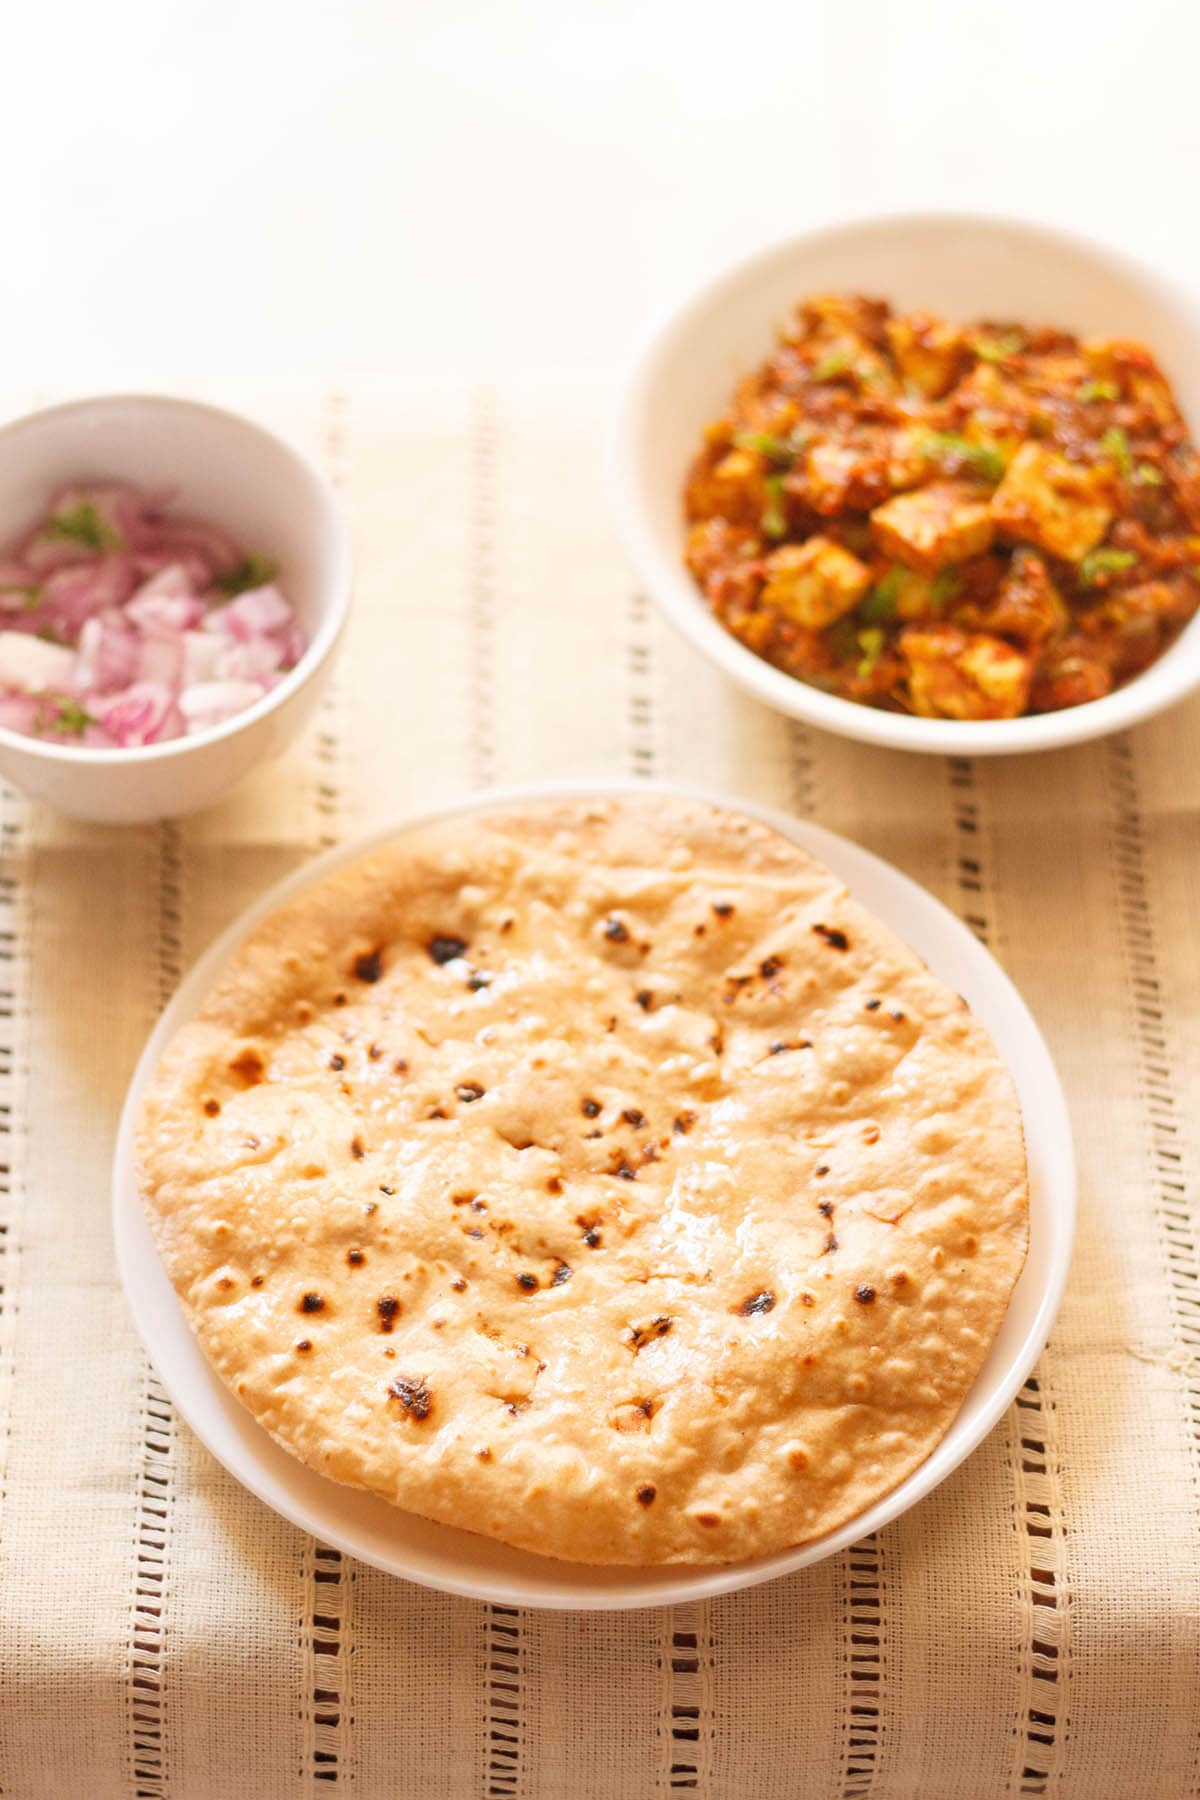
Serving Options
Whichever manner you’ve got made these comfortable roti, serve them with dals like chana dal, masoor dal, mung dal, dal fry or any Indian veggie dish like aloo gobi, vegetable kadai, stuffed capsicum or curry recipes like rajma masala, paneer butter masala, chana masala, palak paneer, veg kadai, aloo matar and so on.
Once you plan to serve them with a dry veggie dish, it’s best to use some ghee or oil to rotis whereas serving them. Making use of ghee additionally helps in preserving the roti comfortable.
Learn how to Retailer Roti
Makeahead the roti or chapati simply earlier than you propose to serve your lunch or dinner. Once they get cooked and roasted nicely, switch them to a roti basket or a metal container or field.
Unfold some oil or ghee throughout. You may fold them if you need. Cowl with lid and start to cook dinner the remaining roti in batches.
Comply with the identical strategy of putting the recent roti within the container, brushing some oil or ghee on them and masking with container with lid. You’re going to get a stack of rotis within the container.
Hold them coated tightly till able to serve. They might change into heat or at room temperature, however can be comfortable.
For well being causes, I don’t freeze roti or roti dough as I’m of the opinion that roti or chapati ought to at all times be had recent and sizzling or heat. Frozen roti can provide digestion issues.
To retailer any leftover dough, place in an air-tight container and use inside 1 to 2 days. If the dough has blackened or smells, then discard.
Ideas For Making Mushy Roti or Phulka
1. Wheat Flour
The standard and protein content material of every model of entire wheat flour is totally different. Because of this, cooking occasions will find yourself being totally different for various flours. It should take some experimentation to know the proper timing for the flour you’re utilizing, so I recommend you keep on with the identical kind of flour every time you make them. Relying on the standard of flour, much less or extra quantities of water can be required. However take into account that your dough ought to be pliable and comfortable with the intention to roll it simply.
2. Fat
Including ghee or oil makes the roti comfortable. You may as well skip including ghee or oil. That is the essential technique of creating entire wheat flour dough. This dough will also be used for making stuffed Parathas like Aloo paratha, Gobi paratha, or Paneer paratha. After making roti, apply some ghee or oil to maintain the roti comfortable.
3. Dough Softness
The dough ought to be kneaded very nicely in order that the gluten is shaped. The dough ought to be easy and comfortable to the contact. If the dough is tough then roti won’t puff up. Then again, if the dough is simply too comfortable or sticky then you definately received’t be capable of roll it evenly and it’ll not puff up in any respect.
4. Resting Dough
After kneading the dough, enable it to relaxation for 20 to half-hour. This may also assist the roti to be comfortable.
5. Rolling
Roll the dough very evenly, in any other case the roti won’t puff up. The dough mustn’t have uneven surfaces like thick in some locations and skinny somewhere else. An erratically rolled roti like this won’t puff up. Will probably be arduous or crisp from some locations and chewy somewhere else.
Additionally, keep in mind that the rolled roti shouldn’t have any cracks or tears in them. Once you place it on tawa then additionally it ought to be flat on the tawa and there shouldn’t be air bubbles between the rolled roti dough and the floor of the tawa.
6. Roasting
Roti that’s puffed on direct flame are softer, nevertheless it’s not essential to roast the phulka instantly on hearth. You may as well cook dinner it on the tava or skillet as I’ve proven above.
Use a heavy spoon or spatula to use strain on the roti whereas cooking on a griddle in order that the roti puffs up. Do the identical on the opposite facet in case you really feel the roti is undercooked.
By no means roast roti or chapati on a low warmth as they are going to change into crispy, crunchy however not comfortable.
NOTE: If you wish to serve the rotis later and wish them to retailer in a container, then it’s advisable to make them on tawa.
7. Scorching Water
Kneading the roti with sizzling water makes it very comfortable, and these rotis will generally tend to stay comfortable even hours after making them. Use this technique when making rotis or phulkas for tiffin field lunch.
Please observe that care ought to be taken when mixing the recent water with the flour. Use a spoon or spatula first, and when the temperature is bearable, then knead the dough with palms. You may as well swap in milk for the water, which is able to lead to comfortable rotis.
8. Storing Dough
If some additional dough is leftover, then preserve it coated within the fridge. Hold in an air-tight field or container, in order that the floor of the dough doesn’t change into dry.
Though it’s higher to make use of the freshly kneaded dough, you should utilize the leftover dough for 1 to 2 days if stored within the fridge. After 1 to 2 days of preserving within the fridge, the dough shade could begin changing into black, arduous and smelly. If this occurs, discard the dough.
FAQs
Kneading the dough nicely, rolling the dough evenly and opting to cook dinner them on the skillet or hearth are three necessary steps that must be mastered to make comfortable rotis. A mistake in any of those steps could result in arduous rotis. I recommend you re-read the part “Tricks to Making Mushy Rotis” above.
Phulka are finest served sizzling, however they are often made a number of hours forward of time. In the event you decide to make them forward, I recommend utilizing the tawa technique reasonably than roasting them on a direct flame, after which preserving them in a warming field or wrapped in a kitchen towel.
Chapati is a sort of roti, and sometimes the phrases are used interchangeably. In my lexicon, chapati is made on a tawa solely and roasted with oil or ghee. Whereas phulka are partially cooked on the tawa and later puffed on direct flame. Additionally Chapati is normally bigger in measurement than a phulka.
In the event you make your roti with oil and never ghee, then roti is vegan.
Extra Indian Breads To Strive!
In the event you made this recipe, please make sure to fee it within the recipe card beneath. Sign Up for my electronic mail publication or you possibly can observe me on Instagram, Facebook, Youtube, Pinterest or Twitter for extra vegetarian inspirations.
By Dassana Amit
Roti or Phulka or Chapati is an on a regular basis staple Indian flatbread that’s made in almost each a part of India. This recipe for this unleavened flatbread is made with fundamental substances – entire wheat flour, ghee, salt and water
Prep Time 10 minutes
Cook dinner Time 30 minutes
Resting Time 30 minutes
Whole Time 1 hr 10 minutes
Servings 15 roti
Forestall your display from going darkish whereas making the recipe
This Roti recipe put up from the weblog archives first printed on August 2009 has been republished and up to date on 1 September 2021.
Source link


