
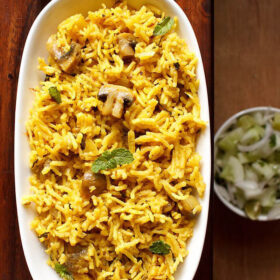
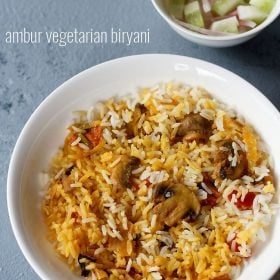
Malabar Biryani additionally known as Kerala Biryani is among the most celebrated biryanis from South India. Identical to its Hyderabadi or Awadhi cousins, the Kerala Biryani recipe too is laborious and wishes a great period of time to arrange and prepare dinner. Finally, when the dish is prepared, its all price. You’ll be able to really feel the aroma, flavors and texture of this gentle and delicately spiced vegetable Thalassery Biryani in each morsel.
About Malabar Biryani
My household loves rice-based dishes, and it’s a no brainer that biryani tops the checklist. Although, it does take some effort and time to make a superbly aromatic Malabar Biryani too, the fantastic thing about it’s that I don’t must prepare dinner the rest with it. It’s an entire meal in itself. Only a easy salad or raita works nice with it.
This Malabar Biryani recipe is tailored from Neeta Dutta’s ‘1000 Nice Indian Recipes: The Final Guide of Indian Delicacies,’ which is a superb cookbook protecting Indian delicacies vastly. I have to admit that I’ve tried a couple of different recipes from the e book. However the Kerala Biryani recipe is a favourite.
Whereas different biryanis have a predominant taste of yogurt in them, this Thalassery Biryani has the principal taste of coconut milk during which the greens are cooked. General, this biryani is milder, little candy in style and fewer in warmth because it has much less spices as in comparison with the Hyderabadi or Tamil Nadu type biryanis.
The Thalassery Biryani is exclusive within the sense that it’s made with kaima rice often known as jeerakasala rice. These are quick grained rice having a beautiful aroma and are usually not sticky.
In Kerala and a few elements of Tamil Nadu this specific rice variant is used to make biryani. Even Nei Choru or the Kerala Ghee Rice is made with kaima rice.
These days kaima rice is definitely out there on-line. But when nonetheless you can’t supply it, make the biryani with the simply out there basmati rice. Make it possible for your basmati rice is aged because it offers one of the best texture to the biryani.
Step-by-Step Information
The best way to make Malabar Biryani
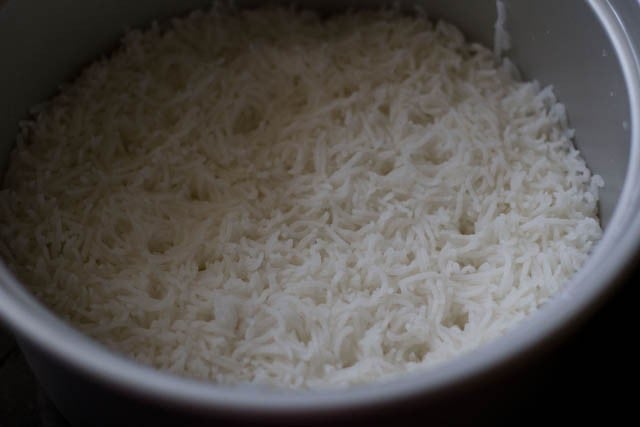
1. First soak 2 cups kaima rice or basmati rice in 3 cups water for 20 to half-hour. Drain all of the water.
Prepare dinner the rice grains in 6 cups of water till they’re ¾ᵗʰ cooked. Utilizing a strainer, drain the remaining starchy water from the rice.
You’ll be able to choose prepare dinner rice in a pan, strain cooker, microwave or in a rice cooker. To make this Thalassery Biryani both use kaima rice (jeerakasala rice) or basmati rice.
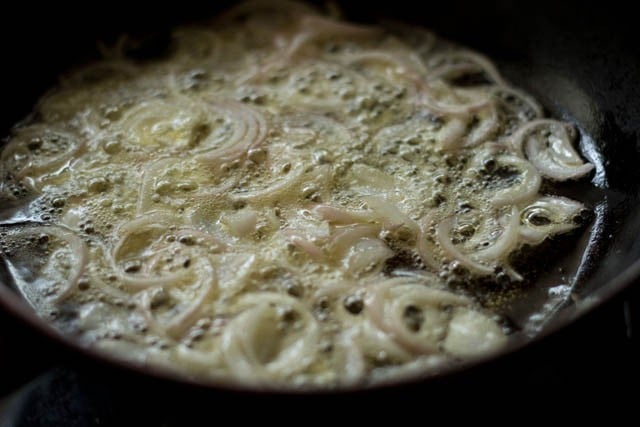
2. Whereas the rice is cooking, you possibly can prep the greens and maintain them apart. Warmth 5 to six tablespoons oil and add 1 cup of sliced onions.
Fry the the onions on medium warmth till they change into mild brown. I’ve used a impartial flavored oil however be at liberty to make use of coconut oil or ghee.
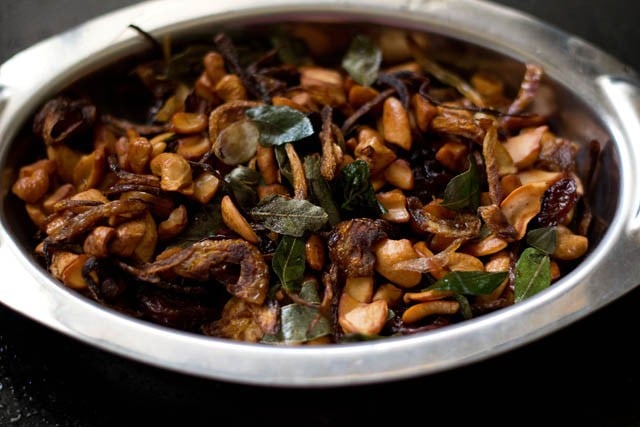
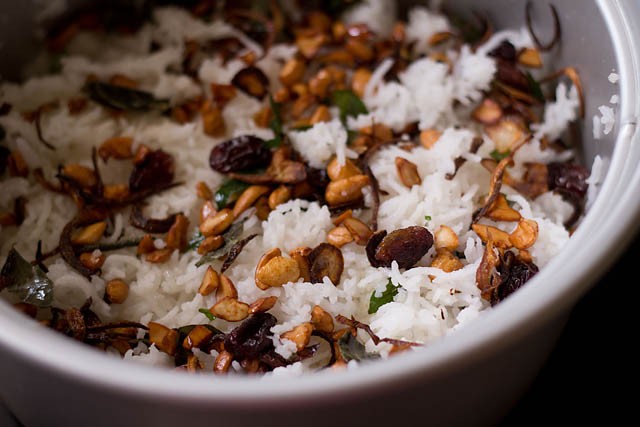
3. Now, add ¼ or ⅓ cup chopped cashews, ¼ cup raisins, 2 sprig curry leaves and fry until the combination turns golden brown. Be sure you don’t burn the combination.
Fry on low warmth. By the point onions flip golden brown, the cashews, raisins and curry leaves would even have browned. In case you possibly can’t do that method, then fry all of them one after the other.
4. Utilizing a slotted spoon take away this fried combination and put aside on a plate.
Make Vegetable Gravy
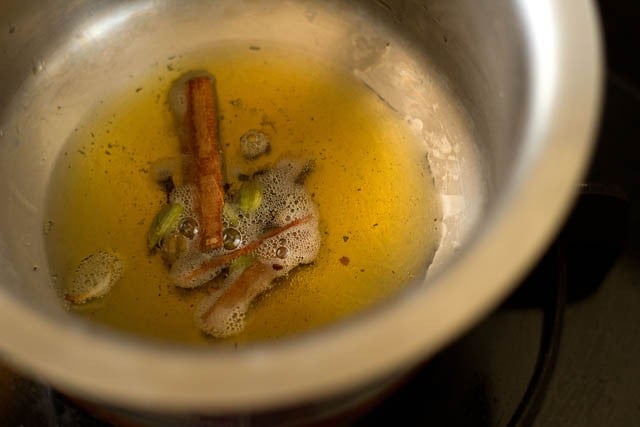
5. Use the identical oil during which the onions, and many others. are fried. Take about 2 to three tablespoons of this oil in one other pan or pot and place on the stovetop. Hold warmth to a low.
Add the entire spices – 2 inch cinnamon stick, 7 to eight cloves and 4 to five inexperienced cardamoms. Fry on low warmth until the spices splutter and the oil turns into aromatic.
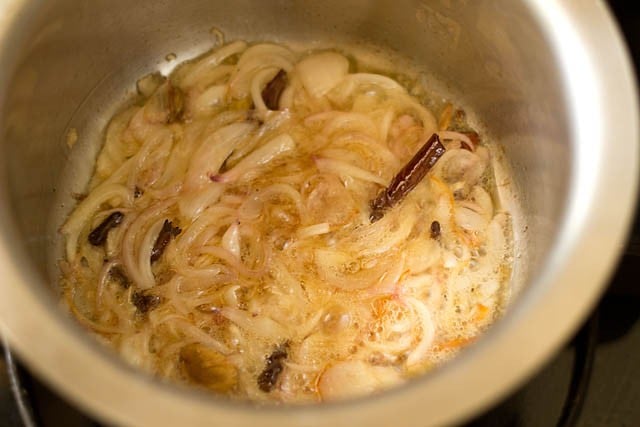
6. Add the remaining sliced onions – ¾ cup. Fry onions till they’re flippantly golden.
7. Add 1 tablespoon ginger-garlic paste and a pair of inexperienced chilies (chopped) and sauté for a minute on low warmth.

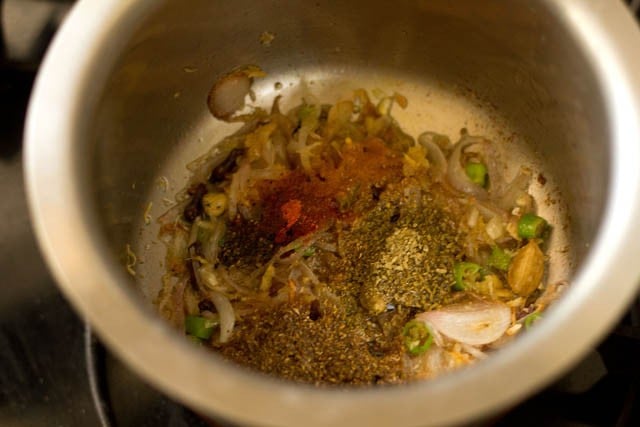
8. Add the dry spice powders listed under:
- 1 teaspoon coriander powder
- 1 teaspoon fennel powder
- ½ teaspoon black pepper powder
- ¼ or ½ teaspoon pink chili powder
- ¼ or ½ teaspoon turmeric powder
Sauté for a couple of seconds on low warmth taking care to not burn the spices.
At this step you too can add about ½ cup chopped tomatoes after sautéing the bottom spices. Sauté tomatoes till they flip delicate and mushy.
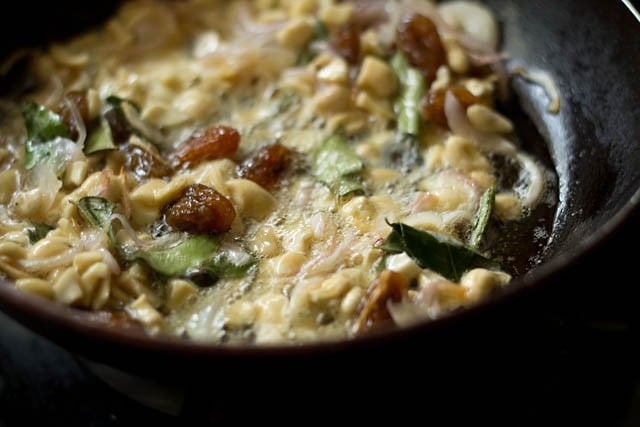
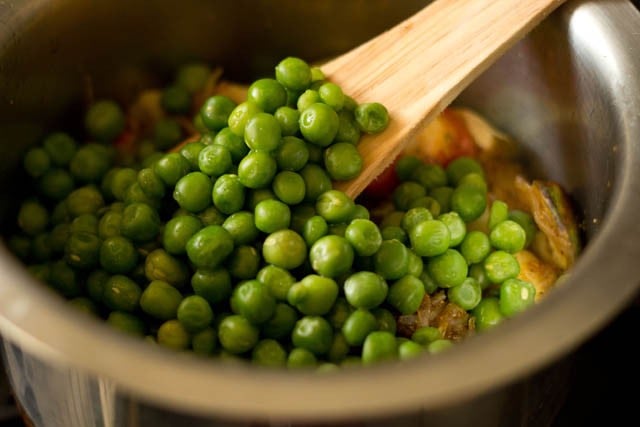
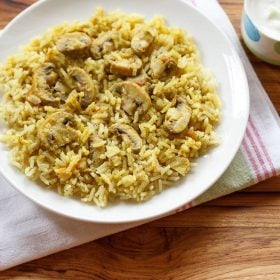
9. Add 2 cups chopped greens, ½ cup inexperienced peas and stir. Sauté for a minute. I’ve used small eggplant (brinjal), potato, carrots and peas.
Add veggies like cauliflower, french beans, bell peppers, broccoli, child corn. You’ll be able to even add mushrooms and steamed or boiled unripe jackfruit and even soya chunks.
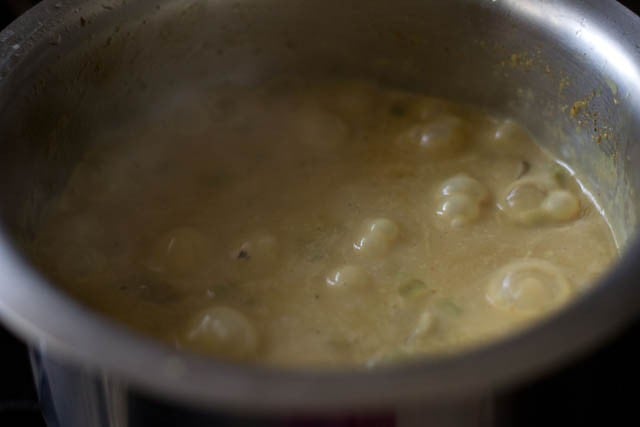
10. Now, add 2 cups of thick coconut milk.
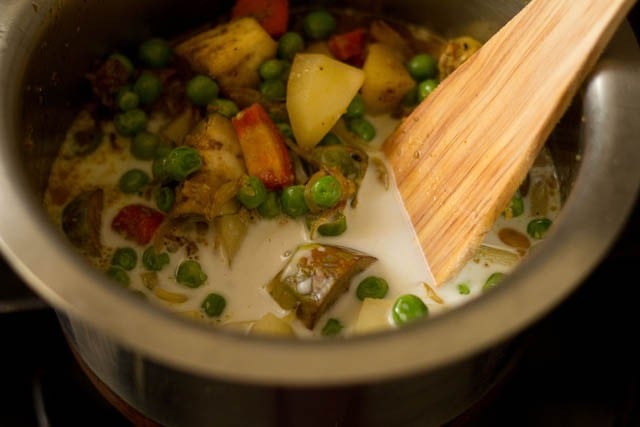
11. Stir to mix on low warmth. Add ½ cup water (or as wanted) together with ½ or 1 tablespoon lemon juice. Combine once more.
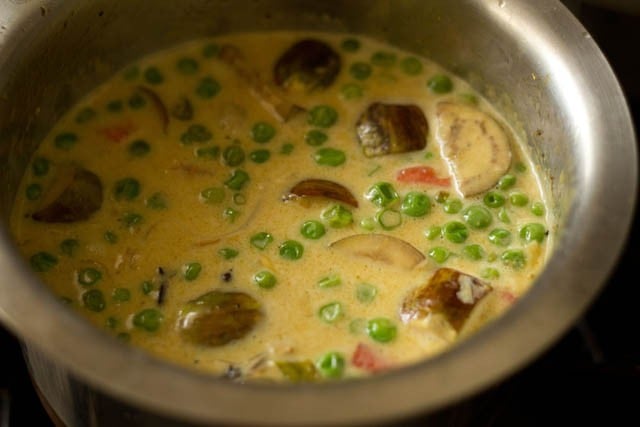
Cowl the pan with lid and let the greens prepare dinner on low to medium-low warmth. The curry would cut back a bit as soon as the greens are tender and cooked.
In case you plan to make use of curd (yogurt) as a substitute of lemon juice, then add at this stage. Combine properly and add salt. Add about ¼ cup of crushed yogurt or curd.
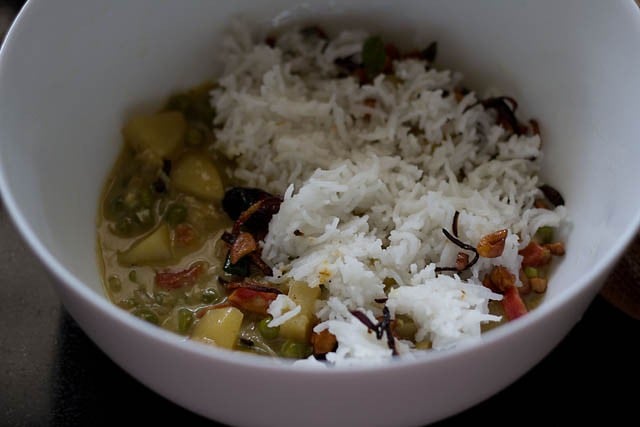
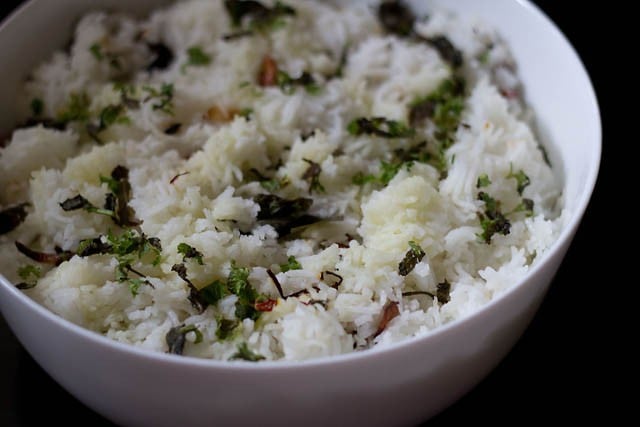
12. In the meantime high the fried combination (onions, cashews, raisins and curry leaves) onto the cooked rice.
13. As soon as the greens are tender, we are able to begin layering the biryani. The gravy is cooked now.
Layer and Make Malabar Biryani
14. Grease an oven proof Pyrex bowl or pan with oil. Layer the vegetable gravy first adopted by the rice.
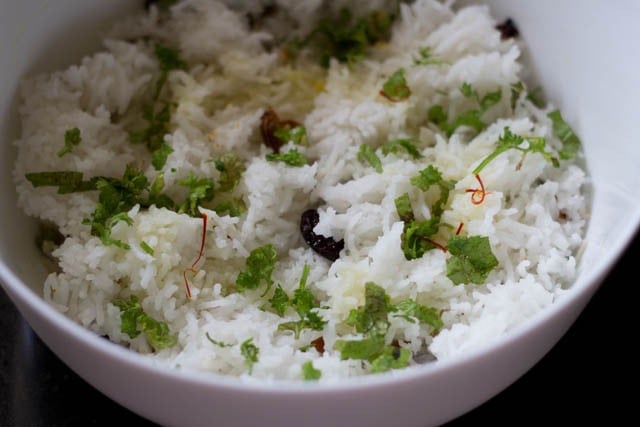
15. Unfold ½ tablespoon of chopped mint and ½ tablespoon of chopped coriander leaves on high.
Sprinkle saffron water (12 to fifteen saffron strands soaked in 1.5 tablespoon water). Dot with some oil or ghee if you happen to favor.
As an alternative of saffron water, you may additionally use a couple of drops of pure edible orange or yellow coloration.
16. Unfold one other layer of the vegetable gravy. Now unfold the fourth layer of rice.
Sprinkle the chopped mint and coriander leaves and saffron water. Dot with some oil once more. Cowl with an aluminium foil.
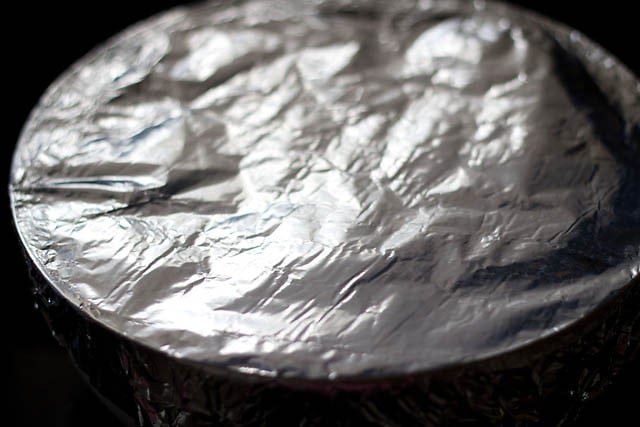
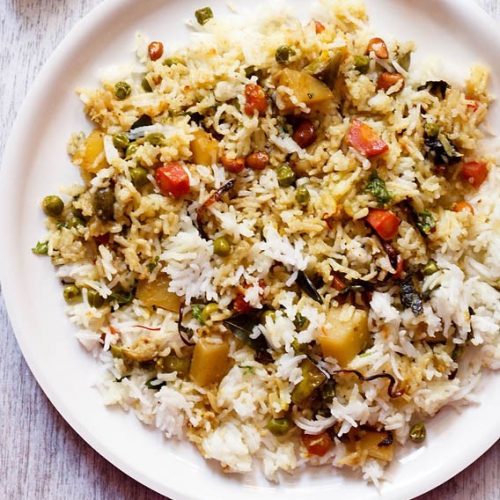
17. Bake the Malabar Biryani in a preheated oven at 200 levels C for 25 to half-hour. The under photograph reveals biryani after baking.
You could possibly additionally choose to prepare dinner the layered biryani in a tightly coated pan on range high for 25 to half-hour on low warmth.
Use a heavy tawa or skillet and warmth it first for a couple of minutes on the stove-top. Place the coated biryani pan/pot on the tawa after which prepare dinner the biryani on a low to medium-low warmth.
I favor to bake this biryani relatively than dum cooking on stovetop as I don’t have to fret concerning the base layer getting burnt.
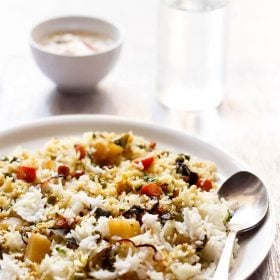
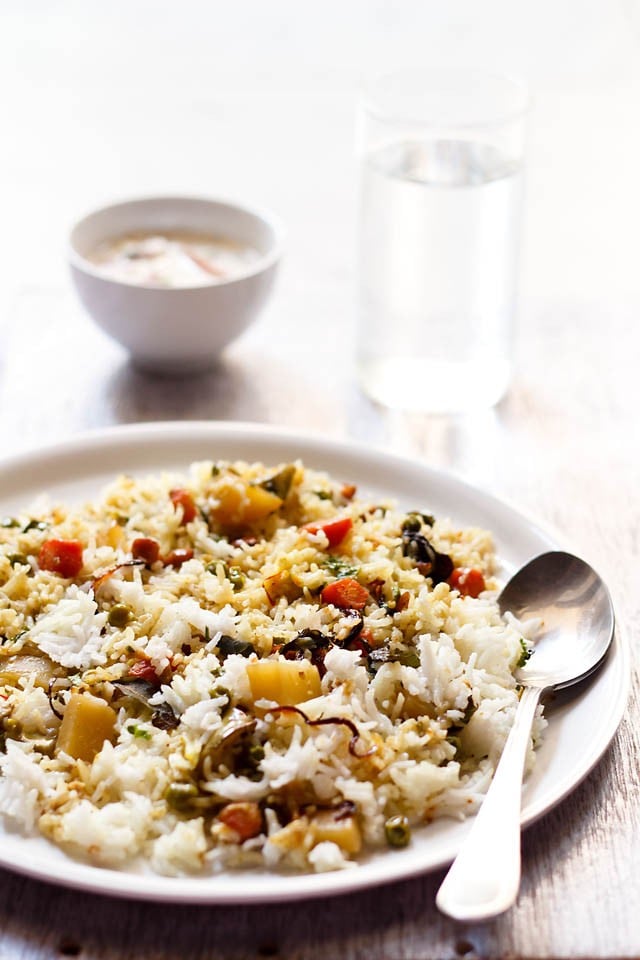
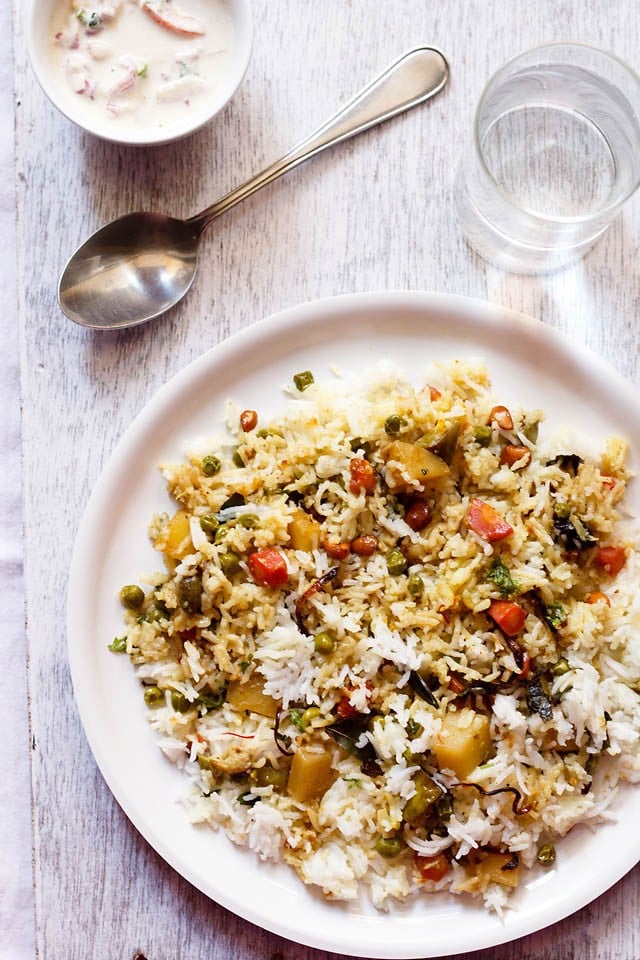
18. Serve the Malabar Biryani sizzling with a raita or salad. I served with Onion Raita.
Serving Solutions
You’ll be able to serve this Thalassery Biryani together with your alternative of raita, plain curd (yogurt), salad or kachumber, lemon wedges, papad or pickle. Or have it simply as it’s.
You’ll be able to refrigerate the leftover biryani for a day solely. Whereas reheating, steam for five minutes in a pan or prompt pot. Or you possibly can flippantly sauté the biryani stirring incessantly in a frying pan or skillet till heat or sizzling.
Vegetarian Biryanis are additionally a factor
Since I’m a vegetarian, I’ve developed fairly a couple of vegetarian biryani recipes like this Malabar Biryani in addition to the Hyderabadi type Veg Biryani. Aside from the Malabar Biryani recipe with greens, different biryanis which might be frequent at my house are the Kathal Biryani, Palak Biryani, Chana Biryani, Bombay Biryani, and many others.
I’ve additionally created my variations of the well-known Lucknowi Biryani, Kolkata Biryani and Mughlai Biryani with veggies. It’s essential to take a look at this Biryani Rice recipe as properly to make a easy, flavorful rice that goes nice with curries and dal.
Lots of people could argue about how an genuine biryani ought to solely be meat-based. What I really feel is if you happen to put your coronary heart, soul and observe the normal recipes to the T, then ensuring modifications like substituting the non-vegetarian elements with vegetarian ones isn’t an enormous deal. Finally, you will need to get a biryani which is flavor-laden and satisfying. That’s what issues!
Skilled Ideas
- Rice: To make any biryani, you want good high quality rice. Biryani will not be mushy and the rice grains ought to stay separate within the dish. Additionally, the rice shouldn’t be totally cooked and solely cooked about 75% or ¾ ᵗʰ. It ought to have a slight chew and may be cooked in a pan, strain cooker, microwave or a rice cooker. For this Thalassery Biryani recipe both use the quick grained kaima rice or the lengthy grained basmati rice.
- Spices: The stunning aroma comes from utilizing entire spices on this Kerala Biryani recipe. So, be sure that the spices are contemporary and in good situation. In case you don’t have saffron, you too can use a pinch of turmeric powder dissolved in water or a yellow edible coloration.
- Coconut milk: It’s best if you happen to can put together a batch of contemporary Coconut Milk at house that can be utilized on this recipe. In case you possibly can’t, you too can use the store-bought one canned coconut milk.
- Curd (Yogurt): In case you’re utilizing curd or yogurt as a substitute of coconut milk within the vegetable gravy of this biryani, then be sure to make use of contemporary curd which isn’t bitter. The curd must also be constituted of entire milk. Don’t use fats free curd constituted of toned milk as it’s going to break up whereas cooking.
- Biryani gravy: The vegetable gravy of this biryani ought to have a medium to medium-thick consistency. It shouldn’t be watery like a inventory or broth, as it will result in the rice turning into mushy or very delicate.
- Cooking biryani: As soon as layered, the biryani may be baked in a preheated oven or cooked in a tightly coated pan on range high on a low warmth.
Extra South Indian Biryani Variants
Rice Recipes
Rice Recipes
Rice Recipes
South Indian Meals
Please make sure you fee the recipe within the recipe card or go away a remark under in case you have made it. For extra veetarian inspirations, Sign Up for my emails or observe me on Instagram, Youtube, Facebook, Pinterest or Twitter.
Malabar Biryani | Kerala Biryani | Thalassery Biryani (Vegetarian)
This Malabar Biryani is a light and delicately spiced vegetable biryani made with a bevy of contemporary veggies, spices, herbs, onions, cashews, raisins and coconut milk. Finest served with facet of raita and a few papadam.
Prep Time 30 minutes
Prepare dinner Time 30 minutes
Whole Time 1 hr
Forestall your display screen from going darkish whereas making the recipe
Preparation
First, rinse the rice a couple of occasions in water. Soak the rice for 20 to half-hour.
Later prepare dinner the rice in water till the rice grains are ¾ᵗʰ cooked. Drain the remaining starchy water and set the rice grains apart.
Warmth oil and add the sliced onions.
Fry until the onions change into mild golden.
Add the cashewnuts, raisins and curry leaves.
Fry until the combination turns golden on low warmth. Do not burn.
- Take away with a slotted spoon and add the fried onions, cashews, raisins and curry leaves to the cooked rice. Don’t combine. Merely make a layer of the fried onions combination on high of the rice.
Making vegetable gravy
- In one other pan, add 2 to three tablespoons of this oil during which the onions have been fried. You’ll be able to add extra oil if required. Warmth the oil on a low flame.It’s also possible to choose to make use of contemporary oil or use ghee as a substitute.
Add the entire spices – cinnamon, cloves and inexperienced cardamoms.
On a low warmth fry until the oil turns into aromatic and the spices splutter.
Now, add the 1.5 cups sliced onions and sauté on medium-low warmth till mild golden, stirring usually.
Add the ginger-garlic paste and inexperienced chilies. Sauté for a minute on low warmth.
Add the dry floor spice powders and sauté for a couple of seconds.
Add the combined chopped greens. Sauté for a minute.
Add the coconut milk. Stir after which add water together with lemon juice.
If utilizing yogurt as a substitute of lemon juice, then add at this step. Stir properly.
Add ½ cup of water. Cowl the pan and let the greens prepare dinner on low to medium-low warmth. The gravy will scale back a bit.
As soon as the greens are tender and cooked, we are able to begin layering the biryani.
Layering and making Malabar Biryani
Grease an oven proof bowl or pan with oil.
Layer the vegetable gravy first. Then layer the rice.
Unfold the chopped mint and coriander leaves on high.
Sprinkle the saffron water. Dot with some oil.
Unfold one other layer of the vegetable gravy.
Now unfold the fourth layer of rice.
Sprinkle the chopped mint, coriander leaves and saffron water.
Dot with some oil once more. Cowl and seal tightly with an aluminium foil.
Bake Kerala Biryani in a preheated oven at 200 levels Celsius for 25 to half-hour.
It’s also possible to prepare dinner the layered biryani in a tightly coated pan on range high for 25 to half-hour on low warmth.
Serve Malabar Biryani sizzling or heat with raita or kachumber.
- Add greens of your alternative. You’ll be able to even make this Malabar Biryani with button mushrooms, steamed or cooked unripe jackfruit or soya chunks.
- As an alternative of oil, you should utilize ghee or coconut oil.
- Use thick coconut milk. Home made is healthier however you too can use canned thick coconut milk.
Vitamin Info
Malabar Biryani | Kerala Biryani | Thalassery Biryani (Vegetarian)
Quantity Per Serving
Energy 811 Energy from Fats 387
% Every day Worth*
Fats 43g66%
Saturated Fats 24g150%
Polyunsaturated Fats 2g
Monounsaturated Fats 15g
Sodium 1287mg56%
Potassium 653mg19%
Carbohydrates 99g33%
Fiber 5g21%
Sugar 10g11%
Protein 12g24%
Vitamin A 123IU2%
Vitamin B1 (Thiamine) 0.2mg13%
Vitamin B2 (Riboflavin) 0.1mg6%
Vitamin B3 (Niacin) 8mg40%
Vitamin B6 0.4mg20%
Vitamin C 23mg28%
Vitamin E 6mg40%
Vitamin Okay 6µg6%
Calcium 113mg11%
Vitamin B9 (Folate) 102µg26%
Iron 6mg33%
Magnesium 124mg31%
Phosphorus 306mg31%
Zinc 3mg20%
* P.c Every day Values are based mostly on a 2000 calorie weight loss plan.
This Malabar Biryani recipe publish from the weblog archives first printed on April 2013 has been up to date and republished on December 2022.
Source link


