

Suji ki Puri for golgappa or pani puri or puchka with step-by-step pictures. These puri made with semolina, all function flour dough are gentle and crisp. Excellent to hold the assorted scrumptious pani puri fillings. Make a giant batch of those suji ke golgappe and retailer it in an hermetic container to make your favourite pani puri or puchka.

Pani Puri, as I name this superior snack has all the time been a favourite since childhood. I bear in mind me and my people having pani poori from the pani puri wallah on the streets of Mumbai many instances.
I’ve even seen how the puris are made in bulk after which offered. Whereas as a child, I used to assume, how come the puri puffs a lot and stays crisp. There was a household, near my home who used to make these puris in bulk, pack them after which provide them to grocery shops.
We’re fond of those crisp puris, that a lot of the instances we simply have them plain. I’ve made these pooris many instances. Therefore, I’ve up to date this put up with higher pictures and lots of suggestions.
I used to be getting many feedback that the pani puri turns into comfortable after cooling down. after I make them, I by no means had this concern. I reasoned, that this drawback is as a result of the dough was not kneaded nicely and the poori roundels being thick.
Beforehand I has simply talked about to knead the dough nicely. However not emphasised that the dough additionally must have elasticity in it. Therefore up to date this suji ke golgappe recipe put up.
I need to say its simpler to get a packet of prepared made puris than to make them. Its does take an effort to make these pooris. So put together them, when you find yourself free from any work.
The perks of constructing home made suji ke golgappe are that recent oil and components are used. Plus no components or preservatives are added and you understand what goes into them. Additionally they do style higher than the shop introduced ones.
These puris might be made in giant numbers and saved in an hermetic container. This recipe yields 50 to 60 pooris. Nonetheless you may simply halve or double the recipe.
You possibly can use these suji ke golgappe later to make Pani Puri or Golgappa or ragda puri or puchka or Dahi Puri, simply crumble and high it up on Ragda Patties, dahi papdi chaat, aloo chana chaat, sev puri, bhel puri or simply have it plain.
Step-by-Step Information
Find out how to make Suji ke Golgappe
Make the Suji (Semolina) Dough
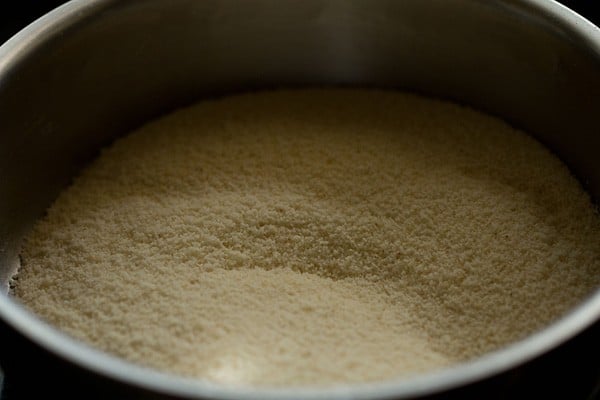
1. In a mixing bowl, take 1 cup high quality unroasted sooji or rava or semolina (160 grams), 1 teaspoon oil, 3 to 4 pinches of baking soda and ¼ teaspoon salt.
Keep in mind to make use of high quality textured rava. It’s also possible to use bombay rava. It needs to be within the shelf interval and never be infested with bugs or molds.
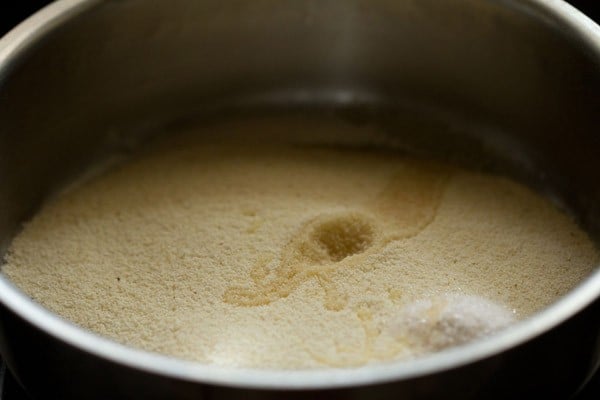
2. Along with your fingers, combine the oil evenly with the sooji.
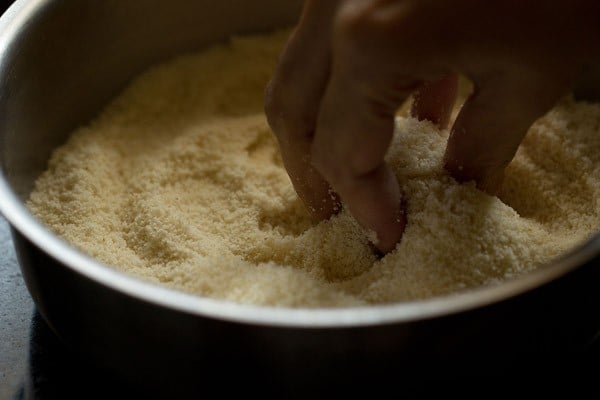
3. Right here’s the evenly combined oil, sooji and salt combination.
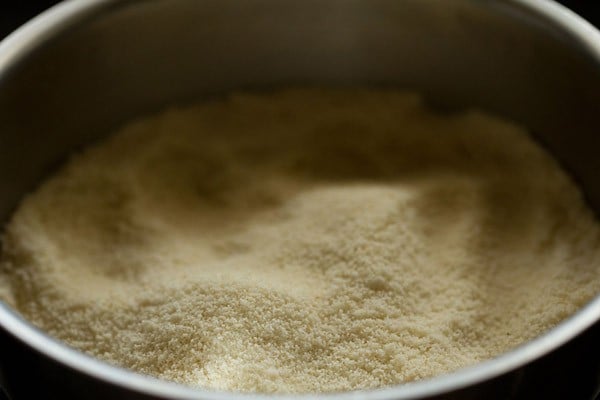
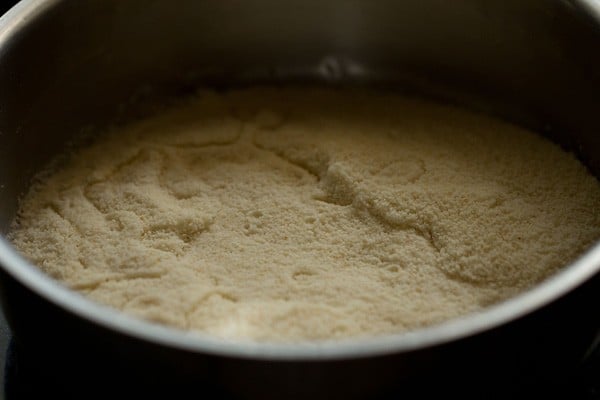
4. Now add 1 tablespoon maida (all function flour) to this combination.
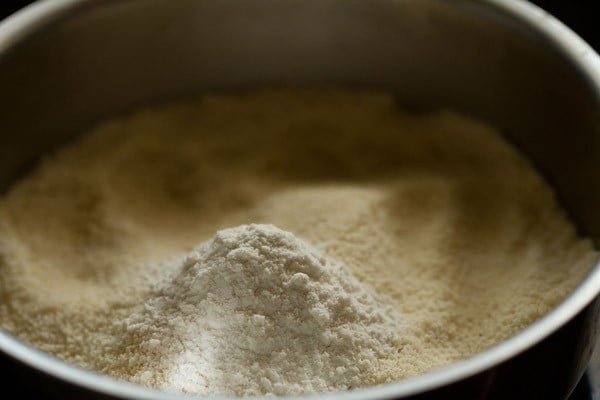
5. Combine once more very nicely in order that the all function flour is combined evenly.
6. Add 3 tablespoons of water first.
7. Stir and blend once more.
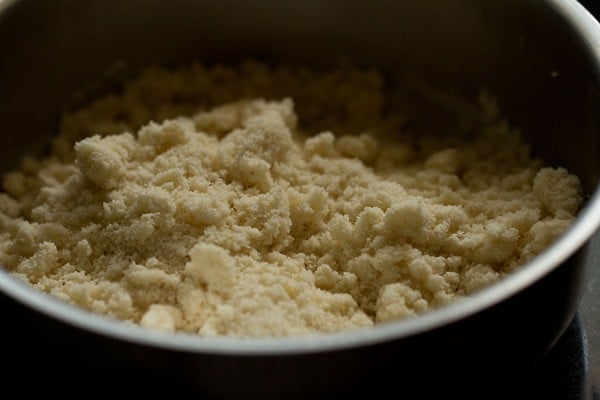
7. Then add 1 tablespoon water extra and start to knead the dough. Sooji absorbs water whereas kneading. Therefore add water in components whereas kneading. Then add 2 tablespoons extra of the water and proceed to knead. I added 6 tablespoons of water.
Relying on the standard of sooji, it’s possible you’ll want so as to add a bit much less or extra. The kneading is essential in getting the right pani poori texture.
Do not forget that the dough isn’t comfortable nor too onerous. Should you make the dough comfortable, then add 1 to three teaspoon extra of the sooji. If the dough seems to be onerous, then add sprinkle some water and proceed to knead.
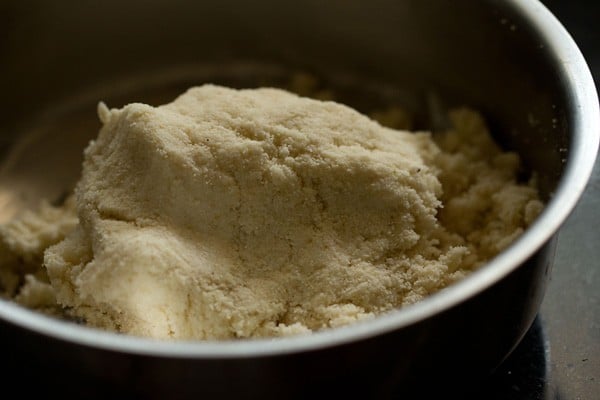
8. The puri dough needs to be elastic. Gluten strands should be fashioned, which supplies construction and form to the pooris.
The right texture of the dough, additionally assist in puffing pooris and helps in them staying crisp. So knead very nicely.
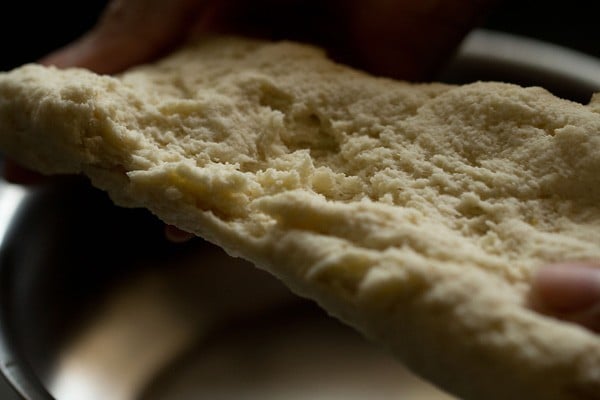
Elasticity helps within the rolling dough with out cracks and thinly. When rolling, the dough ought to roll simply with none cracks.
You ought to be simply capable of raise the rolled dough with out it tearing or breaking and falling aside.
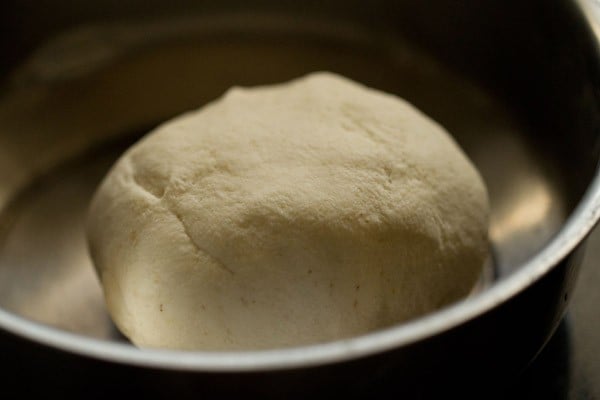
9. Knead to a semi-soft elastic dough.
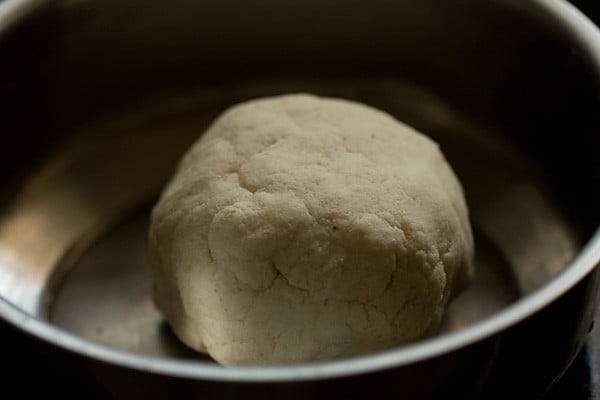
10. Preserve the nicely kneaded dough in a bowl or pan.
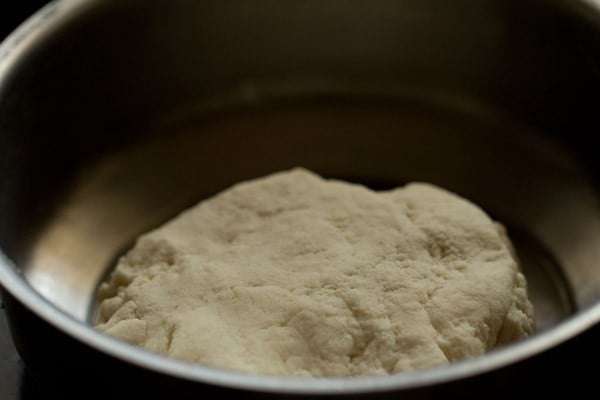
12. Cowl with a moist kitchen towel or serviette and permit the dough to relaxation for half-hour.

13. Right here’s the dough after resting for half-hour.
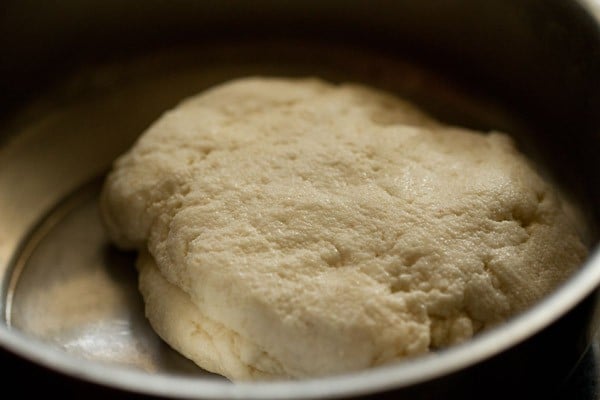
14. Knead the dough once more for two to three minutes.
Assemble and Roll
15. Now divide the dough into two or three components. Take one half in your work floor and start to roll. Keep away from including any dry flour whereas kneading. Preserve the remaining components of the dough coated with a moist kitchen towel in order that it doesn’t dry out.
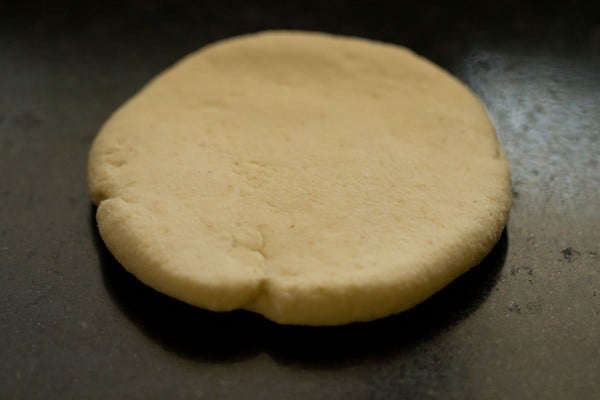
16. Roll to a big spherical. You see there aren’t any cracks within the rolled dough and the dough has good elasticity. You possibly can flip all the rolled dough with out it breaking or tearing aside.
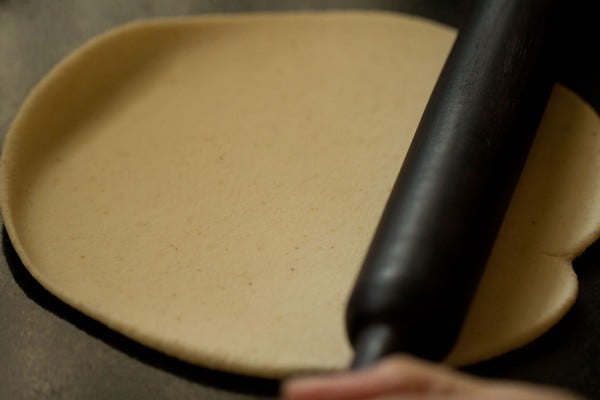
17. Carry on rolling to a skinny and even spherical. The pooris need to be thinly rolled. If not skinny, the bottom turns into thick and stays comfortable even after frying. If the dough isn’t rolled evenly, then the pooris received’t puff up.
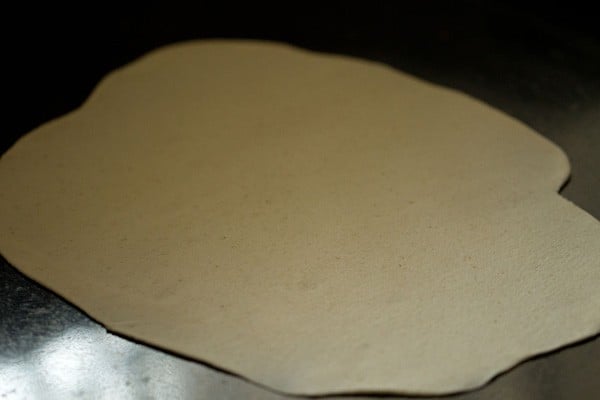
18. With a cookie cutter or a small bowl or a small jar lid, lower small to medium discs from the rolled dough. Utilizing a cookie cutter provides even form and measurement to the pooris.
It’s also possible to make small balls and roll them with a rolling pin. However then the pooris received’t have a fair and uniform form.
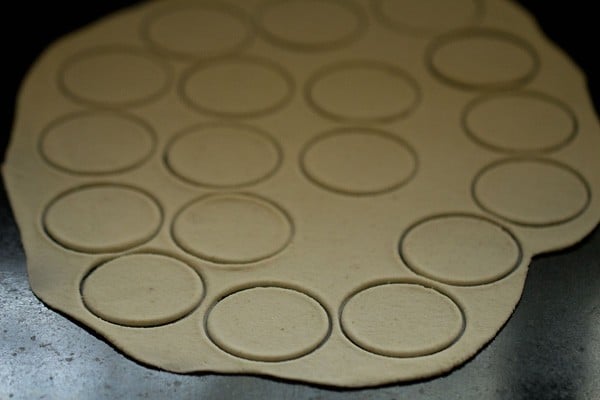
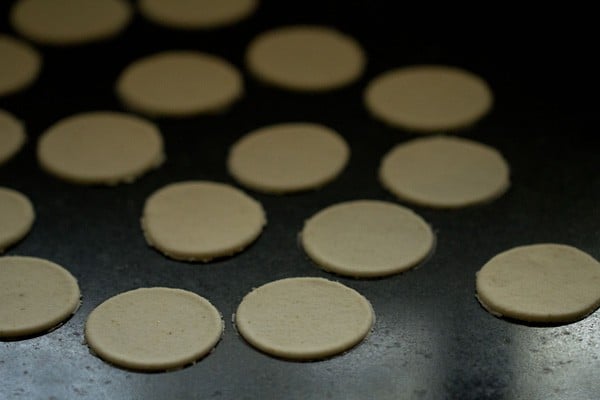
19. Take away the dough edges and place the small roundels on a plate with out them touching one another. Preserve these pooris coated with a moist kitchen towel.
Accumulate the dough scrapes and knead them calmly. Once more roll this dough and make pooris the identical means.
On this means make all of the pooris and hold them coated with a moist kitchen towel. It’s also possible to roll them and fry concurrently like I’ve executed.
Fry Golgappa Puri
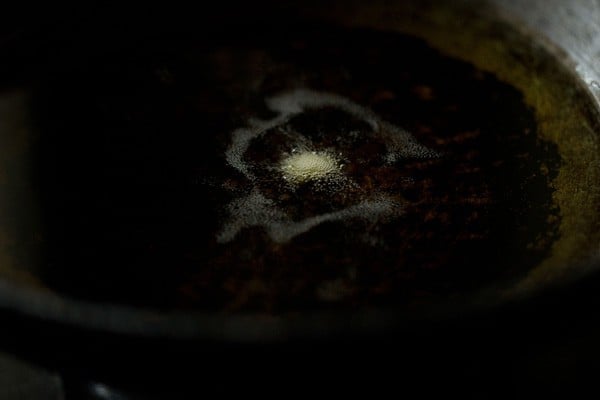
20. Warmth oil for deep frying in a kadai or pan. The oil needs to be medium sizzling. Add a tiny piece of the dough ball to the new oil.
If the ball steadily comes as much as the floor, the oil is sizzling and the pooris might be fried now. Don’t fry them at a low temperature of the oil as this may make the puri soggy with oil.
Frying at a excessive temperature will brown the crust quick however the inside dough might be undercooked and comfortable.
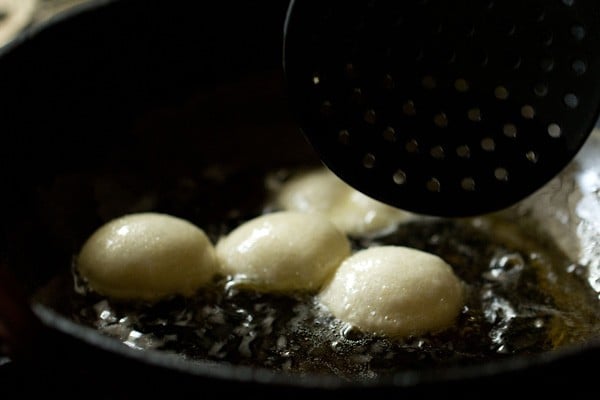
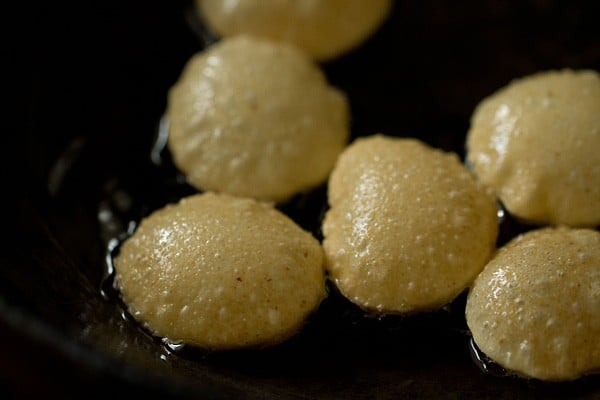
21. Slid a number of pooris within the oil. However don’t overcrowd the kadai.

22. They are going to puff up rapidly as quickly as you add them to the new oil. You possibly can fry as much as 4 to eight items at a time, relying on the dimensions of your pan. Nudge the pooris with the frying spoon in order that they puff up.
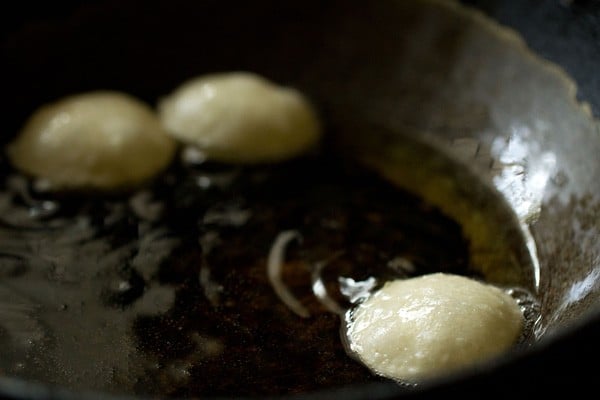
23. With a slotted spoon flip them, as soon as they puff up. Flip a few instances as wanted.
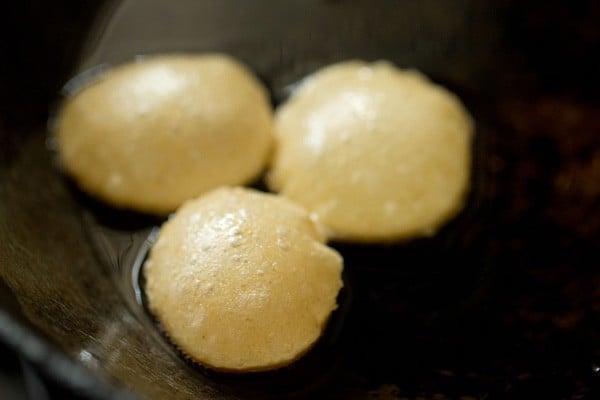
24. Even after oil stops scorching, proceed to fry the pooris until gentle golden or golden. Even after they grow to be golden, hold them within the oil getting fried for a number of seconds, in order that they grow to be crisp.
Frying this manner, provides a crisp texture to the pooris from outdoors in addition to inside. In any other case, they could stay comfortable from the within and crisp from the surface.
25. Drain puris on kitchen paper towels. There might be a number of flat puris too. These you should use to make Sev puri, Bhel puri, chana dal bhel puri or Papdi chaat.
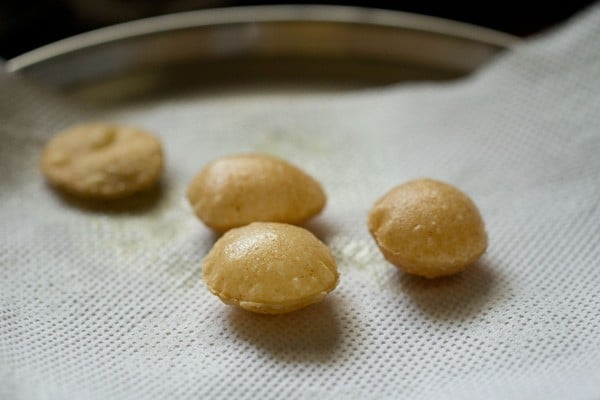
26. Proceed to fry the remaining pooris this manner in batches.
27. Drain puris on paper towels to take away extra oil.
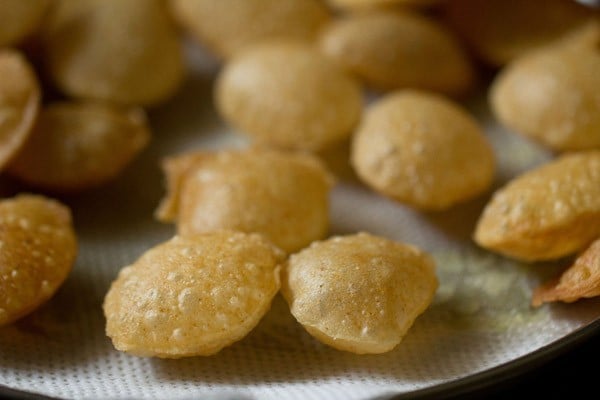
28. As soon as puris get cooled at room temperature, instantly add them to a jar or field and shut the lid tightly.
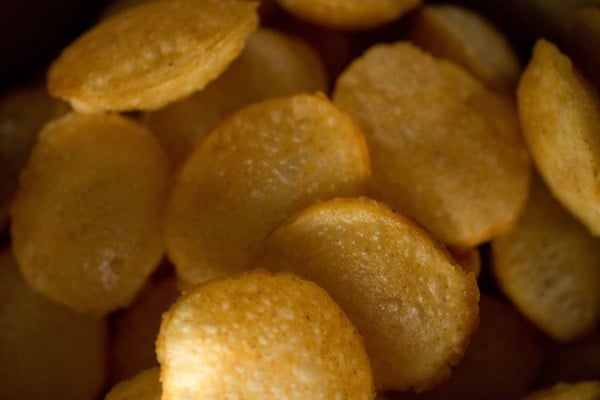
29. An in depth-up photograph exhibiting the crispy texture of the pooris.

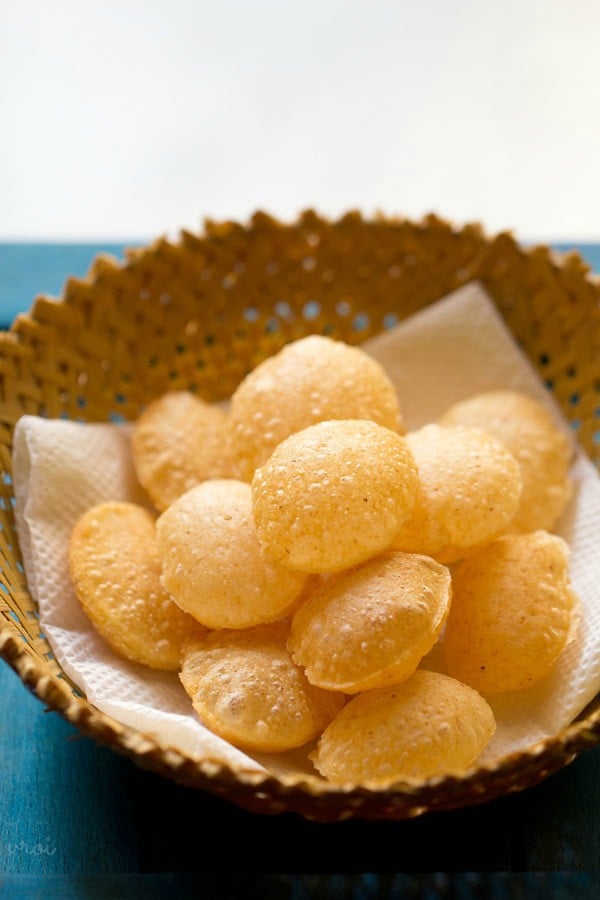
30. Make Pani puri, Dahi puri or ragda puri from these home made puri or golgappas or puchka.

31. You’re going to get 50 to 60 sooji puris from this recipe. They keep crisp and good for a month if saved in an hermetic field or jar.
If in case the crispy texture is misplaced then dry roast the puri in a pan or kadai for some minutes till they grow to be crisp.
Or you may bake them in a preheated oven at 180 diploma Celsius for jiffy until they grow to be crisp. However take care that they don’t get an excessive amount of browned or burnt within the oven. So hold a test when toasting them within the oven.
Should you can scale the recipe relying upon the amount you wish to make.
Knowledgeable Ideas To Make Greatest Golgappa Puri
- At all times cowl the dough with a moist fabric even whereas rolling the puris. If the dough turns into dry, you won’t be able to roll the dough simply.
- Be sure that all of the rolled puris are coated with a moist fabric. If the puris grow to be dry, then the puris is not going to puff up.
- The following tips comes from expertise. Simply earlier than frying take away the damp fabric from the puri.
- You possibly can fry 4 to 7 puris at a time relying upon the dimensions of the kadai.
- Don’t add oil to the dough whereas kneading because the suji ke golgappe will grow to be comfortable later.
- The dough has to semi comfortable with gluten strands fashioned in them. There needs to be elasticity within the dough. These components give a crisp puri. The crispness stays even after the pooris are cooled and even later.
- Refined flour or all-purpose flour (maida) is used for binding the dough. Keep away from including extra flour to the dough. If the dough isn’t binding nicely, then you can add a number of teaspoons extra of flour. However don’t add an excessive amount of.
- The puris need to be skinny. If you don’t roll them thinly, then they received’t puff up nicely and can stay comfortable from inside.
- Fry the puris in a reasonably sizzling oil. If the oil isn’t sizzling sufficient, the puris will take in oil and grow to be soaked in oil. Too sizzling oil, will burn the suji ke golgappe.
When you have made this recipe, please you’ll want to fee it within the recipe card under. Sign Up for my publication or you may observe me on Youtube, Instagram, Facebook, Pinterest or Twitter for extra vegetarian inspirations.

Puri For Pani Puri | Suji Ke Golgappe
These are crispy fried sooji ke golgappe or puri for pani puri and used for making Indian avenue meals snacks like pani poori, dahi poori, sev batata puri, puchka and ragda poori.
Prep Time 15 minutes
Cook dinner Time 30 minutes
Dough Resting Time 30 minutes
Complete Time 1 hr 15 minutes
Forestall your display screen from going darkish whereas making the recipe
Making suji puri dough
In a mixing bowl, take the high quality unroasted sooji or rava or semolina, 1 teaspoon oil, baking soda and salt. Along with your fingers, combine the oil evenly with the sooji.
Now add all function flour to this combination.
Combine once more very nicely in order that the all function flour is combined evenly.
Add 3 tablespoons water first. Combine once more. Then add 1 tablespoon water extra and start to knead the dough. Sooji absorbs water whereas kneading. Add water in components whereas kneading.
Then add 2 tablespoons extra of the water and proceed to knead. The kneading is essential in getting the right texture. The dough isn’t comfortable nor too onerous.
Should you make the dough comfortable, then add 1 to three teaspoon extra of the suji. If the dough seems to be onerous, then add sprinkle some water and proceed to knead.
The suji puri dough needs to be elastic. Gluten strands should be fashioned, which supplies a construction and form to the pooris. The right texture of the dough, additionally assist in puffing puris and helps in them staying crisp.
Knead very nicely. Elasticity helps in rolling the dough with out cracks and thinly. When rolling, the dough ought to roll simply with none cracks. You ought to be simply capable of raise the rolled dough with out it tearing or breaking and falling aside.
Knead to a semi comfortable elastic dough and hold it in a bowl or pan.
Cowl the dough with a moist kitchen towel or serviette and permit the dough to relaxation for half-hour. It’s also possible to hold the dough for an hour.
After half-hour, knead the dough once more.
Assembling and Rolling
Now divide the dough into two or three components. Take one half in your work floor and start to roll. Keep away from including any dry flour whereas kneading. Preserve the remaining dough coated with the moist kitchen towel.
Roll to a big spherical. There needs to be no cracks within the rolled dough. You possibly can flip all the rolled dough with out it breaking or tearing aside.
Carry on rolling to a skinny and even spherical. The puri need to be thinly rolled. If not skinny, the bottom turns into thick and stays comfortable even after frying. If the dough isn’t rolled evenly, then the puri will not puff up.
Making Suji Ke Golgappe
With a cookie cutter or a small bowl, lower small to medium discs from the rolled dough. Utilizing a cookie cutter provides even form and measurement to the pooris. It’s also possible to make small balls and roll them. However then the puri will not have a fair and uniform form.
Take away the dough edges and place the small roundels in a plate with out them touching one another. Preserve these puris coated with a moist kitchen towel.
Accumulate the egdes and knead them calmly. Roll the sides too and make puris the identical means.
On this means make all of the puris and hold them coated in a moist kitchen towel. It’s also possible to roll them and fry concurrently like I’ve executed.
Frying Suji Puri
Warmth oil for deep frying in a kadai or pan. The oil needs to be medium sizzling. Add a tiny piece of the dough ball within the sizzling oil. If the ball steadily comes as much as the floor, the oil is sizzling and the pooris might be fried now.
Slid a number of pooris within the oil. They are going to puff up rapidly as quickly as you add them to the new oil. You possibly can fry as much as 4 to eight items at a time, relying on the dimensions of your pan.
With a slotted spoon flip them, as soon as they puff up. Even after oil stops scorching, proceed to fry until gentle golden. Frying this manner, provides a crisp texture to the pooris from outdoors in addition to inside. In any other case, they continue to be comfortable from inside and crisp from outdoors.
Fry them until they’re a lightweight golden or golden.
Drain fried puri on kitchen paper towels. There might be a number of flat puris too. These you should use to make sev puri or papdi chaat. Proceed to fry all of the pooris this manner.
Drain them on paper towels.
As soon as they get cooled at room temperature, instantly add puris to a jar or field and shut the lid tightly.
Make pani puri, dahi puri or ragda puri or puchka from these home made pooris or golgappas. You’re going to get 50 to 60 pooris from this recipe. They keep crisp and good for a month if saved in an hermetic field.
- Fry the puri at medium temperature of the oil. You possibly can hold the warmth to medium to medium-high whereas frying. Don’t fry at low temperature or excessive temperature. Regulate the warmth as wanted.
- Knead the dough very nicely till you get a semi-soft elastic dough.
- The rava needs to be recent and inside its shelf interval. Use high quality textured rava.
- You possibly can simply halve or double the recipe in accordance with your wants.
- Observe that the approximate diet information is for 1 golgappe ki puri.
Vitamin Information
Puri For Pani Puri | Suji Ke Golgappe
Quantity Per Serving
Energy 21 Energy from Fats 9
% Each day Worth*
Fats 1g2%
Saturated Fats 1g6%
Polyunsaturated Fats 1g
Monounsaturated Fats 1g
Sodium 19mg1%
Potassium 5mg0%
Carbohydrates 3g1%
Fiber 1g4%
Sugar 1g1%
Protein 1g2%
Vitamin B1 (Thiamine) 1mg67%
Vitamin B2 (Riboflavin) 1mg59%
Vitamin B3 (Niacin) 1mg5%
Vitamin B6 1mg50%
Vitamin E 1mg7%
Vitamin Okay 1µg1%
Calcium 25mg3%
Vitamin B9 (Folate) 4µg1%
Iron 1mg6%
Magnesium 2mg1%
Phosphorus 9mg1%
Zinc 1mg7%
* % Each day Values are primarily based on a 2000 calorie eating regimen.
This Suji Ke Golgappe recipe put up from the weblog archives first printed in July 2010 has been republished and up to date on 8 January 2022.
Source link


