
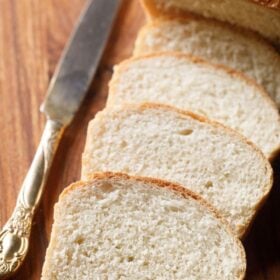
Home made bread is fluffy, tender, and means higher than store-bought loaves. It’s remarkably simple – and enjoyable! – to make with only some easy components. Do this foolproof white bread recipe with step-by-step directions and video and also you’ll probably by no means wish to purchase bundle bread once more.
Why this Bread Recipe Works
I really like baking breads at house. The entire course of – from making the dough from scratch, kneading together with your fingers, patiently letting it rise and baking – is terrifically enjoyable but thrilling on the similar time.
Every loaf is barely completely different however brings such pleasure, each to bake and to eat. And there’s simply nothing higher than sharing heat, mushy slices of do-it-yourself bread with your loved ones and buddies…Like handing them a bit of your love!
This simple lean bread recipe is nice for customizing with further components. If you would like you’ll be able to add some milk for a softer bread (particulars within the recipe).
You may as well make it into candy bread by including additional sugar; or bakes a savory white bread by including herbs and spices.
Under are steps and photographs for making a superbly fluffy and tender primary loaf of white bread. Give this straightforward do-it-yourself bread recipe a try to you’ll probably fall in love, too.

Important Ideas For Any Bread Recipe
Whereas it’s a quite simple course of to make bread from scratch, there are just a few key factors to remember whenever you make any bread recipe. It’s good to comply with these professional ideas to make sure your loaf is ideal in each means, each time:
- Purchase high quality components. The most effective, most scrumptious bread is made with the perfect components accessible. Go for high-quality flour and yeast, and ensure all components are inside the expiration dates. For white breads like these, I like to recommend unbleached all-purpose flour or bread flour, ideally natural.
- Use heat water. The dry energetic yeast must be handled simply rise for the proper rise. Meaning it must be dissolved in water that’s neither scorching nor chilly however is someplace within the heat 110-115 diploma Fahrenheit (43-46 levels Celsius). If the water is simply too chilly it received’t activate the yeast, and whether it is too scorching it can prepare dinner the yeast and depart it inactive.
- Kneading: Keep in mind to knead your dough properly. If kneading by hand, then spend at-least 10 minutes doing so. The dough has to move the windowpane take a look at. Take a small portion of the dough and flatten, stretch, unfold it into a skinny layer. It mustn’t tear or break. You must be capable of see via it very similar to you see via a windowpane.
- Be affected person. There can be some intervals of resting and ready whereas the dough rises and the loaf bakes. Keep away from the urge to hurry and you can be rewarded with the fluffiest and most tender do-it-yourself bread.
- Have enjoyable. Baking bread is all about bringing some heat and happiness to the home. Bread made with love – or any dishes made with love – merely tastes the perfect.
See? Easy. When you excellent the straightforward, joyful artwork of baking recent white bread at house I promise you received’t need retailer purchased loaves once more!

Step-by-Step Information
How one can make Home made Bread
Proofing the yeast
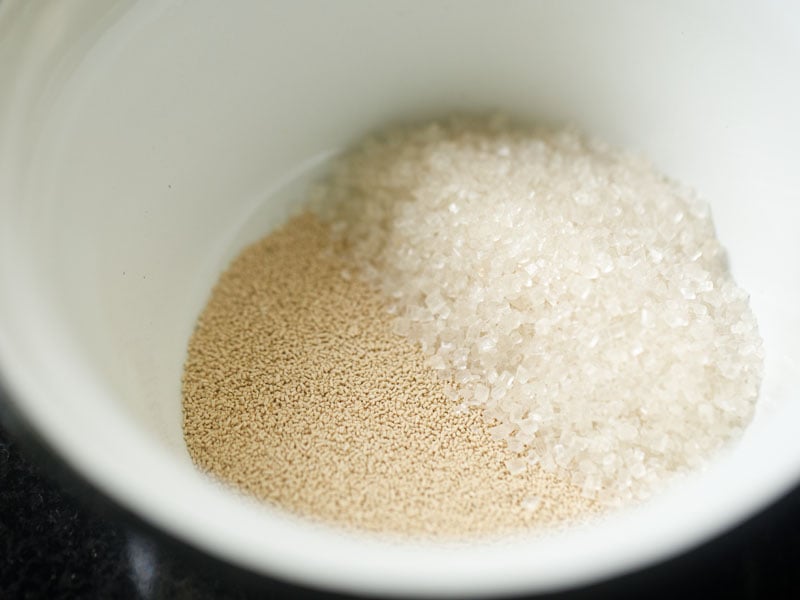
1. Take 1 teaspoon on the spot yeast (speedy rise yeast) or 1.5 teaspoons dry energetic yeast or 1 tablespoon recent yeast and 1 tablespoon sugar in a small bowl.
NOTE: I’ve used on the spot yeast which could be straight added to the flour. However I’m activating it in heat water simply for instance to you the tactic of utilizing dry energetic yeast or recent yeast – which at all times must be activated.
2. Add 1 cup of lukewarm water. Be sure that the water is just not scorching or chilly. The temperature of water must be 41 levels Celsius (105 to 106 levels Fahrenheit). Combine it properly.
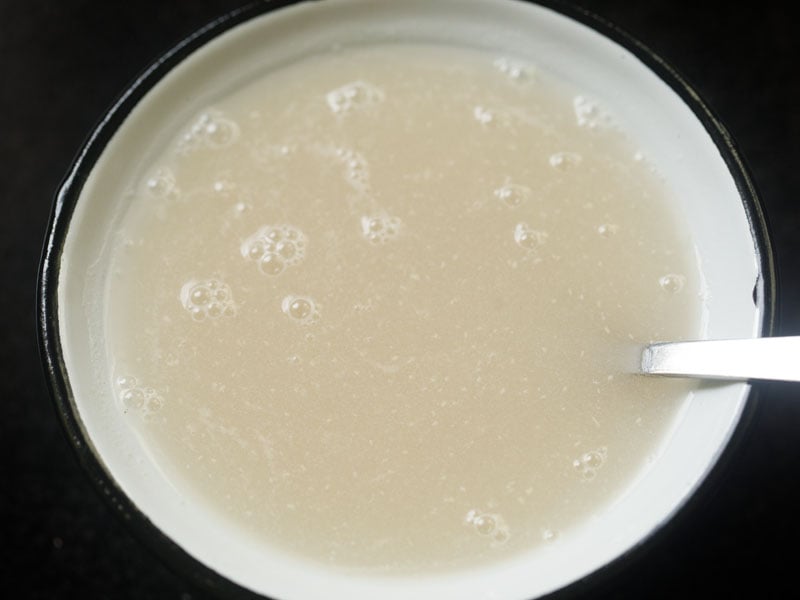
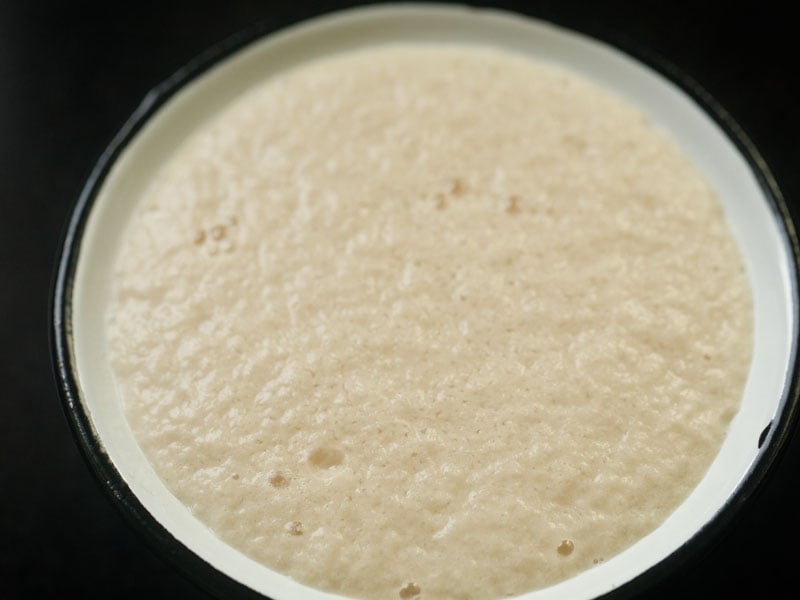
3. Hold in a heat place till the yeast turns into frothy. For fast yeast preserve for five minutes and for dry energetic yeast preserve for 10 to fifteen minutes.
Forming Dough
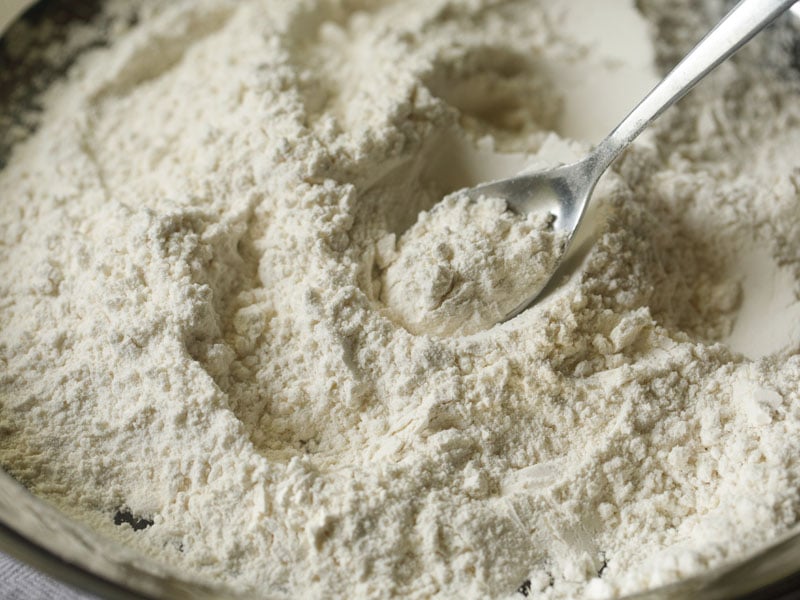
4. Within the meantime take 3 cups of all-purpose flour or bread flour – unbleached or natural (360 grams) and 1 teaspoon salt in a big tray or board or a big bowl. You may as well use a stand mixer for kneading dough.

5. Combine properly. You’ll be able to sift the flour with salt in the event you favor.
6. Add 1 tablespoon oil – any impartial oil or olive oil. Oil could be swapped for 1 tablespoon butter (dairy or vegan).
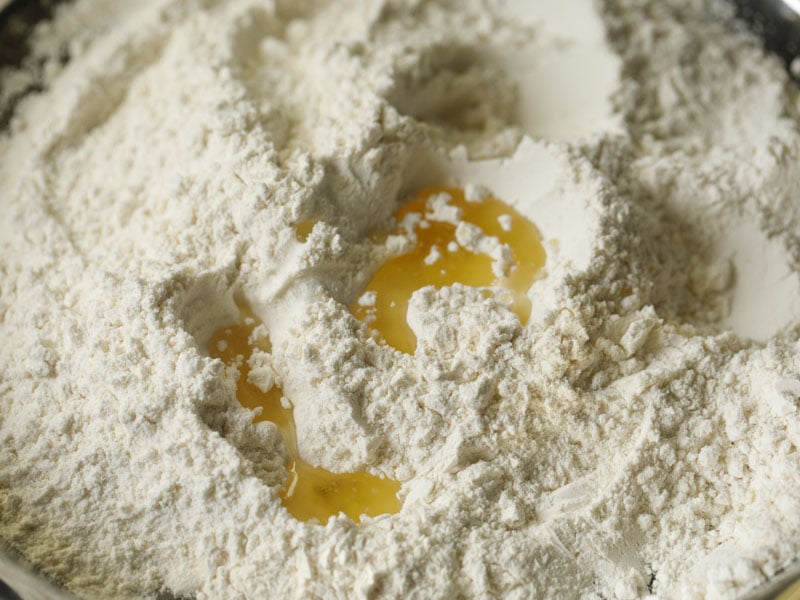
7. Add the frothy bubbly yeast combination to the flour.

8. Combine with a wood spoon and you will notice that the dough turning into sticky.

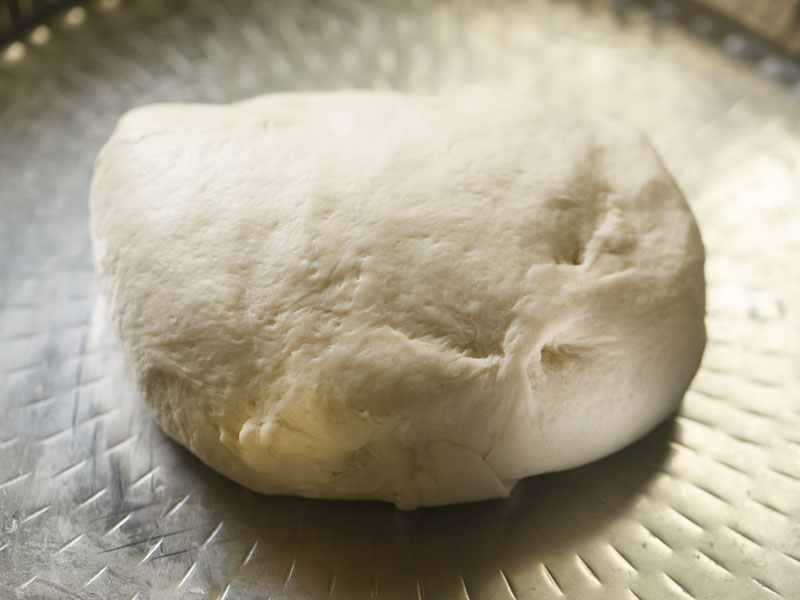
9. Now begin kneading the dough for atleast 8 to 10 minutes or till you get a mushy easy, pliable and light-weight consistency.
TIP: If the dough turns into sticky add some flour – combine and knead. If the dough seems floury or dry add just a few tablespoons of lukewarm water and knead. Bread flour will want a bit extra water than all-purpose flour.

Leavening Dough (First Rise)
10. Cowl your bread dough loosely with a big bowl or a kitchen serviette and preserve at room temperature to leaven. I used the identical plate by which I kneaded the dough. You’ll be able to brush some oil on the dough previous to leavening it.
- For fast yeast – leaven dough for 45 minutes to 1 hour.
- For dry energetic yeast or recent yeast– preserve for 1.5 to 2 hours.
TIP: A terrific thought which I comply with fairly often is to leaven the dough utilizing the yogurt settings of your Instantaneous Pot. It really works like a appeal and so useful on colder days.

11. After 45 minutes my dough has doubled superbly.

12. Now grease or brush a loaf pan with oil. On a calmly floured floor, calmly knead the dough. This can deflate the dough.
Shaping right into a Loaf
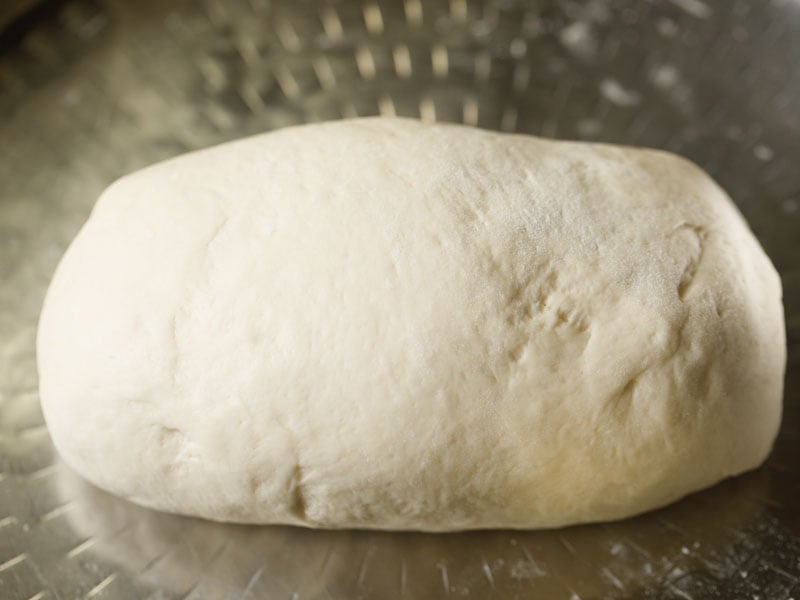
13. Flatten the dough together with your fingers to a spherical or sq. form. Then start to roll it.
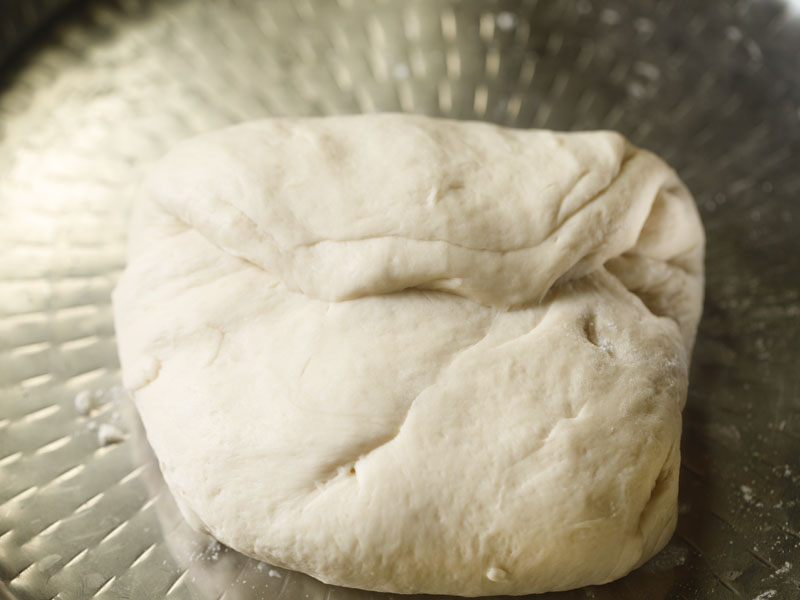
14. Make a neat rolled dough.
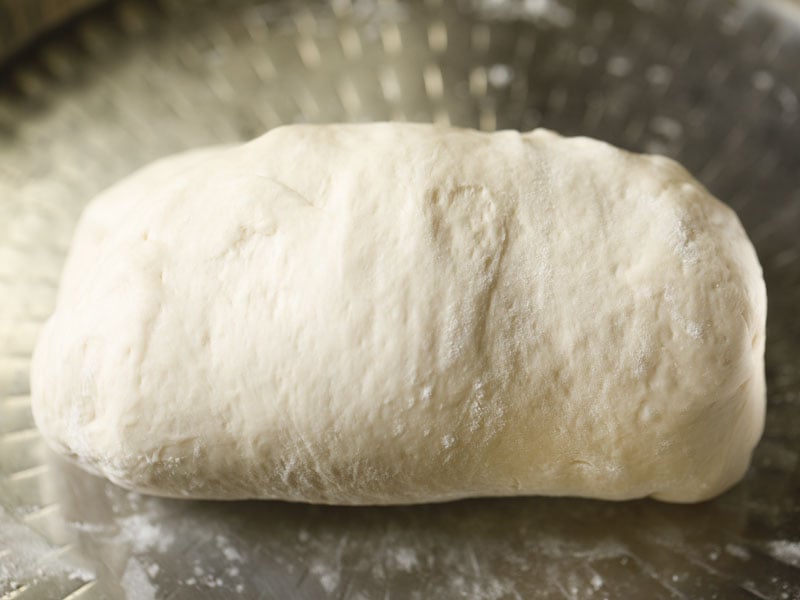
15. The place the place the sides meet, be part of them first. Then press, flatten and smoothen them together with your fingers. Smoothen the perimeters of the loaf as properly.
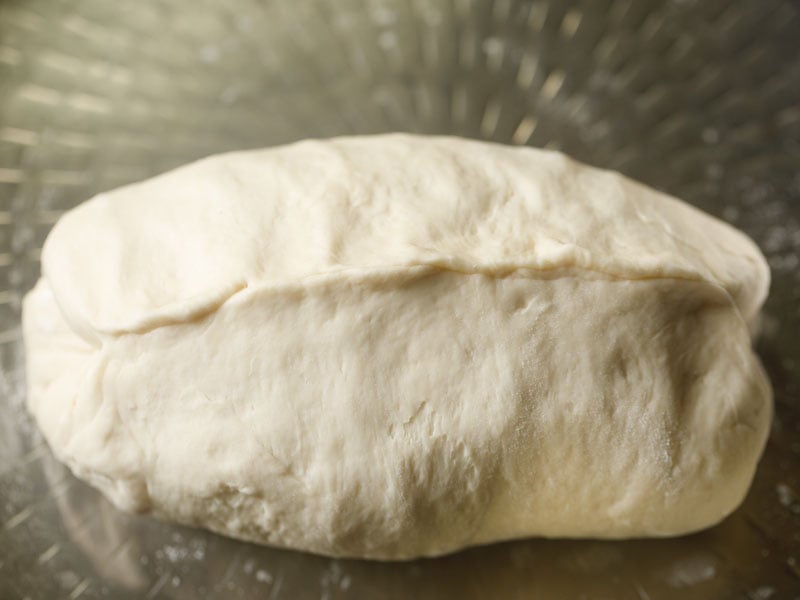
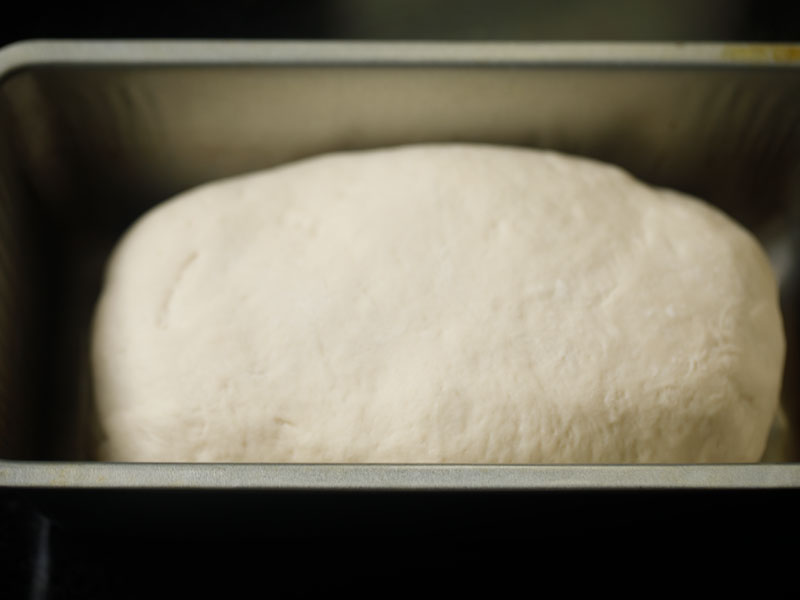
16. Your loaf is prepared for the second rise.
Second Rise
17. Place it within the loaf pan with the seamed joined edges touching the underside of the pan.
18. Cowl the loaf pan with a kitchen towel. Hold it in a heat place.
- If in case you have used on the spot yeast – leaven for 20 to half-hour.
- For dry energetic yeast or recent yeast – put aside for 45 minutes to 1 hour.

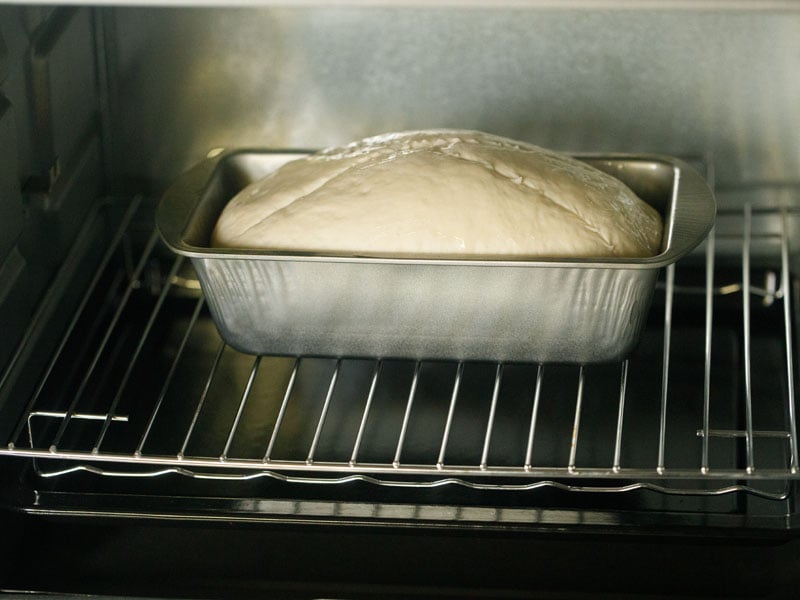
19. The loaf will rise in quantity. Keep in mind to preheat your oven 20 minutes previous to baking. Preheat at 190 levels Celsius (375 levels Fahrenheit).

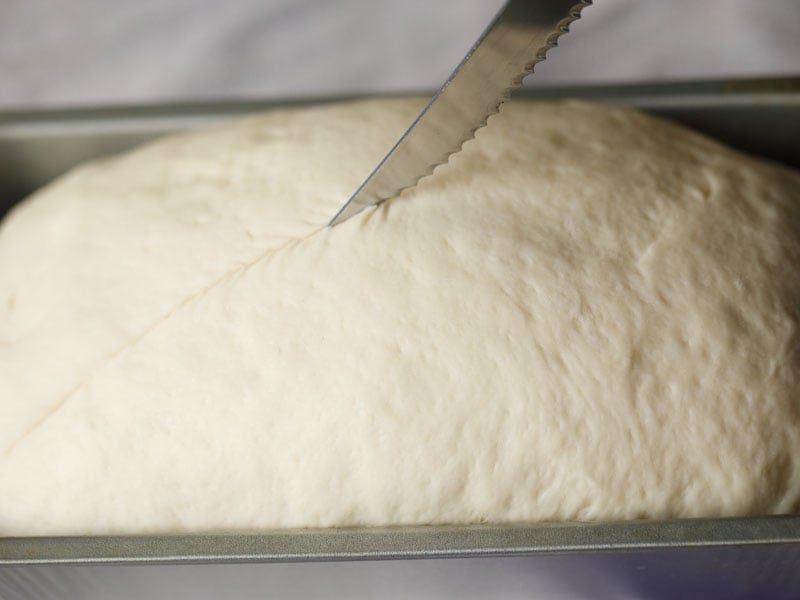
Scoring
20. With a small serrated knife or any sharp knife or a lame, make one lengthy slash or two slashes lengthwise on the middle of the dough about ¼ inch deep.
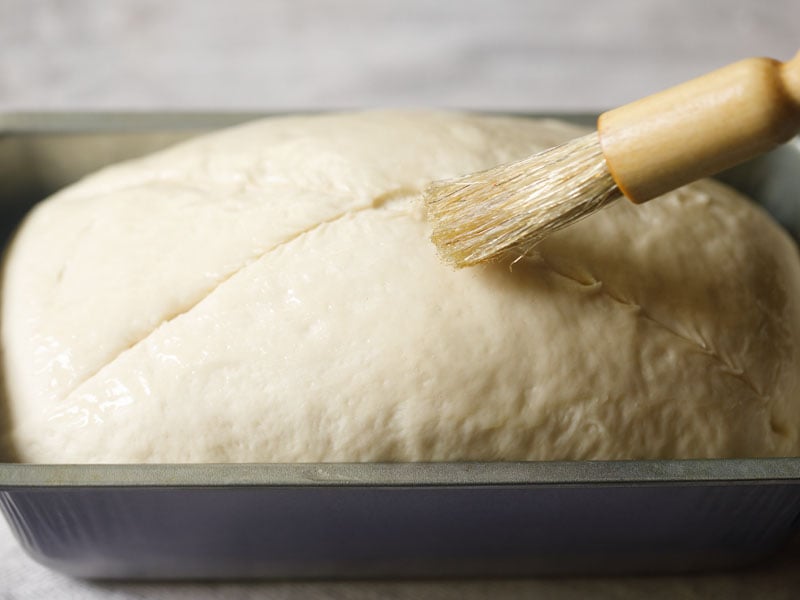
21. Brush the floor with some milk (dairy or vegan). That is an elective step.
Baking
22. Place the loaf pan within the preheated oven. Bake for 30 to 40 minutes at 190 levels Celsius (375 levels Fahrenheit) till the loaf is golden brown. Additionally, you will see the perimeters barely separated from the pan.
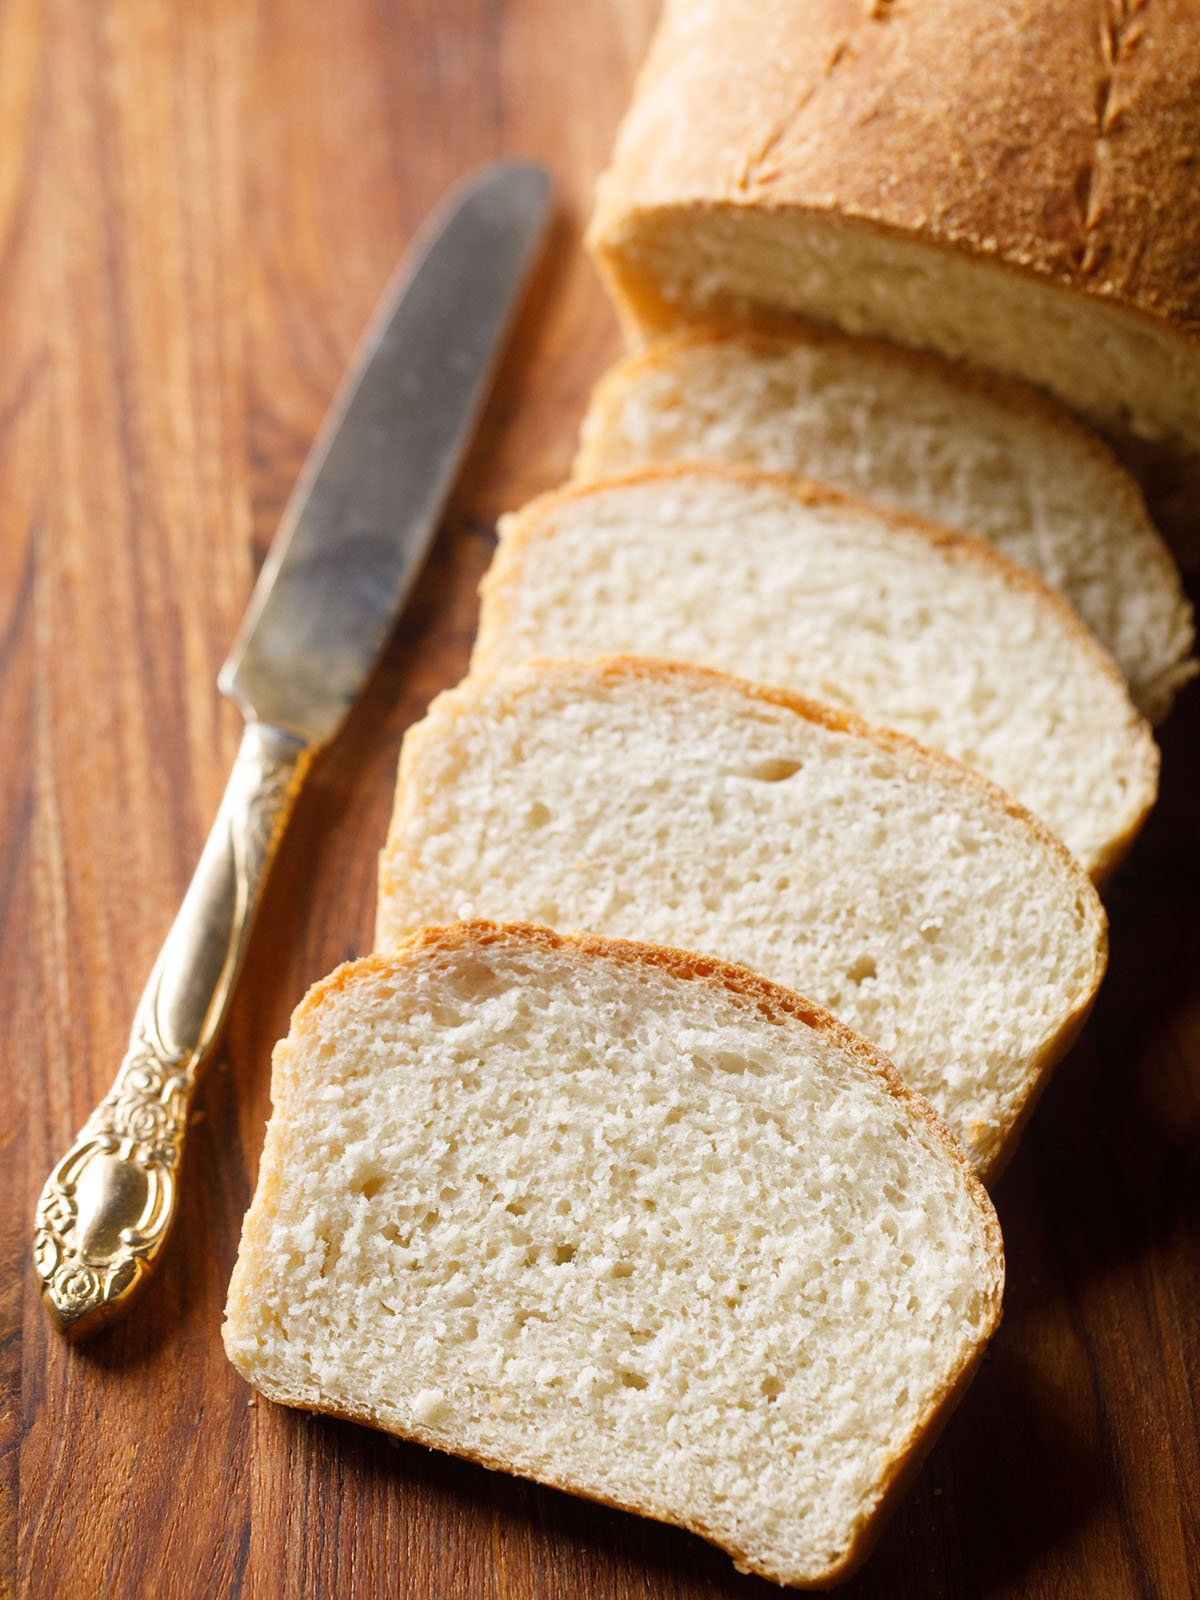
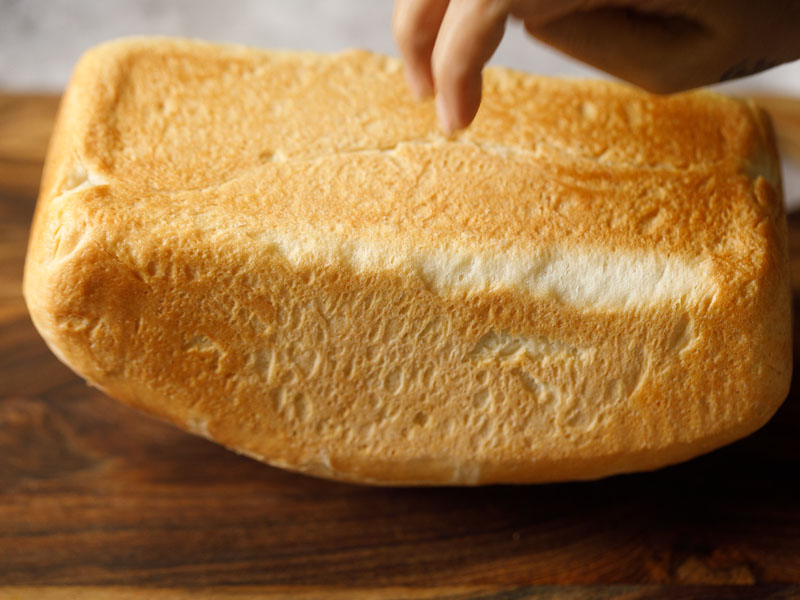
23. Within the photograph beneath, you see a stunning loaf of a properly baked do-it-yourself bread. In case your oven browns the floor in a short time, place a parchment paper or aluminium foil on the highest of the loaf midway via the baking – in order to keep away from extra browning.

24. Await 3 to 4 minutes after the bread is out of the oven. Firstly faucet the bread and it ought to sound hole – which signifies that the bread is baked properly.
If the bread doesn’t sound hole, preserve it again within the oven to bake for some extra minutes.
That is an elective step and you may give it a miss. Keep in mind the bread is scorching and so is the pan. Use oven gloves or thick kitchen towels to take away the bread from the pan.
Elevate one finish of the white bread to examine for a good browning on the backside. If the underside of the loaf is pale, then preserve it straight within the oven (with out the pan) for five extra minutes and bake.
25. Switch the loaf from the pan instantly and preserve it on a wired rack. When you preserve it contained in the pan, the underside will get soggy. Let the loaf cool at room temperature on the wired rack or tray.

26. Take pleasure in do-it-yourself bread together with your favourite curry or soup or simply making considered one of your favourite sandwiches or toast.

Serving Recommendations
Take pleasure in slices of heat, freshly baked white bread plain or with a smear of sentimental butter or calmly toasted in ghee.
Serve toasted bread with jams or topped with slices of avocado, or a tablespoon of peanut butter or most popular nut butter for a yummy snack.
Home made bread is nice for making sandwiches – the one restrict is your creativeness! Take a look at my assortment of 40 Best Sandwich Recipes for some concepts to get began.
Storage
Place the bread in a bread field or a lined field and refrigerate for per week. At room temperature, it retains properly for two to three days. You may as well freeze it for a few months. Thaw earlier than utilizing or defrost it within the fridge in a single day.
Ideas
Useful Ideas
- Variations: You’ll be able to divide the dough into elements and make dinner rolls. Add some herbs (recent or dried) to make a aromatic herb bread. Substitute water with milk (dairy or vegan) for a milk bread. Embody some extra sugar or nuts, berries, dry fruits for a candy bread.
- Kneading: You’ll be able to knead the dough with fingers as I’ve finished. If in case you have a meals processor or a stand mixer, then knead the dough in these.
- Baking: Since no two ovens are the identical, it will possibly take much less or extra time for the bread to bake in your oven. If the highest floor of the bread browns shortly in your oven then place an aluminum foil or parchment paper on the highest. This stops the bread from getting browned extra.
- Yeast conversion: Make this bread recipe simply with any sort of baking yeast that you’ve. Comply with this yeast conversion: 1 teaspoon on the spot yeast = 1.5 teaspoon energetic dry yeast = 1 tablespoon recent yeast.
- Scalable recipe: Make a big batch of two to three loaves by simply scaling this recipe.
FAQs
To maintain the bread mushy I like to recommend that you just retailer in an hermetic bag or a bread field and preserve at room temperature for as much as 2 to three days.
Sure, white bread is nice for freezing. Place in an hermetic bag or a lined container and retailer within the freezer for as much as 2 to three months. Permit the bread to defrost within the fridge in a single day earlier than having fun with.
Divide the dough into equal elements and bake for particular person dinner rolls or Pav.
Substitute all-purpose flour together with your favourite gluten free substitute for a straightforward GF-friendly white bread recipe.
Extra Bread Recipes You Can Attempt!
When you made this recipe, please be sure you fee it within the recipe card beneath. Sign Up for my e mail e-newsletter or you’ll be able to comply with me on Instagram, Facebook, Youtube, Pinterest or Twitter for extra vegetarian inspirations.
By Dassana Amit
Home made bread is fluffy, mushy and so a lot better than store-bought loaves. Do this foolproof white bread recipe with step-by-step directions and also you’ll merely like it.
Prep Time 1 hr 15 minutes
Prepare dinner Time 35 minutes
Whole Time 1 hr 50 minutes
Servings 12 bread slices
Forestall your display screen from going darkish whereas making the recipe
This bread recipe put up from the weblog archives (April 2012) has been republished and up to date on 23 August 2021.
Source link


