

Medu Vada are crispy, fluffy, tender and scrumptious lentil fritters from the South Indian delicacies. If candy breakfast isn’t your factor, do that recipe for savory spiced donuts made with black gram lentils and fragrant spices. Historically paired with Sambar and Coconut Chutney, these make for a comforting, filling and satisfying breakfast or snack.
About Vada
The time period “vada” refers to fritters comprised of deep frying both lentil batter or a vegetable stuffing encased inside a lentil batter.
Within the Indian delicacies, we now have myriad sorts of vada. All of them have totally different recipes and strategies of preparation. The lentils are soaked after which floor to make a batter. In some variations like Batata Vada the batter is comprised of dry gram flour reasonably than complete lentils.
Whereas the time period vada is commonly used interchangeably with medu vada, it ought to be famous that medu vada is a part of the vada household, however not all vada are medu vada. Instance this Dal Vada made with a spiced, savory chana dal batter.
About Medu Vada
Medu vada is one in every of my favourite snacks of all time. I beloved them as a child, they usually clearly stand up to the check of time as a result of they’re nonetheless one in every of my most beloved dishes. I really like most South Indian snacks as a result of they remind me of my rising up days.
NOTE: Need extra scrumptious South Indian breakfast tiffin recipes? Strive my Rava Dosa, Idli or Masala Dosa!
Medu vada are basically savory donuts made with black gram, herbs, coconut and spices. The phrase medu means tender and vada means fritters in Kannada language. This specific kind of fritter is also called:
- Urad Dal Vada in Hindi
- Garelu in Telugu
- Uzhunnu Vada in Malayalam
- Uddina Vada in Kannada
- Medhu Vadai, Ulundu Vadai in Tamil
The hero ingredient right here is urad dal (skinned black gram), however the herbs and spices additionally add a savory and spicy high quality to those fritters that’s completely addictive. The hotel-style medu vada additionally contains onions, which lend a beautiful sweetness.
NOTE: In case you are making these for teenagers, you may contemplate including further veggies like grated carrots, shredded cabbage, or grated beetroot to sneak in slightly further vitamin. Hidden greens are nonetheless greens!
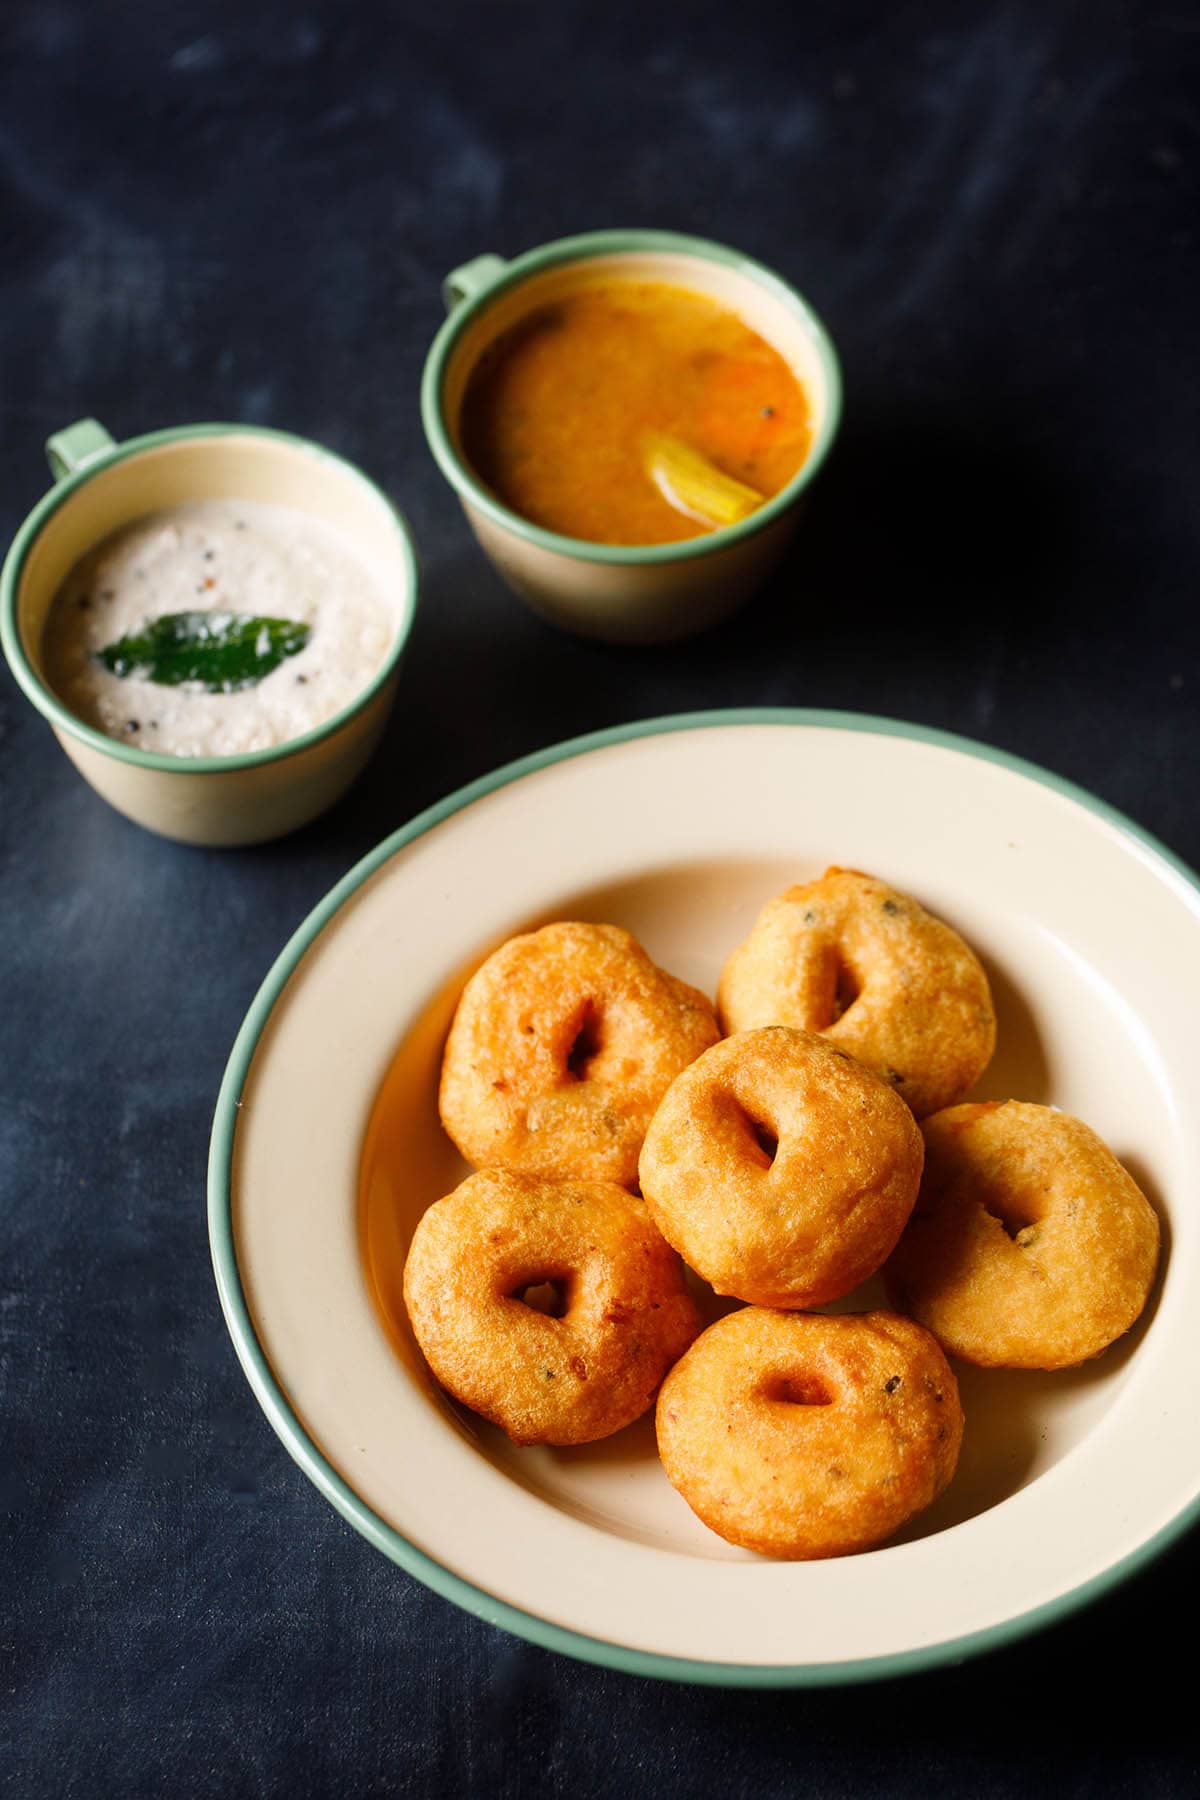
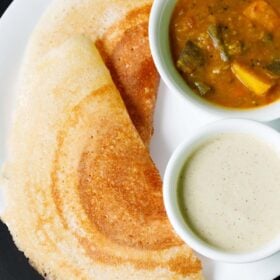
I particularly like serving the crispy, fluffy medu vada the normal manner: dunked in scorching sambar with coconut chutney by the aspect. This common, satisfying meal that can also be known as sambar vada with coconut chutney may be very well-known throughout India. It tastes superior, so is beloved by many.
Each time I make medu vada, I am going the additional size to make sambar. When you’re free to serve them with solely coconut chutney, vada sambar is a kind of joyful meals that carry up many fantastic reminiscences. Don’t you agree? NOTE: You’ll be able to take pleasure in piping scorching vada with any number of Sambar.
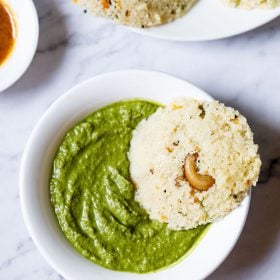
However if you’re pressed for time, merely serve with coconut chutney, mint coriander chutney or tomato ketchup. You could possibly additionally use any savory or spicy dip of your selection. Keep in mind that medu vada are fritters, in order that they’re going to style scrumptious it doesn’t matter what!
Mastering this traditional Medhu Vadai recipe does take time and a few expertise. Making the doughnut form from the batter is essentially the most tough step. To not fear: I additionally struggled with it in my earlier days of cooking! Beneath I share all my ideas and methods that I’ve discovered over time. I hope you take pleasure in making them as a lot as I do.
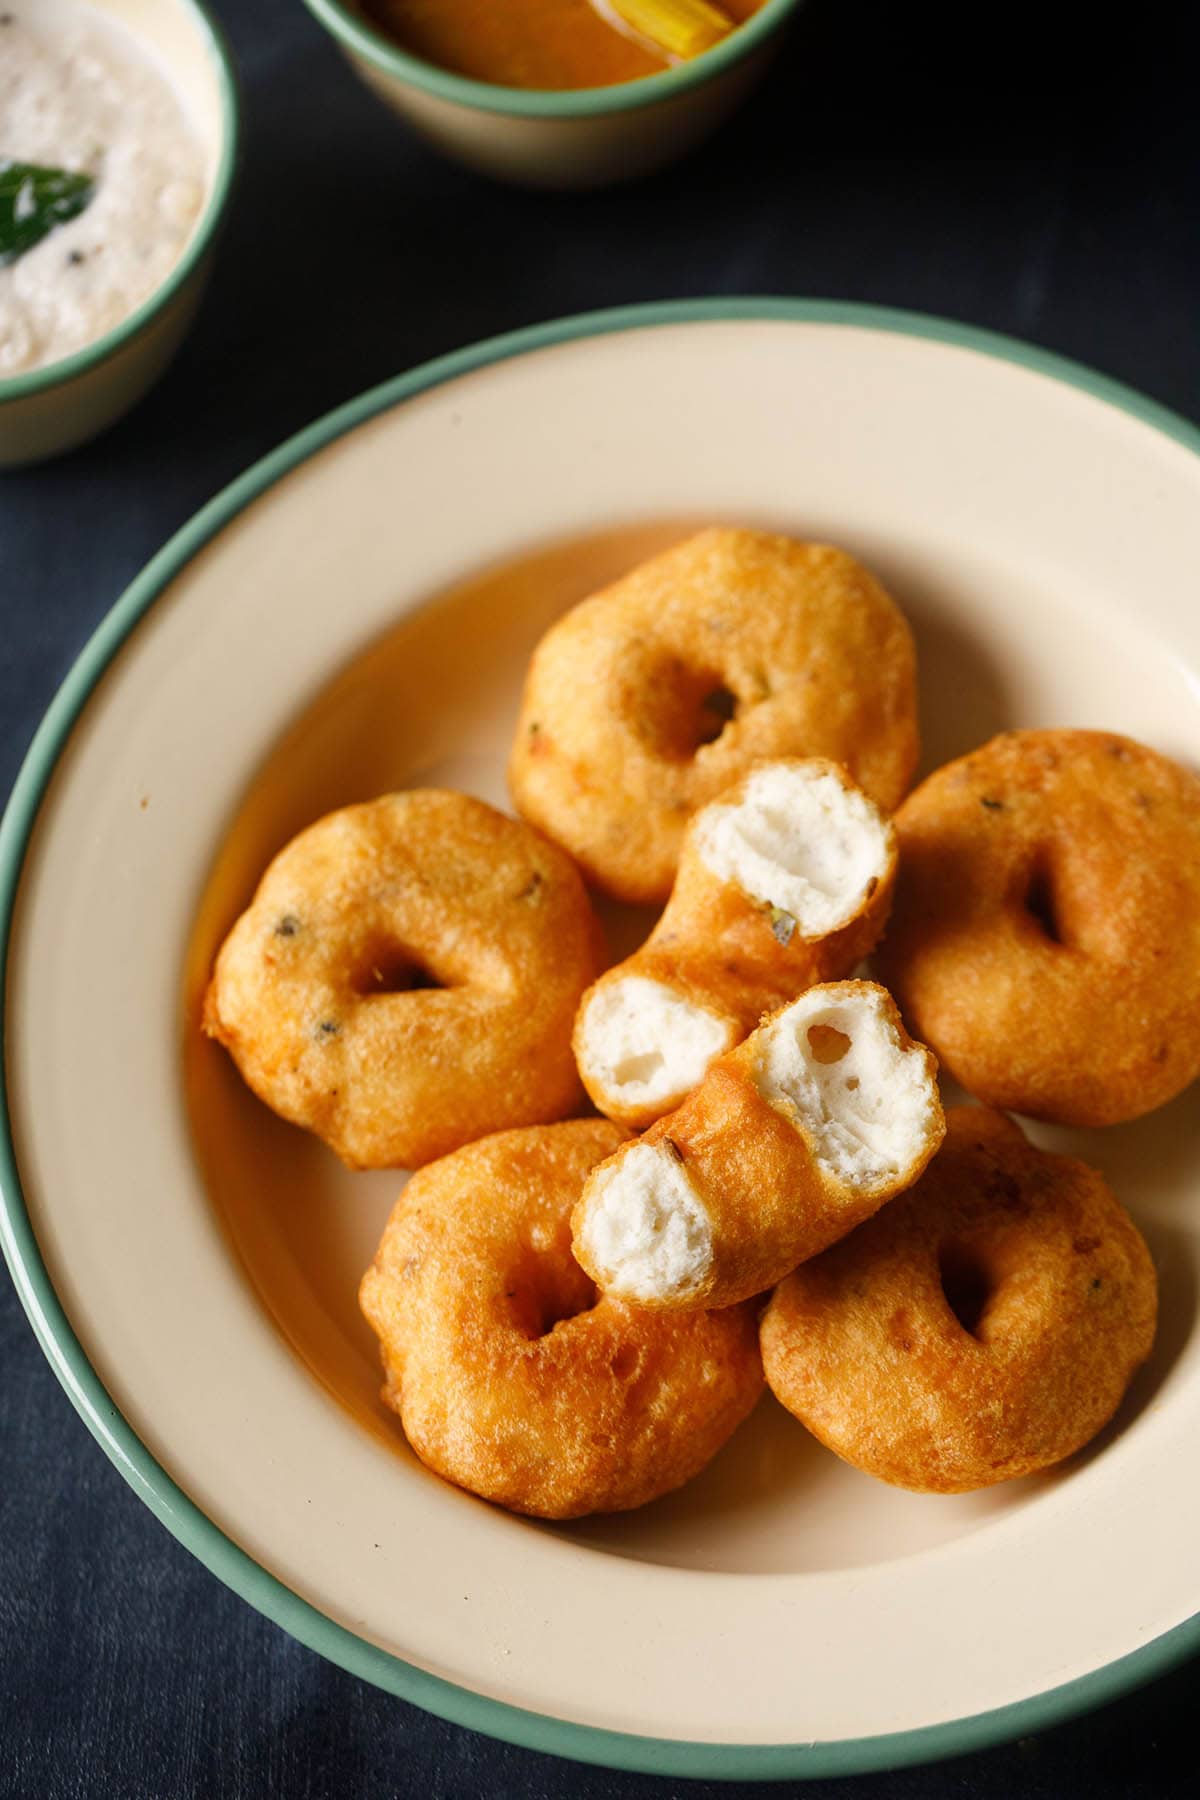
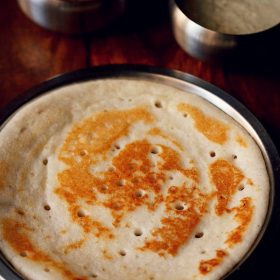
Are you able to make the very best vada recipe with a lightweight, porous texture inside and crispy on the skin? Simply check out the photograph beneath. Isn’t the feel extremely fluffy and tender like a cloud? Yum!
Come together with me within the kitchen and I’ll present you the way to make this traditional South Indian snack with simple to observe step-by-step photographs.
Step-by-Step Information
The way to make Medu Vada
Preparation for Vada Recipe
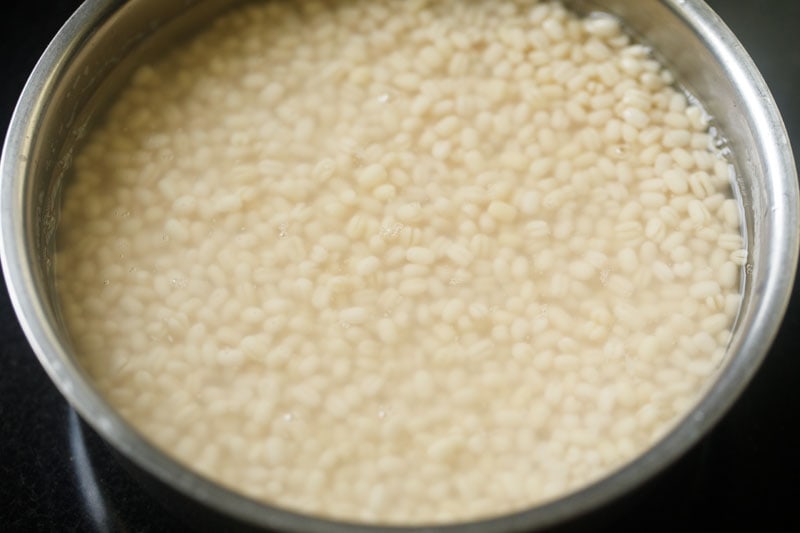
1. Rinse 1 cup urad dal (husked and cut up or complete black gram) a number of instances in water. Then soak the lentils in 2.5 to three cups water for a minimum of 4 to five hours or as much as in a single day.
Ideally use unpolished urad dal to make this vada recipe.
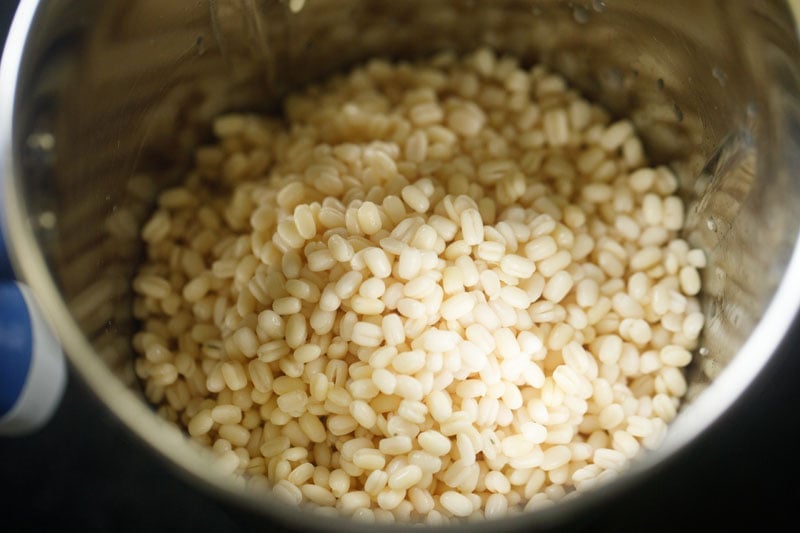
2. Drain and discard the water. Add the soaked urad dal to a grinder jar. Add 3 to 4 tablespoons contemporary water or as wanted. Simply be certain to not make the batter too skinny!
Don’t add an excessive amount of water whereas grinding. The batter ought to be like a tender moist dough however but gentle and fluffy.
It ought to find yourself wanting like a cake batter reasonably than a crepe batter. I like to recommend mixing in steps and including water as wanted to realize the fitting consistency.
Grinding or Mixing Lentils
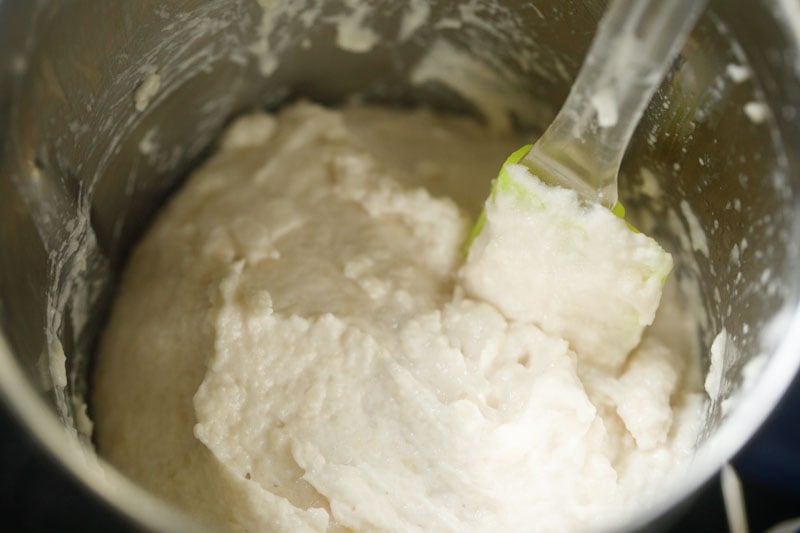
3. Start to grind or mix the urad dal to a easy batter. The batter ought to be fluffy and thick.
You’ll be able to grind in two batches or one lot relying on the capability and measurement of your blender or mixer-grinder.
Scrape down the edges of the blender as you go to make sure all of the lentils will get blended to a uniform consistency.
4. Proceed to grind at intervals by scraping the edges with a spatula. In case your mixer or grinder turns into scorching, then look forward to a couple of minutes till it cools down.
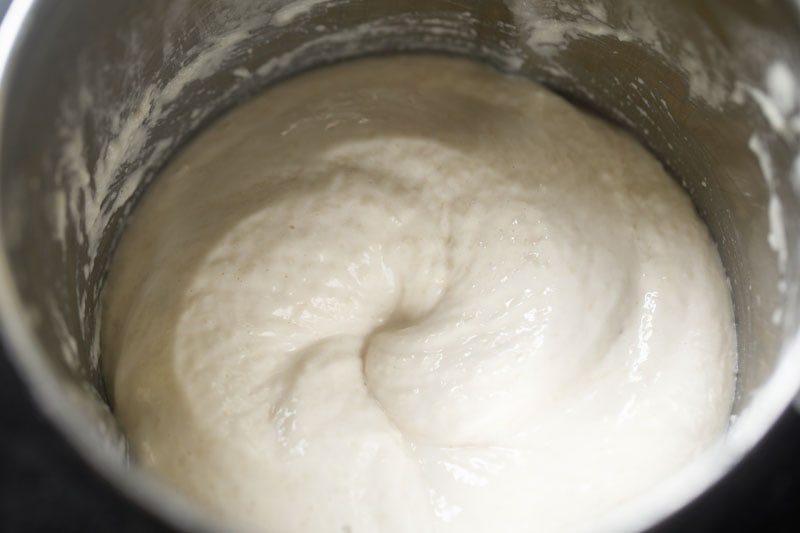
5. Proceed to grind or mix till you obtain a easy, fluffy batter. Keep in mind there ought to be no superb grits or chunks of urad dal within the batter.
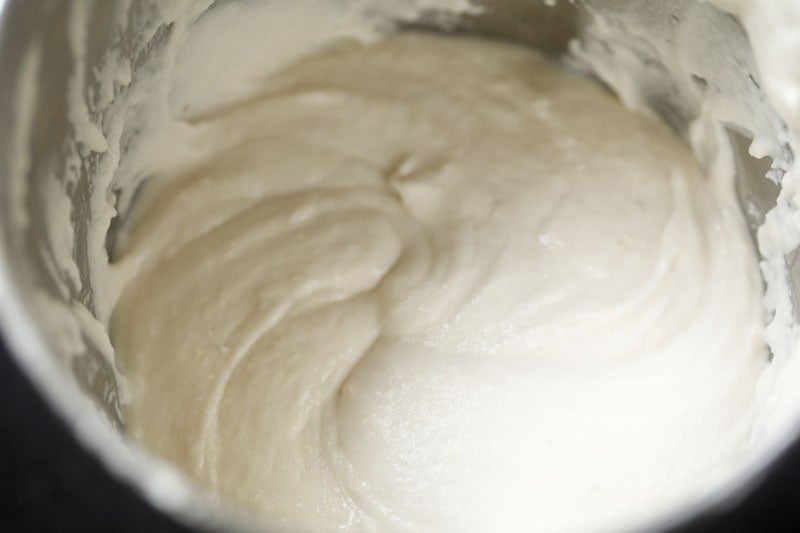
6. Take away the batter into a giant bowl or vessel. Then briskly whip with a spatula, spoon or a wired whisk for two to three minutes. This aerates the batter and provides it a lightweight, fluffy texture.
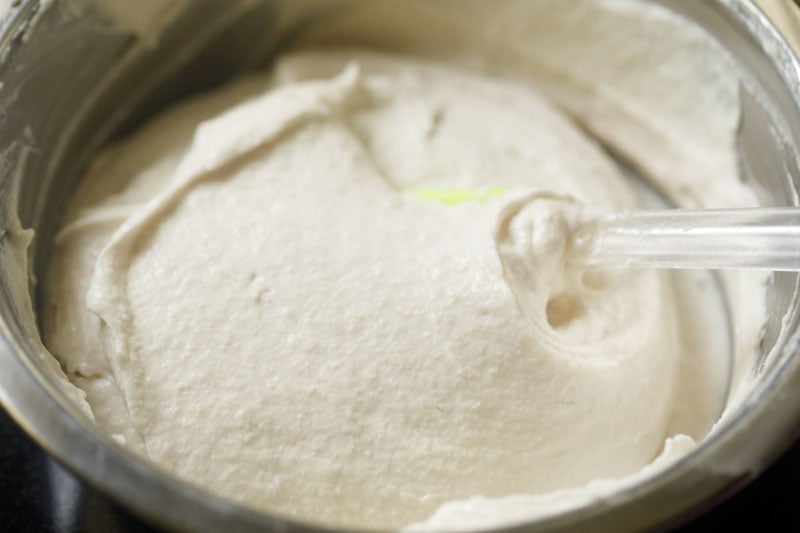
7. Within the beneath photograph you see the vada batter that has been aerated by constantly whisking it for jiffy.

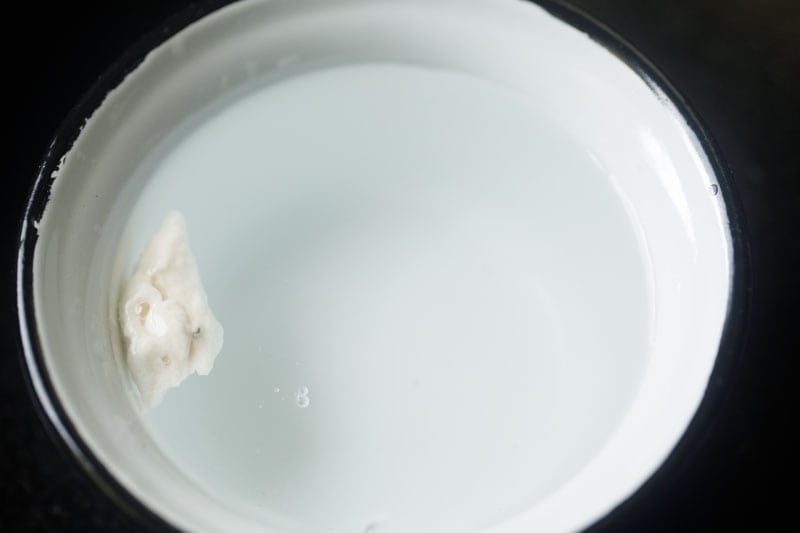
8. A fast technique to verify the right and proper consistency of the batter is so as to add a small spoon of it in a bowl of water. The batter ought to float and stay intact. If it floats and doesn’t get dissolved, then you may have achieved the fitting consistency.
If it sinks, which means your batter shouldn’t be fluffy sufficient (with not sufficient air bubbles trapped in it) or is simply too skinny.
If the batter is simply too skinny, then add some semolina (superb rava or suji) or urad dal flour or rice flour to it to assist thicken it up. Rava or suji additionally helps in giving a crispy texture to the vada.
Making Medu Vada Batter
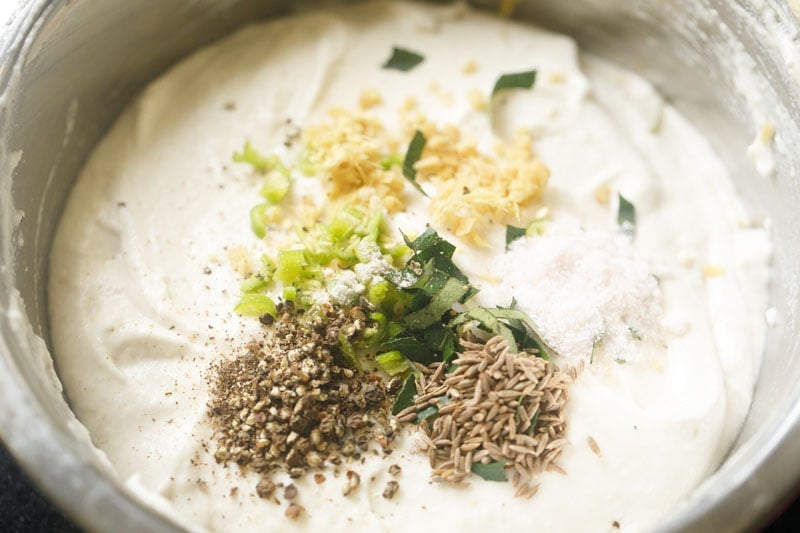
9. Measure and hold all of the components prepared for making the batter. To the batter, add the next spices and herbs:
- 1 tablespoon chopped curry leaves
- 1 teaspoon finely chopped inexperienced chillies
- 1 teaspoon finely chopped ginger
- 1 pinch asafoetida
- ½ teaspoon cumin seeds
- ½ teaspoon frivolously crushed black pepper – can use complete peppercorns as properly. The addition of black pepper provides a very good style however is non-compulsory.
- ½ teaspoon salt or as required
You can even add ⅓ cup finely chopped onions or shallots; 2 tablespoons of chopped coriander leaves and ¼ cup chopped contemporary coconut items.
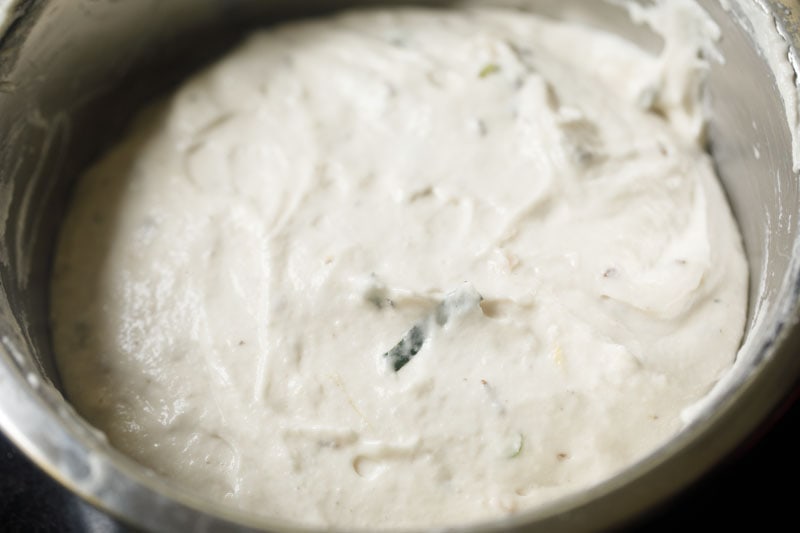
10. Combine the batter properly with the herbs, spices and salt. You shouldn’t have to ferment the batter. You should use it straight away. Test the style of the batter and, if wanted, add some salt.
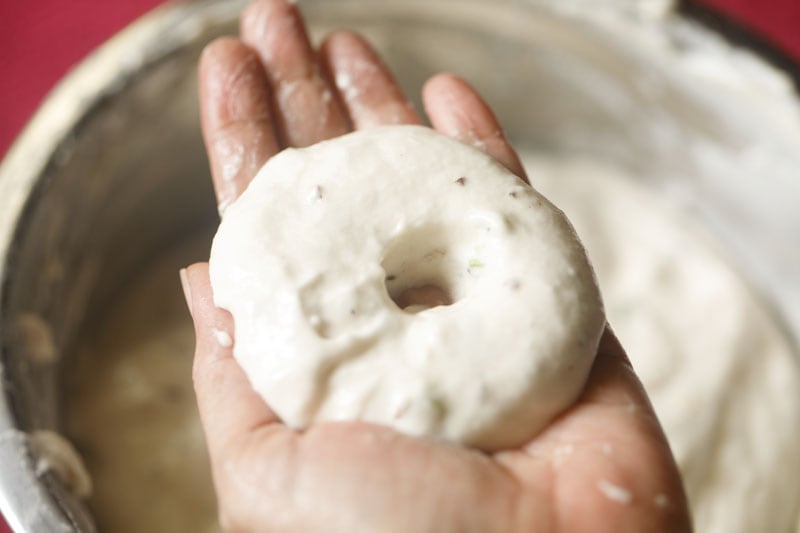
11. Take a bowl of water. Apply some water from the bowl on each your palms. Take some batter in your proper palm from the bowl. Give it a spherical form by shifting it in a round place in the fitting hand.
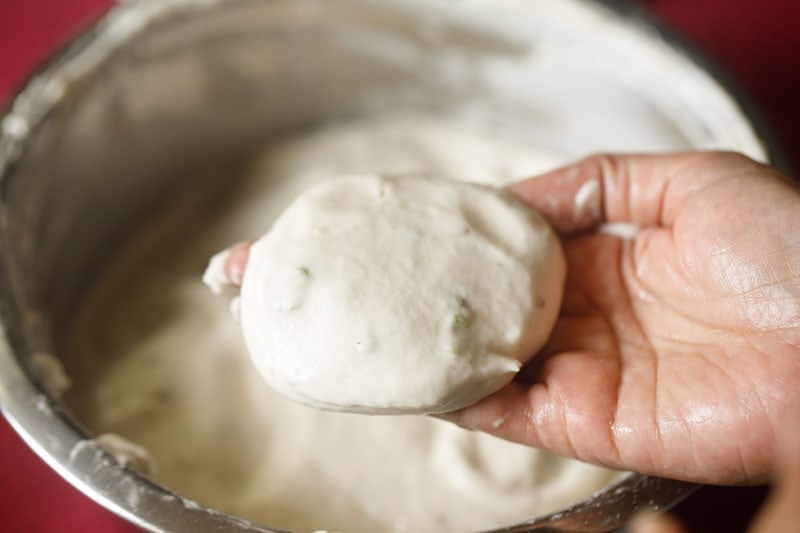
12. Together with your thumb make a gap within the heart. You can even use banana leaves or zip lock luggage to provide the medu vada its doughnut form.
TIP: If the batter sticks and you aren’t in a position to form it then add 1 to 2 tablespoons of rice flour to the batter and blend properly. This occurs if the batter has develop into barely skinny which implies that there’s extra water in it.
Frying Medhu Vadai
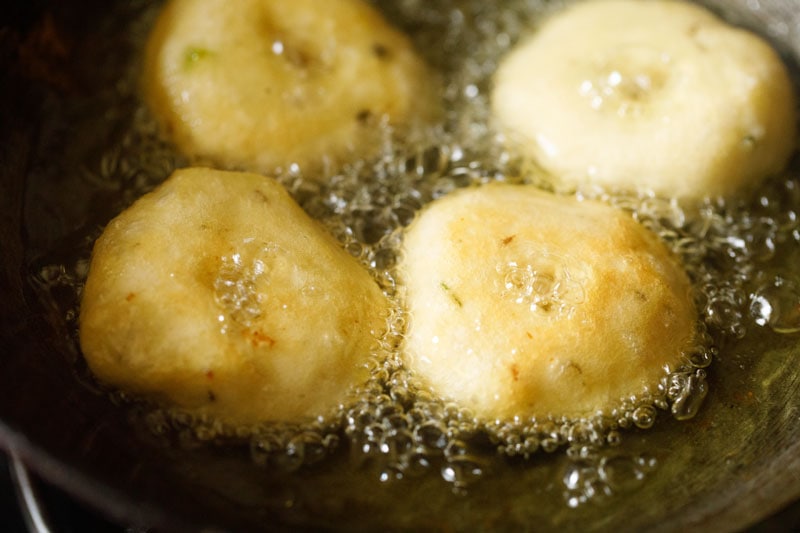
13. In a kadai, warmth oil over medium warmth. As soon as the oil turns into scorching, slide the medu vada gently into the recent oil. Watch out right here! The oil can sputter and pop over fairly a distance, so I like to recommend sporting an apron and lengthy sleeves to guard your pores and skin and garments.
TIP: If you don’t care concerning the look of the doughnut form of the medu vada, then simply drop spoonfuls of the batter immediately within the oil.
Don’t overcrowd the pan. Work in batches, contemplating the dimensions of your pan as your information.

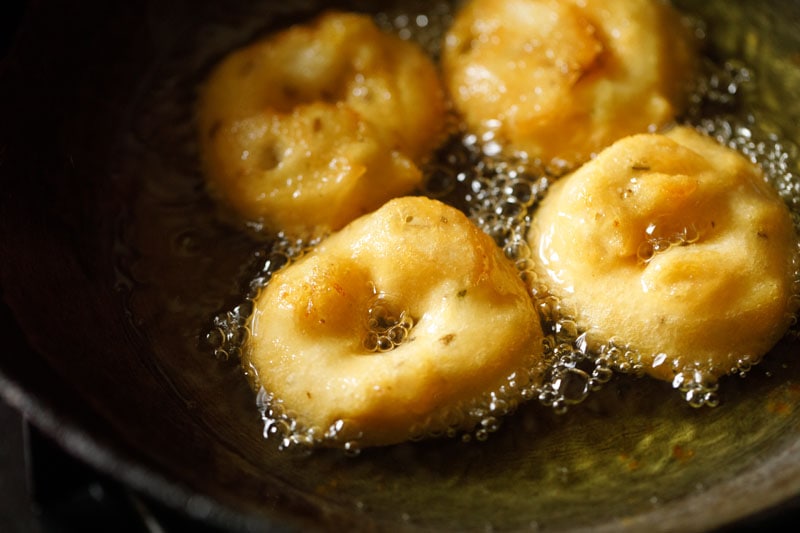
14. As soon as the vada are barely golden and the batter has firmed up and appears crispy, then gently flip over with a slotted spoon and proceed to fry. The oil mustn’t exceed 190 levels celsius (375F), or fall beneath 175 levels celsius (350F).
Keep in mind: oil that’s too scorching will rapidly brown the vadas from the skin, however they may stay raw from inside. Oil that isn’t scorching sufficient will make the vada soak up an excessive amount of oil and develop into greasy.
15. Proceed to fry the vada, turning over as wanted.
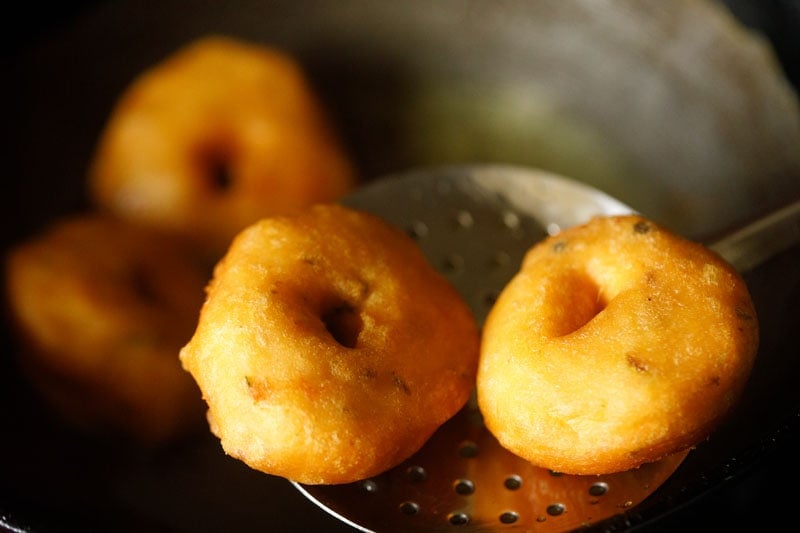
16. Fry the medhu vadai until crisp and golden.
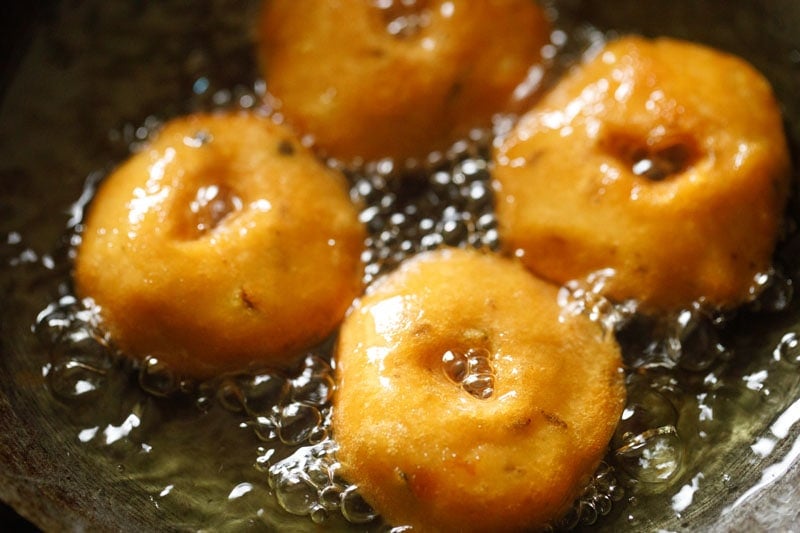
17. As soon as the medhu vadai is crisp and golden, then take away with a slotted spoon to empty the additional oil. Fry the remainder of vadai in the identical method.
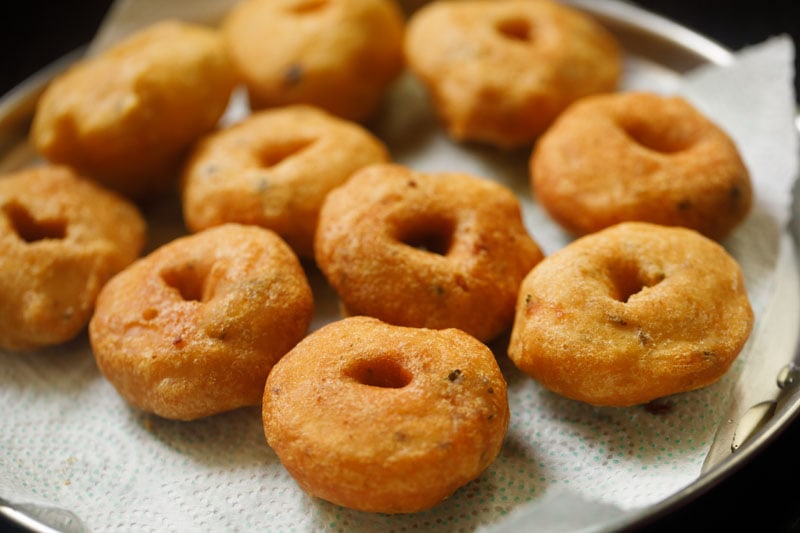
18. Drain them on kitchen tissues to take away further oil. This fashion form the vada batter and fry them in scorching oil.
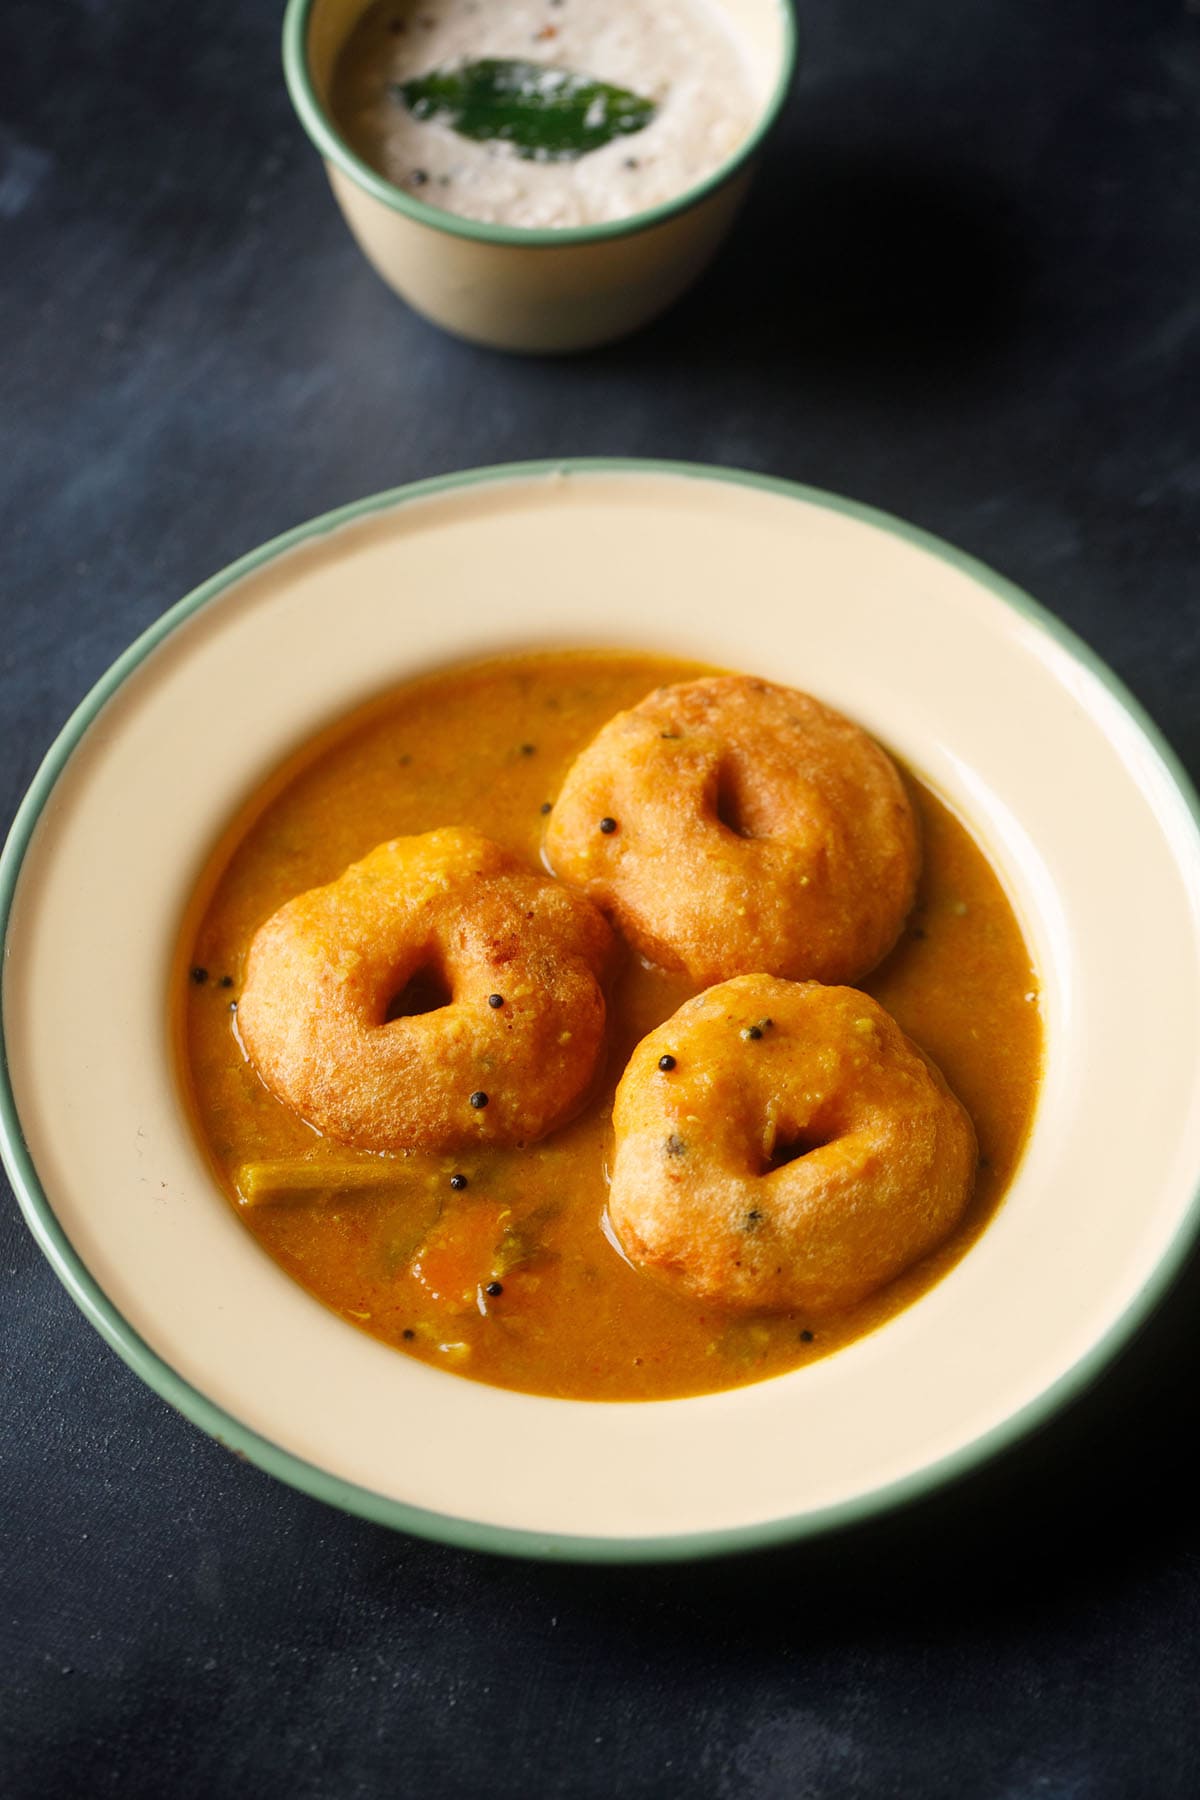
19. Serve medu vada scorching or heat with sambar and coconut chutney. Take pleasure in!
Sambar Vada
To make sambar vada, you may make any of the sambar varieties I’ve listed beneath. Relying on the veggie inventory within the kitchen, I make sambar with only one veggie or a mixture of numerous of them.
Vada and sambar are a match made in heaven, so even for those who make your sambar with none veggie, it can nonetheless be a pleasure to eat.
FAQs
Uh-oh, feels like one in every of two issues occurred. If the batter is skinny, then the vada will soak up an excessive amount of oil throughout frying. However even when the batter is ideal, it is advisable warmth the oil correctly – whether it is heat or not scorching sufficient, the vada will even end up greasy.
Ooops, sounds such as you didn’t mix/grind the batter sufficient. When the urad dal is sort of the consistency of whipped cream, you may have reached the fitting consistency. You’ll want to use a robust (750+ watt or extra) grinder or blender or a table-top moist grinder for the most effective outcomes.
Additionally, please you’ll want to soak the urad dal for a minimum of 4 to five hours and even in a single day. If the dal aren’t properly soaked, they won’t grind to a tender, fluffy batter.
Be sure that you employ contemporary urad dal in its shelf interval. Aged or previous urad lentils will take numerous time to grind or mix and also can make the vada dense or arduous.
Seems like your batter was too skinny. Strive including a little bit of rice flour or semolina to the batter to thicken it up; it ought to be the consistency of a thick cake batter or like whipped cream.
As with most donuts or fried items, these savory fritters are finest served scorching from the frying pan (after draining oil, after all). That stated, any leftovers will hold for as much as a day. To reheat, heat them in an oven till scorching to the contact.
You can even make the batter as much as 1 day forward of time. Preserve it within the fridge till you’re able to fry. Let the batter come to room temperature earlier than frying.
Completely; it may possibly both be halved or doubled relying on what number of vada you wish to make!
I take advantage of both sunflower or floor nut oil for deep frying, however any impartial oil with a excessive smoke level will work. Safflower, vegetable, or peanut oil are all acceptable substitutes.
Extra Well-liked South Indian Snacks!
Breakfast Recipes
Breakfast Recipes
Breakfast Recipes
Breakfast Recipes
In the event you made this recipe, please you’ll want to charge it within the recipe card beneath. Sign Up for my electronic mail e-newsletter or you may observe me on Instagram, Facebook, Youtube, Pinterest or Twitter for extra vegetarian inspirations.
By Dassana Amit
Medu vada are crisp and fried doughnut formed fritters made with black gram (urad dal), herbs and spices. These urad dal vada are also called Garelu in Andhra, Uzhunnu Vada in Kerala, Uddina Vada in Kannada and Medhu Vadai, Ulundu Vadai in Tamil.
Prep Time 4 hrs
Cook dinner Time 40 minutes
Complete Time 4 hrs 40 minutes
Servings 14 Medu Vada
Forestall your display from going darkish whereas making the recipe
This medu vada recipe from the weblog archives first revealed in October 2011 has been republished and up to date on 18 July 2021.
Source link


